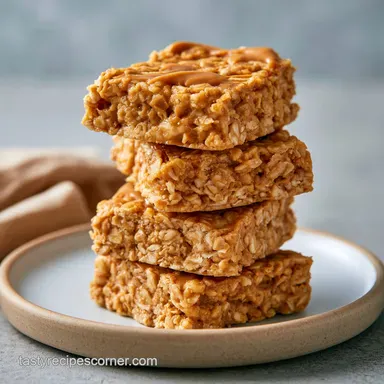
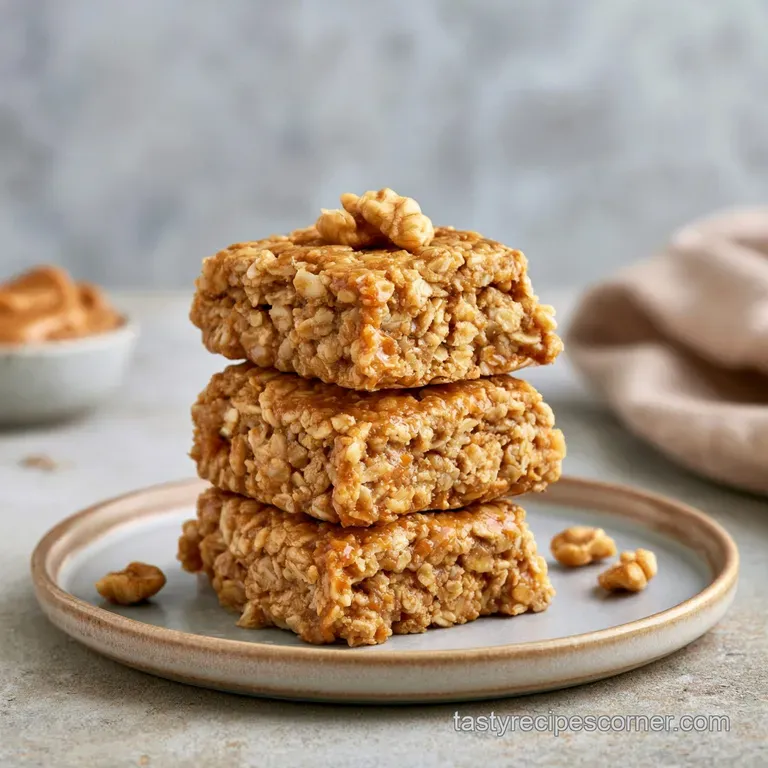
Monster Cookie Protein Bars: Chewy and No Bake
- Time:10 minutes active + 30 minutes chilling = Total 40 minutes
- Flavor/Texture Hook: Glossy peanut butter base with a dense, chewy bite and chocolatey shatter
- Perfect for: Corporate wellness meal prep, post workout fuel, or high protein snacks for kids
- Hidden Truths About Texture
- The Essential Recipe Specs
- The Ingredient List
- Required Tools and Equipment
- The Simple Assembly Process
- Fixing Common Bar Issues
- Troubleshooting Common Issues
- Ways to Customize Flavors
- Adjusting the Batch Size
- Protein Bar Misconceptions
- Freshness and Storage Tips
- Smart Serving Suggestions
- Recipe FAQs
- 📝 Recipe Card
Ever wonder why most store-bought protein bars feel like you're chewing on a gym mat? I used to keep those expensive, foil wrapped bars in my desk drawer during my corporate days, but they always left me feeling unsatisfied and a bit sad.
I wanted something that tasted like a childhood treat but actually kept me full until my 2 PM meeting.
That's how I stumbled into the world of the "monster" style snack. I wanted the peanut butter, the oats, and the colorful candy, but I needed a protein punch. After experimenting with different binders, I found that a specific ratio of honey and nut butter creates a velvety texture that doesn't require any baking.
These Monster Cookie Protein Bars are exactly that - a dense, satisfying snack that hits the sweet spot. They're designed for people who have zero time to spend over a stove but refuse to compromise on flavor.
Trust me on this, once you have a batch of these in the fridge, you'll never go back to the cardboard versions.
Hidden Truths About Texture
The secret to a great no bake bar isn't just the ingredients, it's how they interact. Most people just throw everything in a bowl and hope for the best, but there's a reason these bars stay together without crumbling.
The Honey Glue: Honey doesn't just add sweetness, it acts as a viscous binder that locks the oats and protein powder together. It prevents the bars from drying out over time.
Protein Absorption: Protein powder acts like a sponge, soaking up the oils from the peanut butter. This creates that thick, dough like consistency rather than a runny mess.
Oat Structure: Quick oats are smaller and softer than rolled oats, allowing them to integrate into the binder more effectively. This is similar to how edible cookie dough achieves its smooth, scoopable texture.
Seed Stability: Chia seeds absorb liquid and form a gel, which adds an extra layer of structural integrity. They ensure the bars don't split when you bite into them.
| Feature | No Bake Method | Classic Baked Method |
|---|---|---|
| Total Time | 40 minutes | 2+ hours |
| Texture | Dense and Chewy | Cakey and Soft |
| Nutritional Focus | High Fiber/Protein | High Carb/Sugar |
| Best For | Quick Meal Prep | Dessert Platters |
The Essential Recipe Specs
Right then, let's look at what's actually happening inside the bowl. Understanding the role of each component helps you troubleshoot if your dough feels off.
| Ingredient | Science Role | Pro Secret |
|---|---|---|
| Creamy PB | Fat based Binder | Use a brand without palm oil for a smoother melt |
| Honey | Humectant/Glue | Warm it for 10 seconds if it's too stiff to stir |
| Quick Oats | Bulk and Fiber | Pulse them once in a blender for a "flour like" feel |
| Protein Powder | Structural Base | Whey casein blends usually yield a thicker dough |
The Ingredient List
Gather these items before you start. For the best results, make sure your honey is at room temperature so it blends smoothly into the peanut butter.
- 1/2 cup (125g) creamy peanut butter Why this? Provides the primary fat and velvety base (Substitute: Almond butter for a nuttier taste)
- 1/3 cup (80ml) honey Why this? Natural glue and sweetener (Substitute: Maple syrup, though bars will be slightly softer)
- 1 cup (90g) quick oats Why this? Chewy texture and slow release energy (Substitute: Rolled oats, but pulse them first)
- 1/2 cup (60g) vanilla protein powder Why this? Adds lean protein and structure (Substitute: Unflavored powder + 1 tsp extra vanilla)
- 1 tsp (5ml) vanilla extract Why this? Rounds out the sweetness (Substitute: Almond extract for a wedding cake vibe)
- 1/4 tsp (1.5g) salt Why this? Cuts through the richness (Substitute: Flaky sea salt on top)
- 1/3 cup (60g) mini chocolate chips Why this? Adds a chocolatey shatter (Substitute: Cacao nibs for less sugar)
- 1/3 cup (60g) mini M&Ms Why this? Classic monster cookie color and crunch (Substitute: Dried cranberries)
- 2 tbsp (15g) chia seeds Why this? Omega-3s and extra binding power (Substitute: Ground flaxseeds)
Required Tools and Equipment
I'm a big fan of the minimal tool approach. You don't need a stand mixer or a food processor for this; a couple of bowls and some elbow grease are all it takes.
- Large mixing bowl: For combining the binder and dry ingredients.
- Spatula or sturdy spoon: To press the heavy dough into the pan.
- 8x8 inch baking pan: The standard size for 12 bars.
- Parchment paper: Essential for a clean release.
- Chef's knife: For slicing the chilled bars into clean rectangles.
The Simple Assembly Process
Let's crack on. Follow these steps closely, especially the chilling part, or you'll end up with a delicious but messy blob.
- Mix the binder. Combine the peanut butter, honey, vanilla extract, and salt in your large bowl. Stir vigorously until the mixture is smooth and glossy.
- Incorporate the base. Fold in the quick oats and vanilla protein powder. Mix until a thick, heavy dough forms Note: It should feel like a stiff cookie dough.
- Add the textures. Gently fold in the mini chocolate chips, M&Ms, and chia seeds. Mix just until distributed until you see pops of color.
- Prep the pan. Line your 8x8 inch pan with parchment paper, leaving a bit of overhang on the sides.
- Transfer the dough. Scoop the mixture into the pan.
- Press firmly. Use your spatula to press down hard until the top is flat and compact. This prevents air pockets.
- Chill the bars. Place the pan in the refrigerator for 30 minutes. This allows the honey and PB to set.
- Slice and serve. Lift the parchment paper out and slice into 12 even bars.
Fixing Common Bar Issues

Even with a simple recipe, things can go sideways. Usually, it's a matter of moisture balance. According to King Arthur Baking, the type of oat and the humidity of your kitchen can change how much liquid a dough absorbs.
Troubleshooting Common Issues
| Issue | Solution |
|---|---|
| Why Your Bars are Too Dry | If the dough feels sandy or crumbly before you press it into the pan, you likely have too much protein powder or the oats are very thirsty. Add honey one teaspoon at a time until the dough holds toget |
| Why Your Bars are Too Sticky | This usually happens if the peanut butter was too runny or you used a liquid sweetener like maple syrup instead of honey. Chill the bars for an extra 20 minutes or fold in another tablespoon of protei |
| Why Your Bars Crumble When Slicing | Crumbling is almost always a result of rushing the chill time. The fats in the peanut butter need to solidify to hold the structure. |
Quick Success Checklist:
- ✓ Parchment paper is pressed firmly to the bottom
- ✓ Dough is pressed down with significant force
- ✓ Mixture is chilled for at least 30 minutes
- ✓ Protein powder is fully incorporated (no clumps)
Ways to Customize Flavors
One of the best things about Monster Cookie Protein Bars is that they're basically a canvas. You can swap the mix ins based on what's in your pantry.
If you want something slightly more indulgent, you can stir in a tablespoon of Keto Cookie Dough Dip for an extra creamy core. For a low sugar alternative, swap the M&Ms for freeze dried raspberries and the honey for a sugar-free maple syrup.
Decision Shortcut: If you want a nut free version, do this: Replace peanut butter with sunflower seed butter. If you want a vegan friendly snack, do this: Use maple syrup and a plant based protein powder. If you want extra chocolatey vibes, do this: Use chocolate protein powder and double the chips.
Adjusting the Batch Size
Scaling this recipe is easy, but be careful with the pan size.
Scaling Down (Half Batch): Use a loaf pan instead of an 8x8 pan. Reduce the chilling time by about 10 minutes. For the salt and vanilla, just eyeball a half measure.
Scaling Up (Double Batch): Use a 9x13 inch baking pan. I recommend increasing the salt only to 1.5x rather than 2x to keep the flavor balanced. Extend the chilling time to 60 minutes, as the larger mass takes longer to cool in the center.
Protein Bar Misconceptions
There are a few myths about no bake snacks that I want to clear up.
Myth: No bake means no nutrition. Actually, keeping the oats raw preserves certain nutrients that can be lost during over high heat baking. When combined with chia seeds, you're getting a massive dose of fiber.
Myth: Protein powder ruins the taste. It only ruins the taste if you use too much or a low quality brand. When balanced with honey and peanut butter, the powder mostly adds a velvety thickness.
Myth: You must use a food processor. You don't. In fact, over processing the oats can make the bars gummy. Hand mixing keeps the texture varied and satisfying.
Freshness and Storage Tips
Since these don't have preservatives, you'll want to keep them cool.
Storage: Store the bars in an airtight container in the fridge for up to 7 days. They actually taste better on day two once the flavors have melded. In the freezer, they'll last for about 3 months - just let them thaw for 10 minutes before eating.
Zero Waste: Don't toss the peanut butter residue left in the bowl. Scrape it out with a bit of warm water and a pinch of salt to make a quick sauce for apple slices. Also, if you have leftover parchment paper scraps, use them to line a small container for your next batch of snacks.
Smart Serving Suggestions
While these are great straight from the fridge, you can change the experience with a few tweaks.
For a real treat, pop a bar in the microwave for 10 seconds. This softens the peanut butter and makes the chocolate chips slightly melty without ruining the structure. If you're serving them to kids, try cutting them into small "protein bites" instead of bars - they're easier to handle and feel like a party snack.
Pair these with a cold glass of almond milk or a strong espresso to balance the sweetness. They're the ideal companion for a busy morning when you have to eat while checking emails. Right then, you're ready to make your own high protein treats!
Recipe FAQs
Why are my protein bars too dry or crumbly?
Add honey one teaspoon at a time. This resolves sandy dough caused by thirsty oats or an excess of protein powder.
What should I do if the bars are too sticky?
Chill the bars for an extra 20 minutes. If they remain tacky, fold in another tablespoon of vanilla protein powder to thicken the mixture.
Can these bars be stored in the freezer?
Yes, they freeze well. Keep them in an airtight container for several weeks and thaw in the refrigerator before serving.
How to get the bars to stay together without crumbling?
Press the dough firmly with a spatula. Ensuring the mixture is flat and compact in the 8x8 inch pan creates a stable structure.
Is it true I can swap honey for maple syrup without changing the texture?
No, this is a common misconception. Using a liquid sweetener like maple syrup instead of honey typically makes the bars too sticky to hold their shape.
How to slice the bars for clean edges?
Chill the pan for at least 30 minutes. Once the bars have set in the refrigerator, use a sharp knife to cut the slab into 12 even portions.
Can I use rolled oats instead of quick oats?
No, stick with quick oats. If you enjoy the cohesive texture of peanut butter cookies, you will find that quick oats provide the same necessary bind for these no-bake bars.
Monster Cookie Protein Bars