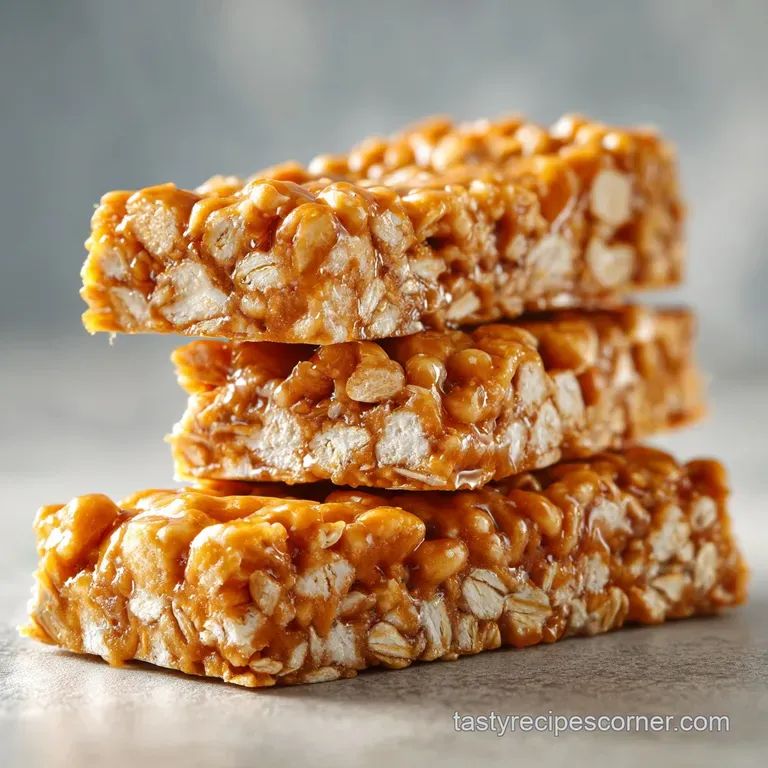
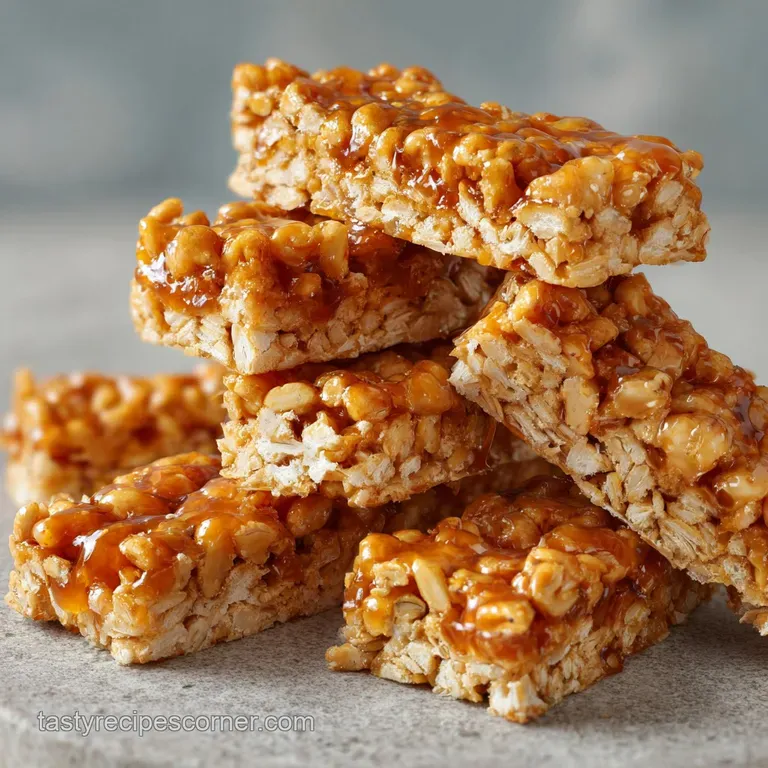
Cereal Bars Easy Recipe: Failure-Proof and Crispy
- Time:10 minutes active + 60 minutes chilling = Total 72 minutes
- Flavor/Texture Hook: Salty sweet with a shatter crisp snap
- Perfect for: Speedy weekday breakfasts or kid friendly lunchbox snacks
- The Secret to a No Stress Cereal Bars Easy Recipe
- Quick Stats for Your Morning Prep
- Picking the Right Crunch for Your Base
- Component Analysis for Better Binding
- Gathering Your Essentials
- The Simple Gear for a Mess Free Kitchen
- Step by Step to a Shatter Crisp Finish
- Solving the Crumble: When Things Go Wrong
- Twisting the Flavor for Different Cravings
- Storage Guidelines and Waste Reduction
- Best Ways to Enjoy Your Morning Bars
- Recipe FAQs
- 📝 Recipe Card
The Secret to a No Stress Cereal Bars Easy Recipe
The scent of warm honey and toasted peanut butter hitting the air is enough to wake anyone up. I remember one chaotic Tuesday morning where the toaster broke, the coffee was cold, and my kids were staring at me with that "I'm hungry" look.
I had a box of generic whole grain cereal and a jar of peanut butter, and I just started throwing things in a bowl. That's how this version was born, right there in the middle of a morning meltdown.
Right then, I realized that the trick isn't in the cooking, but in the binding. Most people overcook their syrup, which makes the bars rock hard, or they don't press them down enough, and you end up with a pile of crumbs.
I spent a few weeks tweaking the ratio until I found the sweet spot where the bars hold together but still have that light, airy crunch.
Trust me on this, you don't need a fancy kitchen or a culinary degree to get this right. We're talking about a handful of ingredients and a microwave. It's the kind of recipe that makes you feel like a genius for putting in almost zero effort. Let's crack on and get these sorted.
Quick Stats for Your Morning Prep
Before we dive into the mixing, let's look at the logistics. Since this is a no bake process, the "cook time" is really just the time it takes to melt your binder. The heavy lifting is done by the refrigerator, which sets the honey and fats into a stable structure.
If you're meal prepping for the week, these are a godsend. They're far more satisfying than a bowl of cereal that turns into mush after five minutes. For those who love a bit of variety in their morning routine, you might also enjoy my homemade protein bars recipe for days when you need an extra energy boost.
Picking the Right Crunch for Your Base
The beauty of this recipe is the flexibility. While I use whole grain cereal for a bit of heartiness, you can swap it for almost any dry cereal. The only rule is to avoid things that are too sugary or "coated" in chocolate, as they can melt and make the binder too runny.
DIVTABLE_0
When choosing your cereal, think about the shape. O shaped cereals provide a great structure, while flakes offer a more velvety, compressed texture. Just make sure whatever you pick is genuinely crunchy.
Component Analysis for Better Binding
Understanding how these ingredients interact helps you avoid the dreaded "crumbly bar" syndrome. It's not magic, just some basic kitchen logic.
| Ingredient | Science Role | Pro Secret |
|---|---|---|
| Honey | Viscous Binder | Use a mild clover honey for a neutral sweetness |
| Peanut Butter | Structural Fat | Stir vigorously after heating to emulsify the oils |
| Whole Grain Cereal | Bulk/Texture | Use a cereal with a lower sugar content to balance the honey |
| Sea Salt | Flavor Contrast | Use fine salt so it dissolves completely in the warm binder |
Gathering Your Essentials
I've kept the list short because that's what makes this a truly easy recipe. Don't bother with expensive organic versions if you're on a budget - the results are still brilliant with store brand staples.
- 6 cups (450g) whole grain cereal Why this? Provides the bulk and the necessary crunch
- 1/2 cup (125g) creamy peanut butter Why this? Acts as the primary glue and adds protein
- 1/3 cup (110ml) honey Why this? Sets firm when chilled to hold everything together
- 1 tsp (5ml) pure vanilla extract Why this? Adds a warm, aromatic depth
- 1/4 tsp (1.5g) fine sea salt Why this? Cuts through the sweetness of the honey
If you don't have honey, maple syrup works, but it's a bit thinner. You might find the bars are slightly softer, almost like a treat you'd find in classic sugar cookie bars, though without the bake.
The Simple Gear for a Mess Free Kitchen
You don't need a stand mixer for this. In fact, using one would probably crush the cereal into powder, which is the opposite of what we want. Keep it simple.
- Microwave safe glass bowl (for the binder)
- Large mixing bowl (to prevent cereal spill over)
- Silicone spatula (the best tool for gentle folding)
- 8x8 inch square baking pan
- Parchment paper (essential for a clean release)
- Flat bottomed glass or a heavy spatula (for packing)
Step by step to a Shatter Crisp Finish
Let's get into it. The goal here is to coat every piece of cereal without crushing the life out of them.
- Combine the peanut butter, honey, and salt in your microwave safe glass bowl. Note: Using glass prevents hotspots that can burn the honey
- Microwave in 20 second bursts, stirring in between, until the mixture is smooth and glossy.
- Stir in the vanilla extract immediately after the last heat burst. Note: Adding vanilla at the end preserves its flavor
- Pour the 6 cups of cereal into your large mixing bowl.
- Drizzle the warm binder over the top of the cereal.
- Gently fold the cereal into the liquid using your silicone spatula until every piece is evenly coated.
- Line your 8x8 inch pan with parchment paper, leaving a bit of overhang on the sides.
- Transfer the mixture to the pan and press down firmly with a flat glass until the surface is level and tightly packed.
- Place the pan in the refrigerator for 60 minutes.
- Slice into 16 bars once the edges feel firm to the touch.
Solving the Crumble: When Things Go Wrong
Even with a simple recipe, things can go sideways. Usually, it comes down to temperature or pressure.
Why Your Bars are Crumbling
If your bars fall apart the moment you touch them, you likely didn't press them down hard enough. The binder needs to be forced into the gaps between the cereal pieces to create a solid bridge.
Why the Texture is Too Sticky
This happens if the honey didn't set or if the binder was too thin. Make sure you chill them for the full hour; skipping this step is the fastest way to ruin the experience.
| Problem | Root Cause | Solution |
|---|---|---|
| Bars are too soft | Not chilled long enough | Return to fridge for 30 more mins |
| Cereal is crushed | Over mixing or too much pressure | Fold gently; press firmly but don't mash |
| Taste is too bland | Lack of salt/vanilla | Add a pinch of salt to the binder next time |
- ✓ Pat the parchment paper with a tiny bit of oil to prevent sticking
- ✓ Use a heavy glass for packing - don't be afraid to apply pressure
- ✓ Ensure the binder is fully melted and glossy before adding cereal
- ✓ Let the bars chill for at least 60 minutes without peeking
- ✓ Slice with a sharp knife to avoid crushing the edges
Twisting the Flavor for Different Cravings
Once you've got the base down, you can really play around. I often change the "add ins" depending on what's in the pantry.
For a chocolate nut twist, stir in 1/4 cup of mini chocolate chips after the binder has cooled slightly but before you mix in the cereal. This prevents the chips from melting completely and gives you nice little pockets of chocolate.
If you're looking for a nut free home version, swap the peanut butter for sunflower seed butter or tahini. Note: Tahini has a more savory, bitter edge, so you might want to add an extra teaspoon of honey to balance it out.
For a protein packed breakfast, you can mix in a tablespoon of chia seeds or ground flaxseed into the warm binder. It won't change the texture much, but it adds a nice nutritional punch.
Storage Guidelines and Waste Reduction
These bars are surprisingly hardy if you store them correctly. Because of the honey and fats, they stay fresh much longer than a standard cereal bowl.
Keep them in an airtight container in the refrigerator for up to 5 days. If you're not going to eat them within a week, they freeze brilliantly. Wrap each bar individually in parchment paper and toss them in a freezer bag for up to 3 months.
To reheat, just let them thaw in the fridge overnight or leave them on the counter for 20 minutes.
To avoid waste, if you have a bit of binder left in the bowl, don't wash it out. Instead, drizzle it over some sliced apples or a bowl of yogurt. It's a great way to use every drop of that honey peanut butter goodness.
Best Ways to Enjoy Your Morning Bars
While these are great on their own, they really shine when paired with the right drinks. I love them with a strong, black coffee - the bitterness of the brew balances the sweetness of the honey.
If you're serving these to kids, try pairing them with a side of fresh berries or a glass of cold milk. The acidity of the berries cuts through the richness of the peanut butter.
For a more indulgent treat, you can dip the ends of the bars in melted dark chocolate and sprinkle a bit of sea salt on top. It turns a simple breakfast bar into something that feels like a fancy bakery find. Right then, you're all set to conquer your morning!
Recipe FAQs
How to melt the binder for the best consistency?
Microwave in 20-second bursts, stirring in between until the mixture is smooth and glossy. Using glass prevents hotspots that can burn the honey.
Do these bars need to be refrigerated before slicing?
Yes, for at least 60 minutes. Chilling ensures the edges are firm and the bars hold their shape without crumbling when cut.
Is it true that vanilla extract should be microwaved with the honey?
No, this is a common misconception. Stir in the vanilla extract immediately after the last heat burst to preserve its delicate flavor.
How to store the bars for long term use?
Wrap each bar individually in parchment paper and place them in a freezer bag. They will stay fresh in the freezer for up to 3 months.
Why are my cereal bars crumbling?
You likely didn't press the mixture firmly enough. Use a flat glass or spatula to pack the cereal tightly into the 8x8 inch pan before refrigerating.
What should I serve these with for a snack platter?
They pair well with salty sides. For a balanced spread, add a batch of homemade chips to contrast the sweetness of the honey.
How to reheat a frozen bar?
Thaw in the fridge overnight or leave the bar on the counter for 20 minutes before eating.
Easy Cereal Bars Recipe

