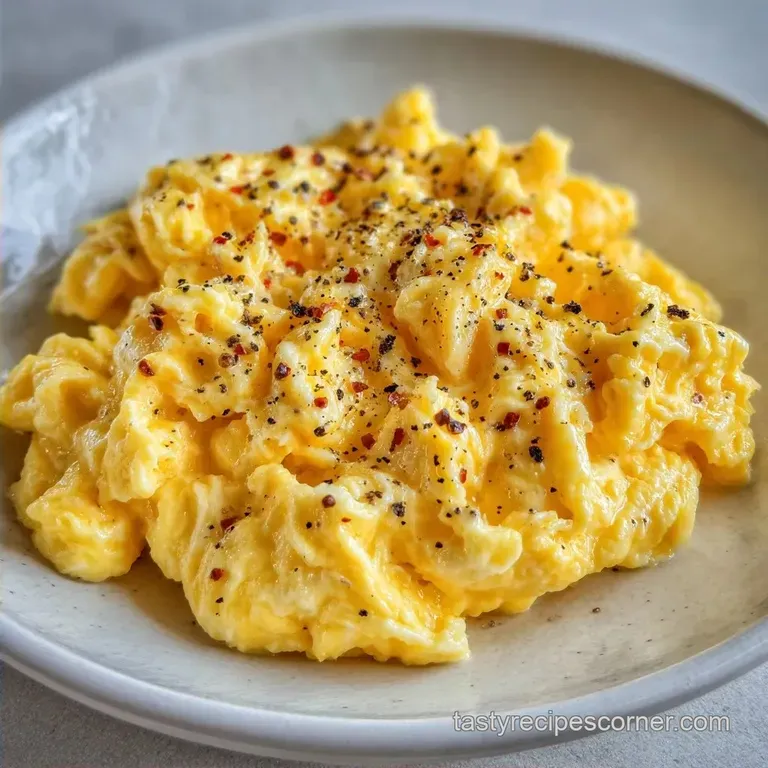
Restaurant Style Soft Scrambled Eggs: Creamy and Velvety
- Time: 5 min active + 3 min cook
- Flavor/Texture Hook: Velvety, custard like curds
- Perfect for: A speedy weekday breakfast
Making Perfect Soft Scrambled Eggs
That sound of butter foaming in a pan is the only alarm clock I actually like. It's that specific, quiet sizzle right before the eggs hit the heat. I remember one Tuesday when I tried to rush my breakfast and ended up with rubbery yellow sponges.
I was starving and annoyed, so I slowed down and realized the secret isn't a fancy gadget, it's just patience.
Once you stop treating eggs like a chore and start treating them like a delicate custard, everything changes. You don't need a professional kitchen to get that diner style texture. You just need to respect the temperature of your pan.
These Soft Scrambled Eggs are designed for people who want a high end breakfast without spending an hour at the stove. We're aiming for a texture that's almost molten, where the eggs are set but still shimmering.
Why the Method Works
- Low Temperature Control: Keeping the heat low prevents the proteins from bonding too tightly, which stops the eggs from becoming tough.
- Hydration Boost: Adding milk provides extra moisture that buffers the heat, keeping the curds tender.
- Mechanical Aeration: Whisking vigorously incorporates air, which helps the eggs expand and feel lighter.
- Carryover Heat: Removing the pan from the heat while the eggs look "wet" allows the residual energy to finish the cook without overdoing it.
According to the guides at Serious Eats, controlling the rate of protein coagulation is the only way to avoid that "rubbery" texture.
| Method | Time | Texture | Best For |
|---|---|---|---|
| Fast/High Heat | 2 mins | Tight, dry curds | Quick burritos |
| Classic Soft | 3 mins | Velvety, moist | Toasted sourdough |
| Slow/French | 10 mins | Thick, porridge like | Fancy brunch |
Egg Component Analysis
| Ingredient | Science Role | Pro Secret |
|---|---|---|
| Large Eggs | Structure/Protein | Room temp eggs emulsify faster |
| Unsalted Butter | Fat/Lubrication | Foam is the signal to pour |
| Whole Milk | Hydration/Softness | Don't overdo it or they'll weep |
Gathering Your Essentials
You don't need a massive pantry for this. Just a few basics. I always suggest using sea salt over table salt because the crystals dissolve a bit differently and give a cleaner taste.
- 4 large eggs Why this? Standard size ensures the liquid ratio stays correct
- 1 tbsp unsalted butter Why this? Controls salt levels precisely
- 1 tbsp whole milk Why this? Fat content keeps curds silky
- 1/4 tsp sea salt Why this? Enhances the natural egg flavor
- 1/8 tsp cracked black pepper Why this? Adds a subtle woody heat
Substitutions for variety:Milk: Use heavy cream for a richer taste or unsweetened almond milk for a dairy-free option (note: almond milk is thinner and may result in slightly softer curds).
Butter: Use ghee if you need a higher smoke point, though you'll lose that classic buttery aroma.
The Right Tools
Keep it simple. You don't need a kitchen full of gadgets.
- Nonstick Skillet: A 8 inch pan is ideal so the eggs don't spread too thin and overcook.
- Silicone Spatula: This is non negotiable. You need something flexible to push the curds without scraping the pan.
- Mixing Bowl: A medium glass or stainless steel bowl works best.
- Whisk: A balloon whisk gets the most air into the mixture.
Step by step Guide
- Crack the eggs into a mixing bowl. Add the milk, salt, and pepper.
- Whisk vigorously for about 30 seconds until the yolks and whites are completely integrated and no streaks remain.
- Place a nonstick skillet over medium low heat.
- Add the butter and melt until it begins to foam, but before it turns brown.
- Pour in the egg mixture.
- Let the eggs sit undisturbed for about 20 seconds until the edges just start to set.
- Using a silicone spatula, gently push the cooked eggs from the outer edges toward the center to create large, velvety curds.
- Continue folding slowly for about 1-2 minutes.
- Remove the pan from the heat immediately as soon as the eggs look wet but are no longer liquid.
Chef's Note: The eggs will continue to cook on the plate for another 30 to 60 seconds. If they look "done" in the pan, they'll be overcooked by the time you eat them.
Fixing Common Egg Issues
The biggest struggle with this recipe is timing. Eggs go from "perfect" to "overcooked" in about fifteen seconds. If you see steam rising aggressively from the pan, your heat is too high.
The Rubbery Texture Issue
This happens when the proteins tighten too quickly. It's usually caused by high heat or leaving the eggs on the stove for too long.
The Runny Mess Problem
If the eggs are too liquid, you likely pulled them off the heat too early or used too much milk.
The Sticking Disaster
This occurs if the pan wasn't hot enough when the butter was added, or if you're using a scratched nonstick pan.
| Problem | Root Cause | Solution |
|---|---|---|
| Rubbery Curds | Heat too high | Lower heat, remove pan earlier |
| Watery Eggs | Too much milk | Stick to 1 tbsp per 4 eggs |
| Browned Edges | Pan too hot | Start with a cold pan on med low |
Mistakes Checklist:
- ✓ Did I whisk for the full 30 seconds?
- ✓ Is the butter foaming but not brown?
- ✓ Did I remove the pan while they still looked wet?
- ✓ Am I using a silicone spatula instead of a fork?
Adjusting Your Batch
Making a smaller portion (1-2 eggs): Use a smaller 6 inch pan if you have one. Reduce the butter to 1 teaspoon and milk to 1.5 teaspoons. The cook time will drop by about 20%, so stay alert.
Scaling up (8-12 eggs): Do not crowd a single pan. If you don't have a massive skillet, work in batches. If you do use one big pan, increase the salt and pepper to only 1.5x instead of 2x to avoid over seasoning. Lower the temperature slightly as the larger mass of eggs will hold more heat.
Egg Cooking Truths
Myth: Milk makes eggs fluffier. Actually, milk adds moisture and tenderness, but air is what creates fluffiness. The vigorous whisking does the heavy lifting here, not the liquid.
Myth: You should salt eggs before cooking. Some say salting early breaks down the eggs. In reality, salting before cooking ensures the flavor is distributed evenly. It won't ruin your texture if you're using low heat.
Storage Guidelines
Fridge Storage: Store your Soft Scrambled Eggs in an airtight container for up to 3 days. They won't be as velvety as when they were fresh, but they're still great for breakfast sandwiches.
Freezing: Honestly, don't bother. Eggs change structure when frozen and become grainy and watery. It's just not worth it.
Zero Waste Tip: Don't toss your eggshells. Crush them up and add them to your garden soil or compost. They provide a great calcium boost for your plants.
Best Breakfast Pairings
These eggs are rich and buttery, so they need something to cut through that weight. A side of fresh berries or a sharp tomato jam works wonders.
If you're feeling extra hungry, try pairing them with my Homemade Hot Cakes for a full blown morning feast. The sweetness of the syrup balances the savory eggs perfectly.
- For the Little Ones
- Make Soft Scrambled Eggs for Baby by omitting the salt and adding a tiny bit of unsalted butter.
- Extra Indulgence
- Stir in 2 tbsp of shredded sharp cheddar for Soft Scrambled Eggs with Cheese just before removing from heat.
- The Umami Twist
- Try Japanese Soft Scrambled Eggs by adding a dash of dashi or soy sauce to the whisking stage.
- Protein Boost
- Mix in 2 tbsp of cottage cheese for Soft Scrambled Eggs with Cottage Cheese for a thicker, heartier texture.
Recipe FAQs
How do you make soft scrambled eggs?
Whisk eggs, milk, salt, and pepper for 30 seconds. Pour the mixture into a nonstick skillet with foaming butter over medium low heat, push the edges toward the center, and remove from heat while still wet.
What is the difference between soft scrambled eggs and regular scrambled eggs?
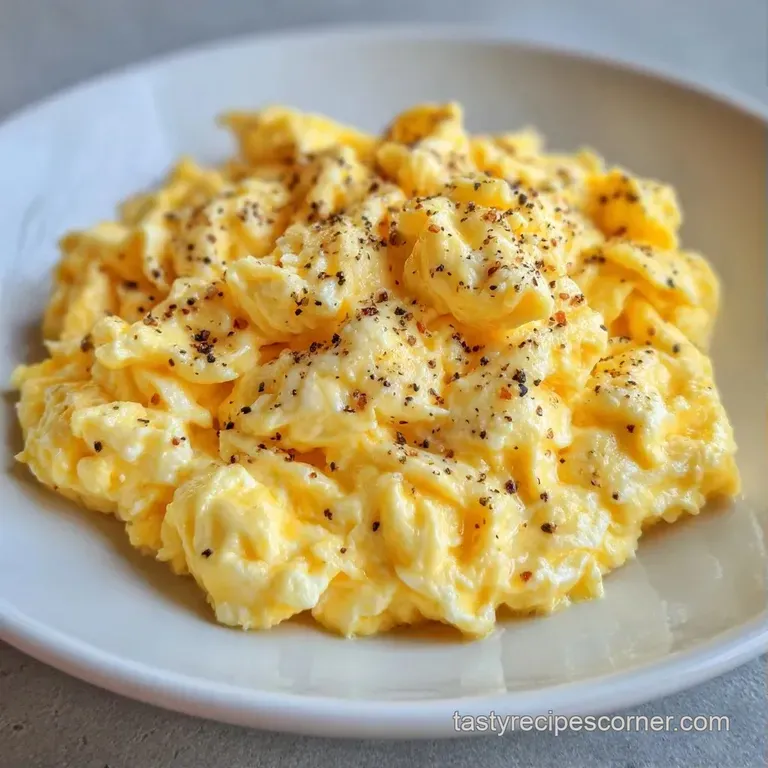
The moisture level and curd size. Soft scrambled eggs are pulled from the heat while still appearing wet to create velvety curds, whereas regular eggs are cooked until firm and dry.
How to make soft scrambled eggs like the restaurants do?
Maintain medium low heat and use a silicone spatula. Gently fold the eggs from the edges to the center and remove the pan from the heat before they look fully cooked to allow for carryover cooking.
Why do restaurant scrambled eggs taste better?
They prioritize temperature control and fat. Using butter that just begins to foam and keeping the heat low prevents the eggs from toughening, ensuring a creamy consistency.
Is it true you should cook scrambled eggs until they are completely dry in the pan?
No, this is a common misconception. Eggs continue to cook on the plate; removing them while they still look wet ensures they stay tender rather than becoming rubbery.
How to store leftover soft scrambled eggs?
Place them in an airtight container in the fridge for up to 3 days. Do not freeze them, as the egg structure changes and becomes grainy and watery.
What can be served with soft scrambled eggs for a balanced breakfast?
Pair them with a savory side like cottage cheese biscuits. This adds a hearty texture that complements the velvety consistency of the eggs.
Soft Scrambled Eggs

