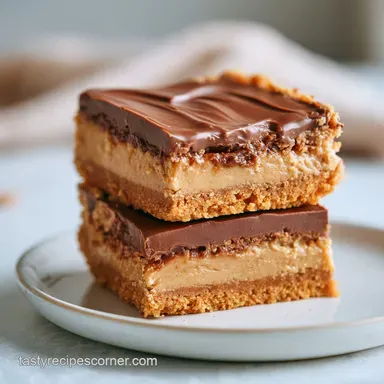
Ultimate Homemade Peanut Butter Bars: Salty and Sweet
- Time:15 minutes active + 2 hours chilling = Total 2 hours 15 mins
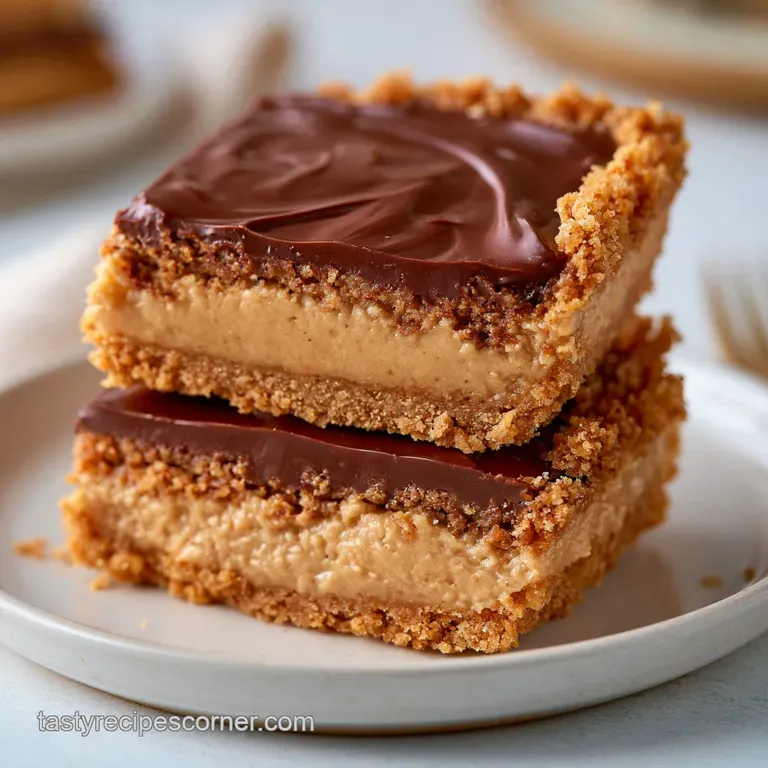
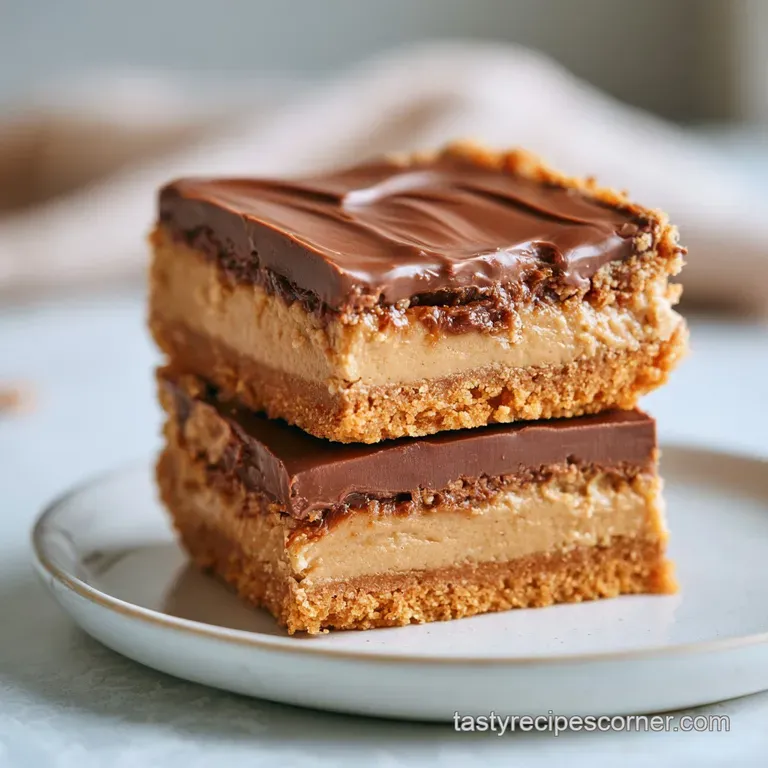
- Flavor/Texture Hook: Salty sweet with a shatter crisp chocolate shell
- Perfect for: Holiday dessert platters or high energy snack prep
That sharp snap of the chocolate shell is the only warning you get before the velvety peanut butter center hits your tongue. I remember bringing these to a neighborhood potluck a few years back during a rainy November weekend.
Everyone had brought the usual warm dips and heavy casseroles, but these stood out because they felt like a high end confectionery treat rather than a home bake.
I didn't tell anyone they took almost no effort to put together. I just watched as the platter emptied in about ten minutes, with people asking if I'd ordered them from a boutique bakery.
The key was that they weren't overly sweet, and the salt from the peanut butter cut right through the richness of the semi sweet chocolate.
You can expect a treat that feels dense and satisfying, not airy or crumbly. These Peanut Butter Bars are the kind of thing you keep in the back of the fridge for those midnight cravings when you need something that feels indulgent but doesn't require turning on the oven.
Peanut Butter Bars
Right then, let's get into why this specific combination of ingredients creates that specific mouthfeel. When you're making a no bake dessert, you're essentially playing with fats and temperatures to create structure.
Since we aren't using eggs or flour to "set" the bars, the butter and peanut butter do all the heavy lifting.
The Magic of the Set
- Fat Solidification: The melted butter and peanut butter transition from liquid to solid in the fridge, locking the graham crumbs in place.
- Sugar Binding: Powdered sugar acts as a glue, filling the gaps between the crumbs to prevent the base from falling apart.
- Temperature Contrast: By chilling the base before adding chocolate, we ensure the chocolate sets quickly without melting the layer beneath it.
- Chocolate Stability: Adding a small amount of peanut butter to the chocolate chips prevents the topping from becoming too brittle, giving it a smoother, more professional finish.
| Method | Time | Texture | Best For |
|---|---|---|---|
| Homemade | 2 hrs 15 mins | Velvety & Dense | Parties & Gifts |
| store-bought | 0 mins | Waxy & Grainy | Emergency Snacks |
| Quick Mix | 30 mins | Soft & Gooey | Immediate Cravings |
Now, let's look at the components. You might think the graham crackers are just for bulk, but they actually provide the necessary structure that separates a "bar" from a "fudge".
Component Analysis
| Ingredient | Science Role | Pro Secret |
|---|---|---|
| Graham Crumbs | Structural Framework | Pulse them fine for a smoother, more truffle like base |
| Peanut Butter | Primary Emulsifier | Use a brand with no stabilizers for a cleaner melt |
| Powdered Sugar | Moisture Binder | Sift it first to avoid white clumps in the paste |
| Semi Sweet Chips | Hardening Shell | Use high cocoa percentages to balance the sugar |
For the ingredients, I've listed exactly what you need. Trust me on this, don't even bother with low-fat peanut butter or margarine here. You need the full fat content to get that velvety texture that doesn't feel like cardboard.
Essential Ingredients
- 125 g graham cracker crumbs Why this? Provides the crunch and stability (Substitute: crushed digestive biscuits)
- 255 g creamy peanut butter Why this? The flavor powerhouse and binder (Substitute: almond butter for a nuttier vibe)
- 120 g powdered sugar Why this? Sets the base without adding liquid (Substitute: finely ground coconut sugar)
- 115 g unsalted butter, melted Why this? Ensures a smooth, cohesive paste (Substitute: coconut oil for dairy-free)
- 255 g semi sweet chocolate chips Why this? Creates the snappy top layer (Substitute: dark chocolate 70% for less sweetness)
- 32 g creamy peanut butter Why this? Softens the chocolate shell (Substitute: a teaspoon of coconut oil)
Chef's Note: If you want a deeper flavor, add a tiny pinch of espresso powder to the melted chocolate. It doesn't make it taste like coffee, but it makes the chocolate taste "darker" and more intense.
Required Kitchen Tools
You don't need a fancy setup for this. A large mixing bowl, a microwave safe bowl for the chocolate, and an 8x8 inch pan lined with parchment paper will do the trick. I highly recommend the parchment paper - don't just grease the pan. You'll want to lift the whole block out to slice it cleanly.
For the chocolate, you can use a double boiler if you're nervous about the microwave, but for this specific recipe, the microwave is faster and works just fine as long as you're patient. According to Serious Eats, overheating chocolate can cause it to seize, so those 30 second bursts are non negotiable.
Bringing It Together
Let's crack on with the assembly. Pay close attention to the textures as you mix; you're looking for a uniform paste, not a crumbly mess.
Phase 1: Building the Foundation
- Combine the 125 g graham cracker crumbs, 255 g peanut butter, 120 g powdered sugar, and 115 g melted butter in a large bowl.
- Stir until the mixture is a uniform paste Note: ensure no streaks of butter remain.
- Press the mixture into the bottom of a parchment lined pan until it is flat and compact.
- Press firmly with the back of a spoon to avoid air pockets.
Phase 2: Creating the Chocolate Shell
- Place 255 g chocolate chips and 32 g peanut butter in a microwave safe bowl.
- Heat in 30 second bursts, stirring between each interval until the mixture is glossy and smooth.
- Let the chocolate cool for 2 minutes so it doesn't melt the base.
Phase 3: The Final Layering
- Pour the melted chocolate over the peanut butter base.
- Spread it carefully to the edges until the surface is level and velvety.
- Chill in the refrigerator for at least 2 hours until the chocolate is firm and snaps when touched.
- Lift the parchment and slice into 20 equal squares.
Precision Checkpoints:
- Base Weight: The combined base should weigh roughly 510g before pressing.
- Chill Time: Minimum 120 minutes; any less and the center will be too soft to slice.
- Serving Size: Exactly 20 squares for the standard 8x8 pan.
Fixing Common Issues
Most problems with these bars happen during the "pressing" or "melting" stages. If your base feels too loose, it's usually because the butter was too hot or the peanut butter was too oily.
Crumbly Base Fixes
If the base doesn't hold together, you likely didn't press it firmly enough or the ratios were off. Add a tablespoon of melted butter and press again.
Streaky Chocolate Shell
This happens when the chocolate doesn't emulsify with the peanut butter. Continue heating in 15 second bursts and stir vigorously until the streaks disappear.
Soft Center Issues
If the bars are too soft to cut, they haven't chilled long enough. Put them back in the fridge for another 30 minutes.
| Problem | Root Cause | Solution |
|---|---|---|
| Base is too oily | Natural PB separation | Stir your PB thoroughly before weighing |
| Chocolate is dull | Overheating/Seizing | Add a teaspoon of oil and stir fast |
| Base is too sweet | Clumped powdered sugar | Sift sugar before mixing |
Common Mistakes Checklist:
- ✓ Did you line the pan with parchment? (Essential for removal)
- ✓ Did you stir the chocolate every 30 seconds? (Prevents burning)
- ✓ Did you press the base firmly? (Prevents crumbling)
- ✓ Did you wait the full 2 hours? (Ensures clean cuts)
- ✓ Did you use creamy peanut butter? (Chunks create uneven layers)
Creative Twists
If you're feeling adventurous, you can easily tweak this. For a breakfast style version, you can try making homemade granola bars using similar binding techniques.
Decision Shortcut:
- If you want a salty kick: Sprinkle flaky sea salt on top of the chocolate before chilling.
- If you want more crunch: Swap half the graham crumbs for crushed pretzels.
- If you want it less sweet: Use 85% dark chocolate chips instead of semi sweet.
For those who love the flavor but want a different format, these are surprisingly similar to edible cookie dough in terms of that rich, unbaked satisfaction. You can even add a layer of crushed potato chips between the PB base and the chocolate for a "Payday" bar vibe.
Scaling Guidelines
Adjusting the batch size is simple, but remember that no bake desserts are sensitive to pan volume.
- Scaling Down (Half Batch): Use a loaf pan instead of a square pan. Reduce chilling time by about 20% (around 90 minutes should work).
- Scaling Up (Double Batch): Use a 9x13 inch pan. When doubling, only increase the salt or vanilla by 1.5x to avoid overpowering the peanut butter.
- Baking Note: Since these are no bake, you don't need to worry about oven temps, but if you decide to toast the crumbs first, do so at 300°F for 5 minutes.
| Scale | Pan Size | Chill Time | Adjustments |
|---|---|---|---|
| 1/2x | Loaf Pan | 90 mins | Use half ingredients |
| 1x | 8x8 Square | 120 mins | Standard recipe |
| 2x | 9x13 Rect | 150 mins | Increase salt slightly |
Truths About Peanut Butter
There are a few myths I see floating around the internet about these types of treats. Let's set the record straight.
Natural PB is always better. Not for this recipe. "Natural" peanut butter that separates requires a lot of stirring and can sometimes make the base too oily, which leads to a crumbly texture. Commercial creamy peanut butter is more stable for binding.
You must temper the chocolate. Nope. Since we are adding peanut butter to the chocolate, we are creating a ganache like topping rather than a tempered shell. It won't have that professional "snap" of a candy bar, but it will be velvety and smooth.
Storage Guidelines
Keep these in an airtight container. Because of the butter and peanut butter, they can pick up smells from the fridge if left uncovered.
- Fridge: Stay fresh for up to 10 days.
- Freezer: Wrap individually in parchment and freeze for up to 3 months. Thaw for 15 minutes before eating for a fudgy texture.
- Zero Waste: If you have a bit of the PB paste left over in the bowl, don't toss it. Roll it into a small ball, dip it in the leftover chocolate, and you've got a "chef's snack" truffle.
Serving and Plating
Depending on who you're serving, you can change the presentation from "after school snack" to "dinner party dessert".
Simple Style
Cut into rustic squares and serve on a wooden board. This is best for family gatherings where people just want to grab and go.
Polished Style
Cut into precise 1 inch rectangles using a hot knife (dip the knife in hot water and wipe dry between cuts). Dust the top with a light sprinkle of cocoa powder.
Restaurant Style
Place a single rectangle offset on a white plate. Add a small quenelle of whipped cream on the side and a few fresh raspberries to cut through the richness.
| Level | Cut Style | Garnish | Vibe |
|---|---|---|---|
| Simple | Rough Square | None | Casual |
| Polished | Clean Rectangle | Cocoa Powder | Elegant |
| Restaurant | Slim Finger | Raspberries | Gourmet |
Trust me, whether you serve these simply or go all out, the combination of the shatter crisp chocolate and the velvety center is always a winner. Just make sure you have some cold milk or a strong coffee on hand to balance out the decadence!
Recipe FAQs
How to make these bars using natural peanut butter?
Stir the natural peanut butter vigorously to incorporate the separated oil before mixing it with the graham cracker crumbs and powdered sugar. This ensures the base maintains a uniform consistency and doesn't become overly greasy.
What are the essential ingredients for these peanut butter bars?
Combine graham cracker crumbs, creamy peanut butter, powdered sugar, and melted unsalted butter. The topping requires semi sweet chocolate chips mixed with a small amount of additional creamy peanut butter.
What causes the peanut butter base to be crumbly?
Insufficient melted butter or under mixing usually causes a crumbly texture. Ensure the ingredients form a uniform paste and press the mixture firmly into the parchment lined pan.
How to professionally package these bars for gifts?
Wrap each bar individually in parchment paper before placing them in an airtight container. This prevents the chocolate from sticking and protects the bars from absorbing fridge odors.
Can I use milk chocolate instead of semi sweet chocolate chips?
Yes, milk chocolate works well. It creates a sweeter, softer topping; if you enjoyed this sweet creamy balance, see how a similar flavor profile works in our cream cheese sugar cookies.
How long should I chill the bars before slicing?
Chill for at least 2 hours in the refrigerator. This allows the fats in the butter and chocolate to fully set, ensuring you get clean edges when slicing into 20 squares.
Is it true that these bars must be baked in the oven to set?
No, this is a common misconception. These are no-bake treats that rely entirely on refrigeration to firm up the peanut butter and chocolate layers.
No Bake Peanut Butter Bars