Pumpkin Chocolate Chip Bread: Tender and Spiced
- Time: Active 15 minutes, Passive 60 minutes, Total 75 minutes
- Flavor/Texture Hook: Velvety pumpkin crumb with molten chocolate pockets and a warm, spiced finish.
- Perfect for: Elegant weekend brunches, impressive gifting, or a sophisticated afternoon tea.
- Master the Ultimate Pumpkin Chocolate Chip Bread
- Why the Crumb Stays Velvety and Spiced
- Essential Components and Smart Swaps for Success
- Tools Required for an Elegant Baking Experience
- Professional Techniques for the Best Loaf Possible
- Solving Common Issues for a Flawless Result
- Flavor Adaptations and Creative Ingredient Twists
- Preserving Freshness and Reducing Kitchen Waste
- Three Levels of Presentation to Wow Guests
- The Secret to the Perfect Rise
- Recipe FAQs
- 📝 Recipe Card
Master the Ultimate Pumpkin Chocolate Chip Bread
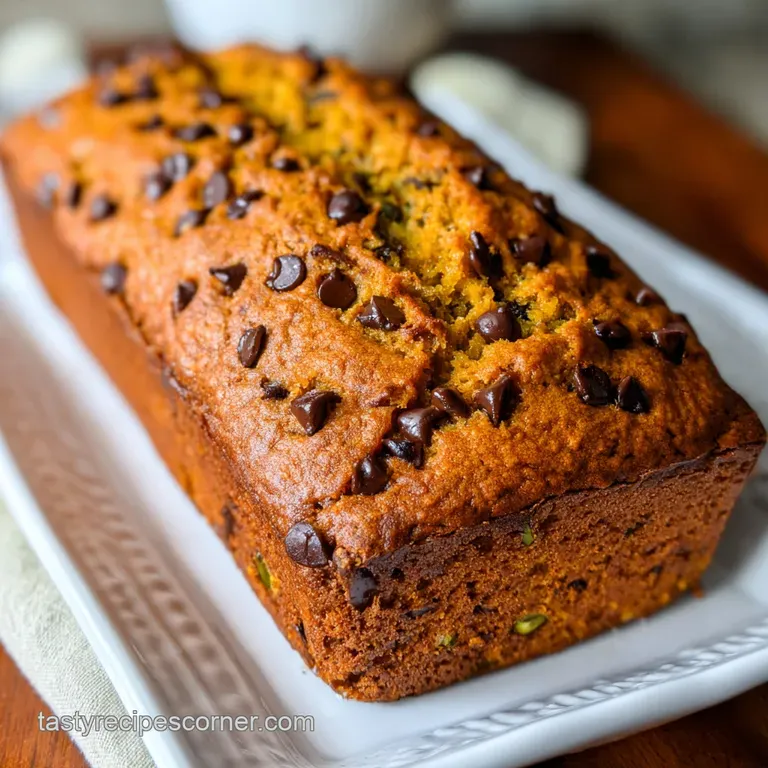
The first thing you notice isn't the sight of the loaf, but the heavy, intoxicating aroma of ground cloves and toasted cinnamon that clings to the air before the oven door even opens. It is a scent that feels like a warm wool blanket.
When you finally pull the pan out, the top has a gorgeous, rugged landscape of copper colored cracks and glistening, semi sweet chips that have just begun to soften into dark, velvet pools.
There is a specific sound, too - a soft, muffled thud when you tap the bottom of the pan to check for doneness, signaling a crumb that is dense with moisture but light enough to feel elegant.
I remember making this for a neighborhood gathering where I forgot to grease the corners of the pan properly. Even though the edges were a bit jagged, the center was so incredibly moist that people were asking for the recipe before the first slice was finished.
That is the beauty of a Pumpkin Chocolate Chip Bread recipe. It is forgiving, but when you treat it with a little bit of baker's intuition, it transforms from a simple snack into something truly high end.
We aren't just mixing sugar and flour here; we are layering textures and balancing the earthy, vegetal sweetness of pumpkin against the sharp, sophisticated bite of semi sweet chocolate.
This isn't your average "throw it all in a bowl" bread. While it is simple, the magic happens in how we handle the fat and the spices. You want a loaf that doesn't just taste like "sweet orange cake," but one that has a complex, spicy backbone.
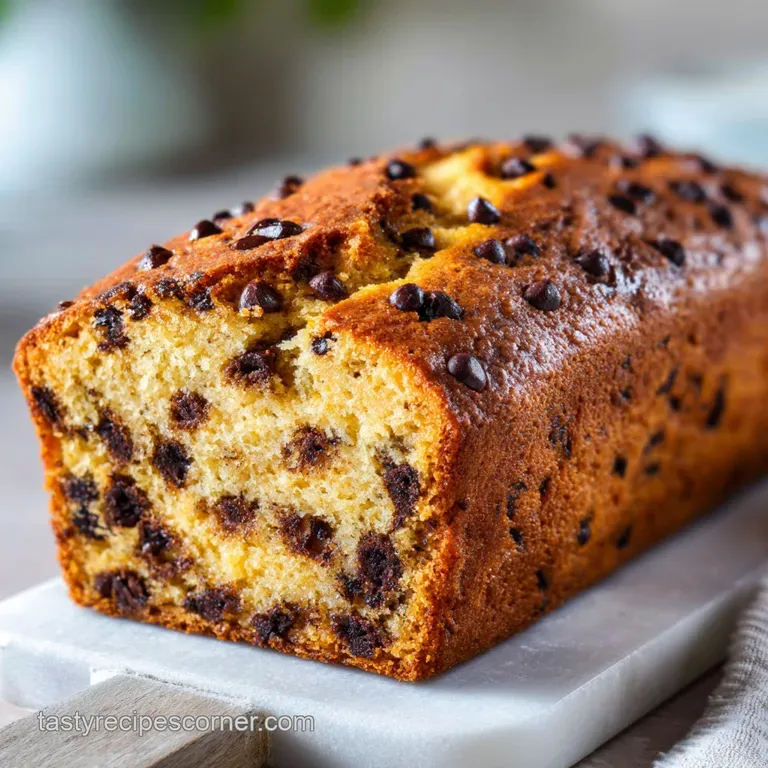
By the time we're done, you'll have a bread that has a tight, velvety crumb that doesn't crumble away the second a serrated knife touches it. It's about achieving that polished, professional look while keeping the soul of a homemade treat.
Why the Crumb Stays Velvety and Spiced
Fat Soluble Flavor: Whisking spices into neutral oil first allows the heat stable aromatic compounds to dissolve, ensuring the cinnamon and ginger flavor is evenly distributed through every single bite.
Emulsion Stability: Whisking the eggs, pumpkin, and sugars vigorously for a full minute creates a stable emulsion that traps tiny air bubbles, which helps the bread rise without becoming airy or "bready."
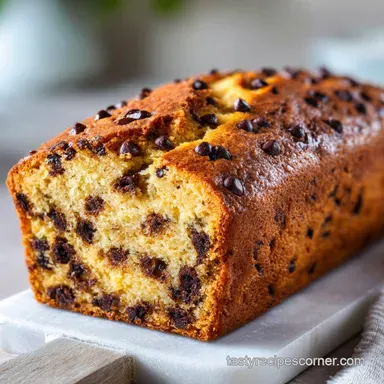
Starch Coating: Tossing chocolate chips in a dusting of flour creates a rough surface that allows the chips to "grip" the batter, preventing them from sinking to the bottom of the pan during the 60 minutes bake.
Moisture Retention: The combination of pumpkin purée and light brown sugar acts as a humectant, pulling moisture from the air and keeping the bread soft for days longer than a standard quick bread.
| Method | Time | Texture | Best For |
|---|---|---|---|
| Standard Oven | 60 minutes | Evenly domed, crisp edges, moist center | The classic, polished presentation |
| Stovetop (Dutch Oven) | 70 minutes | Extremely moist, almost steamed texture | A rustic, dense result when an oven isn't available |
| Air Fryer (Small Batch) | 45 minutes | Very dark crust, slightly drier crumb | Quick cravings or making mini loaves |
Choosing the right method depends entirely on what kind of crust you prefer. The oven provides that iconic dry heat "shatter" on the very top of the dome, while a stovetop method in a sealed pot keeps the environment humid, resulting in a loaf that feels more like a heavy pudding cake.
Most of us will stick to the 350°F (175°C) oven for that reliable, golden finish.
Essential Components and Smart Swaps for Success
| Ingredient | Science Role | Pro Secret |
|---|---|---|
| Pumpkin Purée | Provides structure and moisture without the weight of extra butter | Always use "Pure Pumpkin," not "Pumpkin Pie Filling" which contains stabilizers |
| Neutral Oil | Keeps the crumb soft even when the bread is cold from the fridge | Use avocado or grapeseed oil for the cleanest flavor profile |
| Light Brown Sugar | Adds acidity to react with the baking soda and contributes deep caramel notes | Pack it tightly in the cup to ensure the moisture ratio is exact |
When you are gathering your ingredients, the quality of your spices is the difference between a "good" bread and the best pumpkin chocolate chip bread you've ever tasted. If your cinnamon has been sitting in the back of the cupboard since three houses ago, it is time for an upgrade.
Freshly grated nutmeg, if you can manage it, adds a woody, floral note that pre ground versions simply cannot match.
- 1 cup (225g) Pumpkin Purée: Why this? Provides the foundational moisture and the iconic orange hue without adding heavy fats.
- 2 Large Eggs: Why this? Acts as the primary binder and provides the protein structure for the bread to rise.
- 0.5 cup (120ml) Neutral Oil: Why this? Ensures a moist mouthfeel that lasts longer than butter based cakes.
- 0.25 cup (60ml) Whole Milk: Why this? Thins the batter slightly for a more even pour and adds a hint of richness.
- 1 tsp Vanilla Extract: Why this? Rounds out the spices and bridges the gap between the pumpkin and chocolate.
- 1.75 cups (220g) All Purpose Flour: Why this? The perfect protein content for a tender but sliceable crumb.
- 0.75 cup (150g) Granulated Sugar: Why this? Provides sweetness and helps the edges crisp up beautifully.
- 0.5 cup (100g) Light Brown Sugar: Why this? The molasses content adds moisture and a subtle toffee flavor.
- 1 tsp Baking Soda: Why this? Reacts with the brown sugar and pumpkin to provide lift.
- 0.5 tsp Baking Powder: Why this? Provides a secondary lift for a higher, more impressive dome.
- 0.5 tsp Sea Salt: Why this? Cuts through the sugar and intensifies the chocolate and spice notes.
- Spices (1.5 tsp Cinnamon, 0.5 tsp Ginger, 0.25 tsp Nutmeg, 0.25 tsp Cloves): Why this? The "holy quartet" of warm spices that define the pumpkin profile.
- 1 cup (170g) Semi sweet Chocolate Chips: Why this? Dark enough to contrast the sweet pumpkin without being overly bitter.
| Original Ingredient | Substitute | Why It Works |
|---|---|---|
| Whole Milk | Full fat Coconut Milk | Keeps the fat content high while adding a very subtle tropical nuttiness. |
| Neutral Oil | Melted Coconut Oil | Adds a slightly firmer texture when cooled and a mild coconut aroma. |
| Semi sweet Chips | Dark Chocolate Chunks | Higher cocoa content creates a more sophisticated, less sugary flavor profile. |
If you find yourself out of neutral oil, you can use melted butter, but be aware that the bread will firm up significantly in the fridge. Oil is the secret to that "eternal moisture" that makes simple pumpkin chocolate chip bread so addictive.
For those who want a bit of a twist, I sometimes swap the semi sweet chips for white chocolate, though it does make the loaf much sweeter.
Tools Required for an Elegant Baking Experience
You don't need a kitchen full of gadgets, but a few specific tools will make the process much more graceful. A standard 9x5 inch (23x13 cm) loaf pan is non negotiable. I prefer a light colored metal pan over glass or dark non stick.
Dark pans tend to brown the edges too quickly before the center is set, often leading to a "burnt outside, raw inside" situation.
A fine mesh sifter is also a silent hero here. Sifting the flour and leavening agents together isn't just about removing lumps; it's about aerating the dry ingredients so they incorporate into the wet pumpkin mixture with minimal agitation.
If you use a stand mixer like a KitchenAid, use the paddle attachment on the lowest speed. However, I find that a simple silicone spatula and a heavy balloon whisk give you much more control over the texture.
Finally, always have parchment paper on hand. While greasing the pan is good, a parchment "sling" - where the paper hangs over the long sides of the pan - allows you to lift the entire loaf out perfectly without risking a "shatter" of the delicate crust.
It's these small, polished touches that move your baking from amateur to professional.
Professional Techniques for the Best Loaf Possible
1. Preparing the Pan and Oven
Preheat your oven to 350°F (175°C). This temperature is the sweet spot for quick breads; it's hot enough to activate the baking soda quickly for a good rise, but low enough that the 60 minutes bake time won't scorch the sugars in the pumpkin.
Grease your 9x5 inch pan and line it with parchment paper, leaving an overhang on the sides.
2. Whisking the Wet Base
In your largest mixing bowl, combine the neutral oil with the cinnamon, ginger, nutmeg, and cloves. Whisk them together for a few seconds. This blooming step is something most people skip, but it's essential for a deep flavor.
Now, add the pumpkin purée, granulated sugar, light brown sugar, eggs, milk, and vanilla. Whisk vigorously for 1 minute. You are looking for a glossy, emulsified look. Note: This vigorous whisking builds a stable base that supports the heavy chocolate chips later.
3. Integrating the Dry Ingredients
In a separate bowl, sift together the all purpose flour, baking soda, baking powder, and sea salt. Using a sifter ensures there are no pockets of salty baking soda in your finished bread.
4. Folding the Chocolate
Add the dry ingredients into the wet pumpkin mixture. Switch to a silicone spatula and use a "folding" motion - cut through the center, scrape the bottom, and turn the batter over. Stop the moment you see no more white streaks of flour.
Note: Over mixing at this stage develops gluten, which will turn your elegant loaf into something tough and rubbery.
5. Mastering the Bake
Toss your 1 cup of chocolate chips with a teaspoon of flour until they look dusty. Fold them into the batter, reserving a small handful. Pour the batter into the prepared pan and smooth the top. Sprinkle those reserved chips over the surface for a polished look.
6. Cooling for Stability
Bake for 60 minutes until a toothpick inserted into the thickest part comes out clean or with just a few moist crumbs. If you hit a chocolate chip, wipe the toothpick and try again in a different spot.
Let the loaf cool in the pan for at least 15 minutes before using the parchment sling to lift it onto a wire rack. Cooling is part of the cooking process; the internal structure needs time to set so it doesn't collapse when sliced.
Solving Common Issues for a Flawless Result
Why Your Loaf Sunken in the Center
This is the most common heartbreak in the world of homemade pumpkin chocolate chip bread. Usually, this happens because the oven door was opened too early, causing a sudden drop in temperature before the protein structure of the eggs and flour could set.
It can also happen if your baking soda is old and doesn't provide enough "lift" to hold up the heavy pumpkin purée.
Avoiding the Dreaded Gummy Layer
If you slice into your bread and find a dark, dense, gummy line near the bottom, it usually means the batter was over mixed or the pumpkin had too much water content. Some canned pumpkins are more watery than others. If yours looks loose, you can blot it with a paper towel before measuring.
Also, ensure your oven is truly at 350°F (175°C) using an oven thermometer, as a cool oven will cause the fat to sink before the bread can rise.
| Problem | Root Cause | Solution |
|---|---|---|
| Chips Sunk to Bottom | Batter too thin or chips too heavy | Toss chips in flour and ensure you whisk the wet base for a full minute for better viscosity. |
| Dry, Crumbly Texture | Too much flour or over baking | Measure flour by weight (220g) and pull the loaf out the second the toothpick is clean. |
| Burnt Top, Raw Center | Oven too hot or pan is too dark | Tent the loaf with foil after 40 minutes and use a light colored metal pan. |
Common Mistakes Checklist
- ✓ Never skip sifting the dry ingredients - it prevents "alkaline spots" from clumped baking soda.
- ✓ Don't use "pumpkin pie filling" - the added spices and thickeners will ruin the moisture balance.
- ✓ Avoid over mixing once the flour hits the wet ingredients - use a spatula, not a whisk.
- ✓ Let the loaf cool for at least 15 minutes before moving - the structure is very fragile when hot.
- ✓ Check your spices' expiration dates - old ginger loses its "heat" and just tastes like dust.
Flavor Adaptations and Creative Ingredient Twists
If you are looking to make a healthy pumpkin chocolate chip bread, you can swap half of the all purpose flour for whole wheat pastry flour. This adds a nutty depth and a boost of fiber without making the loaf feel like a brick.
You can also reduce the granulated sugar to 0.5 cup, though the crust won't be quite as crisp. For a more "grown up" version, adding 0.5 cup of toasted chopped pecans or walnuts provides a necessary crunch that contrasts beautifully with the soft chocolate.
For those needing a gluten-free pumpkin chocolate chip bread, a high-quality 1 to-1 gluten-free flour blend (like King Arthur or Cup4Cup) works remarkably well here because the pumpkin provides so much natural moisture and structure.
Just be sure to let the batter sit for 10 minutes before baking to allow the rice flours in the blend to hydrate, which prevents a "gritty" mouthfeel.
If you really want to lean into the seasonal flavors, try adding a tablespoon of orange zest to the sugar before whisking. The citrus oils brighten the earthy pumpkin and make the chocolate taste even richer. If you're a fan of different textures, you might also enjoy my Chocolate Chip Muffin recipe, which uses a similar flavor profile but in a much faster, snackable format.
Preserving Freshness and Reducing Kitchen Waste
Storage Guidelines: This bread is actually better on day two. Keep it in an airtight container at room temperature for up to 4 days. The moisture from the pumpkin will continue to soften the crust, making it almost fudgy.
If you live in a very humid climate, store it in the fridge after day two to prevent mold, though this may firm up the chocolate chips.
Freezing Instructions: This loaf freezes beautifully. Wrap the completely cooled loaf in a double layer of plastic wrap, then a layer of aluminum foil. It will stay fresh for up to 3 months. I recommend slicing it before freezing and placing pieces of parchment between the slices.
This way, you can pull out a single piece and pop it in the toaster for a quick, elegant breakfast.
Zero Waste Tip: If you find yourself with half a can of leftover pumpkin purée, don't let it sit in the fridge until it turns into a science project. You can whisk it into oatmeal, stir it into a marinara sauce for a creamy "autumnal" pasta, or even freeze it in ice cube trays for future baking.
If the bread does go stale, it makes the most incredible French toast you've ever had. Just soak the slices in a basic egg and milk wash and fry them in plenty of butter until the chocolate chips get melty again.
Three Levels of Presentation to Wow Guests
Simple: The Rustic Slice
For a casual morning, simply cut a thick, generous slice while the bread is still slightly warm. Serve it on a wooden board with a small ramekin of salted butter. The contrast of the salty butter melting into the sweet, spiced crumb is a classic for a reason.
It is unpretentious and focuses entirely on the quality of the bake.
Polished: The Afternoon Tea
Slice the bread into perfectly even 1 inch rectangles. Arrange them on a white ceramic platter. Sift a very light dusting of powdered sugar over the top just before serving. This highlights the dark chocolate chips and gives the loaf a "finished" look.
Pair it with a strong Earl Grey tea or a dark roast coffee to balance the sweetness.
Restaurant: The Griddled Dessert
This is how you turn a simple loaf into a "wow" moment. Take a slice of the bread and lightly sear it in a pan with a tiny bit of butter until the edges are caramelized and the chocolate is molten. Place it in the center of a shallow bowl.
Top with a dollop of mascarpone whipped cream (just heavy cream, mascarpone, and a touch of maple syrup) and a sprinkle of flaky sea salt.
| Plating Level | Key Element | Texture Goal |
|---|---|---|
| Simple | Salted Butter | Soft and melty |
| Polished | Powdered Sugar | Clean and bright |
| Restaurant | Griddled + Mascarpone | Crispy edges vs. silky cream |
Whatever level you choose, the key is to handle the bread gently. Because it is so moist, it can be delicate when warm. Using a sharp serrated knife is essential for getting those clean, professional edges without squishing the crumb. If you're looking for something with a different texture profile for your next dessert tray, my Chewy Crispy Chocolate Chip Cookies offer a fantastic contrast to the soft, cake like nature of this bread.
The Secret to the Perfect Rise
The ultimate goal of this recipe is a high, proud dome. While we use both baking soda and powder, the real lift comes from the interaction between the acidic pumpkin and the leavening agents.
Make sure you don't let the batter sit on the counter for too long once it's mixed; the reaction starts the moment the wet meets the dry. Get it into that preheated oven immediately to capture all that carbon dioxide.
When you pull it out, resisting the urge to slice it immediately is the hardest part. But trust me, that 15 minute rest in the pan is where the "velvet" happens. The steam redistributes, ensuring the edges aren't too dry and the center isn't too soft. It's the mark of a patient, skilled baker.
Enjoy every spiced, chocolatey crumb!

Recipe FAQs
How to prevent chocolate chips from sinking to the bottom?
Toss the chips in a teaspoon of flour before folding them into the batter. This creates friction that keeps the chocolate suspended throughout the loaf while it bakes.
Can I use canned pumpkin pie filling instead of pumpkin purée?
No, avoid using pie filling. It contains added spices and thickeners that will ruin the moisture balance of the bread, leading to an unpredictable texture.
Why is it necessary to sift the dry ingredients?
Sifting prevents alkaline spots caused by clumped baking soda. If you enjoy mastering these types of structural fundamentals, you can apply the same precision to our chocolate chunk cookies to ensure a perfectly uniform bake.
Is it safe to slice the bread as soon as it comes out of the oven?
No, let it cool for at least 15 minutes first. The crumb structure is extremely fragile while hot, and slicing too early will cause the loaf to crumble or collapse.
How to ensure the bread stays moist?
Whisk the wet ingredients vigorously for one full minute to create a stable emulsion. This ensures the oil and liquids incorporate perfectly, providing a consistent, tender crumb throughout the bread.
How to tell if the bread is finished baking?
Insert a toothpick into the center of the loaf. If it comes out clean without wet batter attached, the bread is finished after its 60-minute bake time at 350°F.
Is it necessary to bloom the spices in the oil?
Yes, blooming the spices helps release their fat-soluble flavor compounds. Whisking the cinnamon, ginger, nutmeg, and cloves directly into the oil before adding other ingredients ensures a more aromatic and flavorful result.
Pumpkin Chocolate Chip Bread
Ingredients:
Instructions:
Nutrition Facts:
| Calories | 386 kcal |
|---|---|
| Protein | 4.7 g |
| Fat | 17.4 g |
| Carbs | 54.2 g |
| Fiber | 2.9 g |
| Sugar | 37.1 g |
| Sodium | 224 mg |
