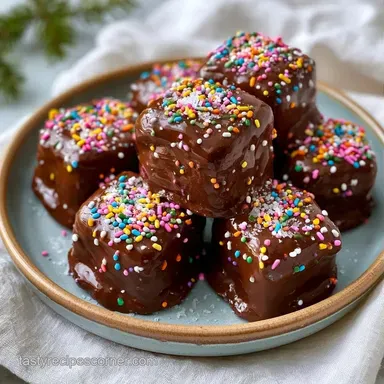
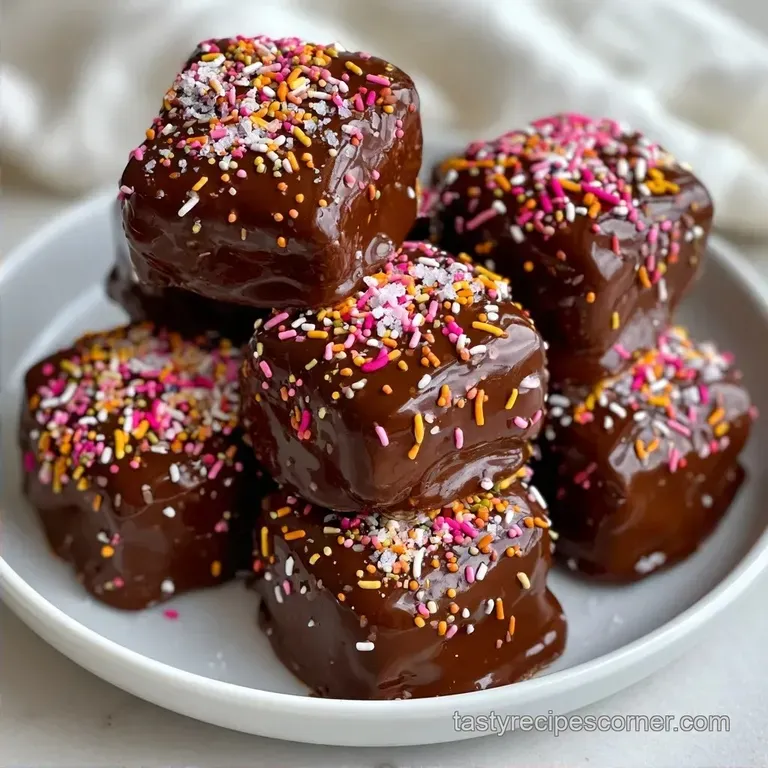
Chocolate Covered Marshmallows: Velvety
- Time:15 minutes active + 10 minutes cooking = Total 25 minutes
- Flavor/Texture Hook: Velvety chocolate shell with a pillowy, cloud like center
- Perfect for: Last minute party platters or a cozy movie night snack
Chocolate Marshmallow Treat Secrets
That sharp snap when you bite into a chilled chocolate shell is everything. I remember the first time I tried making these without any added fat, just straight chocolate chips. The result was a dull, matte finish that seized up the moment a drop of condensation hit it, and it felt waxy on the tongue.
It was a total letdown.
Then I started using coconut oil. It transforms the texture from a stiff block of cocoa into a velvety, glossy glaze that clings to the marshmallow without sliding off. This one tweak is the difference between a homemade snack and something that looks like it came from a high end boutique.
You can expect a treat that balances the intense sweetness of the marshmallow with the deep, slightly bitter notes of semi sweet chocolate. This Chocolate Marshmallow Treat is all about that contrast in textures, and since it requires no oven time, it is an absolute breeze to put together.
Why These Ingredients Work
- Fat Emulsification: Coconut oil lowers the melting point of the chocolate, ensuring the coating stays smooth and glossy rather than grainy.
- Sugar Buffer: The high sugar content in marshmallows provides a structural base that supports the weight of the chocolate without collapsing.
- Salt Contrast: Flaky sea salt cuts through the sugar overload, triggering different taste receptors to prevent "palate fatigue."
- Viscosity Control: The specific ratio of oil to cocoa creates a surface tension that allows the chocolate to drape over the marshmallow in a thin, even layer.
| Method | Time | Texture | Best For |
|---|---|---|---|
| Microwave | 10 mins | Velvety | Speed and convenience |
| Stovetop | 20 mins | Silky | Precise temperature control |
| Double Boiler | 25 mins | Professional | Large batches/tempering |
While the microwave is the fastest route, using a double boiler allows you to avoid the risk of overheating the cocoa solids. For most of us, the microwave is just too convenient to pass up.
The Component Analysis
| Ingredient | Science Role | Pro Secret |
|---|---|---|
| Semi sweet Chips | Structural Base | Use chips with lecithin for a smoother melt |
| Coconut Oil | Texture Modifier | Use refined oil if you hate the coconut scent |
| Large Marshmallows | Core Volume | Keep them at room temp for better adhesion |
| Flaky Sea Salt | Flavor Balancer | Add it immediately after dipping for maximum stick |
Necessary Kitchen Tools
You don't need a professional kitchen for this, but a few specific items make it way easier. A microwave safe glass bowl is a must, as plastic can hold onto scents and unevenly heat the chocolate.
I usually grab a sturdy toothpick or a small fork to handle the marshmallows, which keeps my fingers clean and the coating even.
Parchment paper is non negotiable here. If you use a plate or foil, the chocolate will likely stick, and you'll end up with smeared treats. I suggest a large baking sheet so you can spread the treats out and avoid them touching before the chocolate fully sets.
Step-by-step Coating Process

1. The Setup
Line a baking sheet with parchment paper and arrange the marshmallows in a single layer. Note: This prevents a frantic rush once the chocolate starts to cool.
2. The Melt
Combine chocolate chips and coconut oil in a microwave safe glass bowl.
3. Interval Heating
Microwave on high for 30 seconds, then stir. Repeat in 30 second intervals until the chocolate is velvety and smooth. Stop while a few tiny lumps remain to let residual heat finish the melt. Note: Overheating causes the chocolate to seize and turn grainy.
4. The Dip
Insert a toothpick or fork into the center of a marshmallow and submerge it into the melted chocolate, swirling to coat completely.
5. Excess Removal
Lift the marshmallow and gently tap the fork against the side of the bowl to remove excess chocolate. This prevents a thick, clumpy base from forming on your parchment.
6. The Set
Place the coated marshmallow on the parchment paper and repeat for the remaining treats.
7. The Finish
Garnish with flaky sea salt and colorful sprinkles before the chocolate sets.
Chef's Tip: To get a mirror like shine, freeze your coconut oil for 10 minutes before measuring it; this slightly alters the integration speed and creates a more stable emulsion.
Fixing Coating Errors
But what about the sogginess or the sliding? If your chocolate is acting up, it usually comes down to temperature or moisture. According to Serious Eats, moisture is the enemy of melted chocolate, which is why you should never let steam enter your bowl.
Why Your Chocolate Seized
If the mixture becomes clumpy and matte, you've likely overheated it or introduced water. This happens when the cocoa butter separates from the solids.
Why Chocolate is Sliding Off
If the coating is too thin and runs off, your coconut oil ratio might be too high, or your marshmallows were too cold from the fridge.
| Problem | Root Cause | Solution |
|---|---|---|
| Grainy Texture | Overheated chocolate | Stir in 1 tsp of warm coconut oil |
| Dull Finish | Lack of fat | Add a tiny pinch of oil and stir vigorously |
| Clumping | Water contamination | Start over with a bone dry bowl |
Common Mistakes Checklist
- ✓ Avoid microwaving for more than 30 seconds at a time.
- ✓ Use room temperature marshmallows for better grip.
- ✓ Tap the fork consistently to avoid "chocolate puddles."
- ✓ Apply salt immediately before the chocolate skins over.
- ✓ Ensure the bowl is completely dry before adding chips.
Creative Flavor Variations
If you want a more adult version, try a dark chocolate swap. Replacing semi sweet chips with 70% cocoa creates a sophisticated Treat with Chocolate that isn't overly sweet. You can also add a pinch of espresso powder to the melt to deepen the flavor.
For something more playful, try a PB drizzle. Melt a tablespoon of peanut butter with a touch of coconut oil and drizzle it over the set chocolate. If you're looking for other no bake ideas, my Keto Cookie Dough Dip is another great option for those who want something sweet without the oven.
Decision Shortcut: If you want a salty sweet vibe, use Maldon salt. If you want a festive look, use gold sanding sugar. If you want a richer taste, use dark chocolate chunks.
Storage and Waste Tips
These are best kept in an airtight container in the fridge for up to 7 days. If you leave them on the counter in a warm kitchen, the coconut oil will soften, and the treats will become sticky. For longer storage, you can freeze them for up to 2 months, though the sprinkles may bleed slightly.
To avoid waste, if you have leftover melted chocolate in the bowl, don't throw it away. Pour it into a small silicone mold to make chocolate discs or stir it into your morning coffee for a mocha twist. This ensures every bit of that Marshmallow Treat base gets used.
Pairing and Presentation Ideas
Since this is a simple treat, the presentation is where you can really make it feel elegant. For a party, I recommend pairing these with a crisp, acidic drink to cleanse the palate between bites.
| Level | Presentation | Tweak |
|---|---|---|
| Simple | Flat Plate | Scatter sprinkles around the base |
| Polished | Mini Cupcake Liners | Place each treat in a gold foil liner |
| Restaurant | Slate Platter | Add a raspberry coulis dot and mint leaf |
For those who love this kind of confectionery, these pair wonderfully with my Traditional Christmas Gumdrop Nougat for a full dessert board.
- 1. Melting Time
- No single microwave burst should exceed 30 seconds.
- 2. Temperature
- Chocolate should be warm to the touch but not hot (approx 110°F/43°C).
- 3. Setting Time
- Allow 15 minutes in the fridge for a complete shatter effect shell.
This Classic Marshmallow Sweet Treat with Chocolate is a reminder that you don't need complex techniques to wow your guests. Just a few high-quality components and a little bit of patience with the microwave, and you've got a Sweet Treat with Chocolate that tastes professional. Enjoy your treats!
Recipe FAQs
How to melt the chocolate without burning it?
Microwave on high for 30-second intervals. Stir after each session and stop while a few tiny lumps remain to let residual heat finish the melt.
Can I store these treats at room temperature?
No, keep them refrigerated. In a warm kitchen, the coconut oil will soften and make the treats sticky.
How to prevent the chocolate from pooling at the bottom?
Gently tap the fork against the side of the bowl. This removes excess chocolate before you place the treat on the parchment paper.
Are these suitable for a kids party?
Yes, they are a crowd pleaser. Since these require no baking, you can apply the same simple assembly logic to our cookie dough fat bombs for another easy party option.
Is it true that I should microwave the chocolate until every lump is gone?
No, this is a common misconception. Stop microwaving while tiny lumps remain so the residual heat can melt them without scorching the chocolate.
How to package these treats for gifting?
Place them in an airtight container. Once the chocolate is fully set, arrange them carefully to avoid smudging the sprinkles.
Can I use these as an easy DIY Halloween treat?
Yes, they are perfect. You can customize the look by using specific colored sprinkles to match a Halloween theme.
Chocolate Marshmallow Treat