Black Bean and Cheese Quesadilla in 15 Minutes
- Time: 5 min active + 10 min cook
- Flavor/Texture Hook: Mahogany brown crunch with melted cheese
- Perfect for: Hearty weeknight dinners
Sizzle. That's the sound of butter hitting a hot pan in my kitchen. But we've all been there, biting into a quesadilla only to find the tortilla is damp and limp because the beans leaked. It's frustrating when you want a crunch but get a sponge.
I used to just toss whole beans on a tortilla and hope for the best. That was a mistake. I've spent a lot of time in my Tennessee kitchen figuring out that moisture is the enemy of a crisp crust. The trick is creating a physical barrier so the moisture stays locked in the middle.
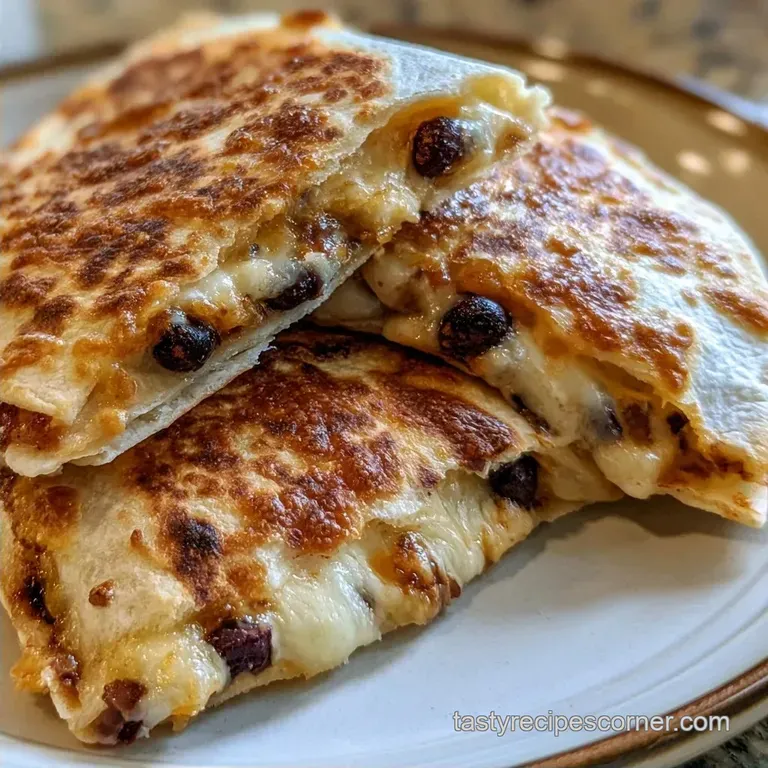
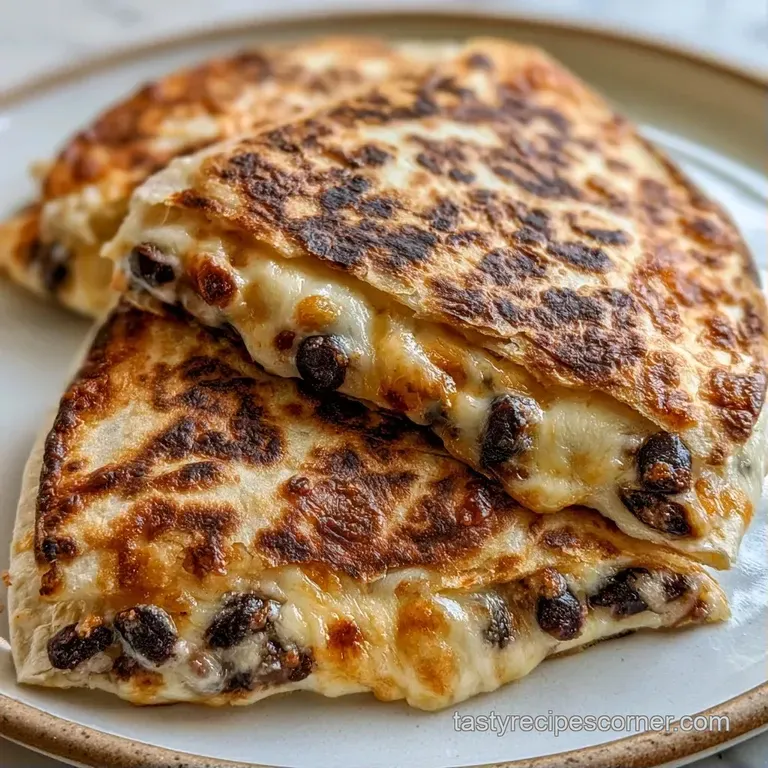
This Bean and Cheese Quesadilla fixes that by sandwiching the beans between two layers of cheese. You get a soul warming meal that actually holds its shape and tastes like something you'd get at a proper family gathering.
Bean and Cheese Quesadilla
Right then, let's talk about why this actually works. Most people just sprinkle everything in and fold. When you do that, the water from the canned beans soaks straight into the flour tortilla. By the time the cheese melts, the tortilla has turned into a wet cloth.
The logic here is the "cheese sandwich" method. I put a layer of cheese down first. That cheese melts and creates a fat based seal. Then the beans go on top, and another layer of cheese locks them in. It's simple, but it changes everything.
Another big deal is the bean texture. Whole beans roll around and create gaps. When you mash half of them, you create a thick, spreadable paste. This paste stays put and gives you a rich, consistent bite every single time.
The Logic Behind This Version
- Cheese Barrier: Placing cheese directly on the tortilla prevents bean moisture from soaking into the flour.
- Bean Mash: Crushing half the beans creates a thick paste that doesn't roll out of the fold.
- Butter Searing: Using butter instead of just oil gives a deeper, nuttier brown on the outside.
| Method | Time | Texture | Best For |
|---|---|---|---|
| Fast Style | 8 mins | Soft / Steamy | Quick lunches |
| Classic Style | 15 mins | Crispy / Toasted | Hearty dinners |
The Logic Behind This Version
The way we build the filling is what makes the difference. It's not just about the ingredients, but how they sit against each other. When the heat hits the pan, we want the exterior to crisp up before the inside gets too hot and releases steam.
If you've ever had a quesadilla that felt rubbery, it's usually because the heat was too high, and the cheese didn't have time to melt before the tortilla burned. We use medium heat to let the heat soak through to the core. This ensures the Monterey Jack becomes a gooey, stretchy glue.
Ingredient Role Breakdown
| Ingredient | What It Does | Best Swap |
|---|---|---|
| Monterey Jack | Provides the "glue" and mild flavor | Oaxaca or Mozzarella |
| Black Beans | Hearty protein and bulk | Pinto beans |
| Cumin | Adds earthy, smoky notes | Chili powder |
The Right Ingredients
I don't believe in fancy substitutions when the basics do the job. You want a cheese that melts well without separating into oil. Monterey Jack is my go to because it's creamy and doesn't fight with the beans.
- 1 can (15 oz / 425g) black beans, drained and rinsed Why this? High protein and holds shape well
- 1 tsp (5g) ground cumin Why this? Essential earthy base flavor
- 1/2 tsp (3g) garlic powder Why this? Even distribution of savory taste
- 1/4 tsp (1.5g) salt Why this? Brings out the bean flavor
- 2 tbsp (30ml) water or lime juice Why this? Loosens the mash for spreading
- 6 (8 inch) flour tortillas Why this? Flexible and toasts beautifully
- 2 cups (225g) shredded Monterey Jack or Oaxaca cheese Why this? Superior melt and stretch
- 3 tbsp (42g) unsalted butter or neutral oil Why this? Butter gives the best crust color
Tools You'll Need
You don't need a professional kitchen for this. A standard non stick skillet is your best friend here. If you have a cast iron pan, use it. It holds heat better and gives a more consistent sear across the whole surface.
I always use a potato masher for the beans. You could use a fork, but the masher is faster and gets a better consistency. A wide spatula is also a must so you can press the quesadilla down firmly against the heat.
Step by step Process
Let's get into the actual making of this Bean and Cheese Quesadilla. I like to prep all my filling first so I'm not rushing once the butter is foaming.
Phase 1: Creating the Creamy Bean Base
- Combine the drained black beans, cumin, garlic powder, and salt in a bowl.
- Use a potato masher to crush about half of the beans. Note: Leaving some whole adds nice texture.
- Stir in the water or lime juice. Mix until it forms a thick, spreadable paste that doesn't run.
Phase 2: The Layering Technique
- Lay a flour tortilla flat on your counter.
- Sprinkle a thin layer of shredded cheese over one half of the tortilla.
- Spread 2-3 tablespoons of the bean mixture over the cheese. Spread it evenly to the edges but leave a tiny gap.
- Top the beans with another layer of cheese.
- Fold the tortilla in half to create a semi circle.
Phase 3: Searing for the Gold Standard
- Heat 1 tbsp (14g) of butter in a skillet over medium heat until it starts foaming.
- Place the quesadilla in the pan. Press down lightly with a spatula to ensure full contact.
- Cook for 2-3 minutes per side until the exterior is mahogany colored and the cheese is completely melted.
Fixing Common Problems
Even the best of us have a bad day in the kitchen. Usually, when this recipe goes wrong, it's a heat or moisture issue. If your tortilla is sticking, your pan wasn't hot enough when the butter went in.
To Prevent Soggy Tortilla Syndrome
This happens when the beans touch the tortilla directly or when you overfill the fold. Stick to the cheese bean cheese order. If you add too many beans, the steam can't escape and it softens the crust.
To Stop the Filling From Leaking
Leaking usually means the cheese didn't melt fast enough to act as a glue. Make sure your pan is at a steady medium heat. Don't rush it on high, or you'll burn the outside while the inside stays cold.
| Problem | Root Cause | Solution |
|---|---|---|
| Soggy Bottom | Too many beans / too high moisture | Use the cheese barrier |
| Falling Apart | Not enough cheese "glue" | Add more shredded cheese |
| Burnt Outside | Pan too hot | Lower to medium heat |
Ways to Change It
Once you've got the base down, you can play around. If you want a spicy kick, stir some diced jalapeños or chipotle in adobo into the bean mash. It adds a smoky heat that pairs well with the creamy cheese.
For extra veggie bulk, add a thin layer of sautéed spinach or corn. Just make sure you sauté the veggies first to get the water out. Wet veggies are just as bad as wet beans when it comes to the crust.
If you're craving something even creamier, you could dip these in a cheddar cheese sauce. For a dairy-free version, swap the Monterey Jack for a vegan cheese sauce mix and use oil instead of butter.
Decision Shortcut
- If you want it spicy, add diced jalapeños to the mash.
- If you want it heartier, add a layer of canned corn.
- If you want a gluten-free swap, use corn tortillas and double the cheese.
Storage and Waste
You can store leftovers in an airtight container in the fridge for up to 3 days. To reheat, don't use the microwave if you can help it. The microwave makes them rubbery. Toss them back in a dry skillet over medium heat for 2 minutes per side to bring back the crunch.
These don't freeze particularly well because the tortilla can get gummy. But you can freeze the bean mash! Put the seasoned bean paste in a freezer bag for up to 2 months. Just thaw it in the fridge overnight before assembling.
To keep waste low, use any leftover bean mash as a dip for veggie sticks or spread it on toast for a quick breakfast. If you have a bit of cheese left, toss it into an omelet.
Best Ways to Serve
This Bean and Cheese Quesadilla is a meal on its own, but a few sides make it a feast. I always serve mine with a big dollop of sour cream and a side of chunky salsa. The cool creaminess of the sour cream cuts through the rich, toasted butter flavor of the tortilla.
The "Loaded" Plate approach is the way to go. Put two quesadillas on a plate, add a scoop of guacamole, and some pickled red onions. The acidity of the onions wakes up the whole dish.
Right then, you've got a hearty, soul warming meal that won't let you down. Just remember the cheese barrier and the bean mash, and you'll never deal with a soggy tortilla again. Enjoy your Bean and Cheese Quesadilla!
Recipe FAQs
Are beans a good addition to quesadillas?
Yes, they add protein and fiber. Mashing a portion of them creates a creamy binder that keeps the shredded cheese in place.
Are bean and cheese quesadillas healthy?
Yes, especially for those seeking plant based protein. The combination of black beans and cheese creates a nutrient dense, satisfying meal.
Can kidney patients safely eat these quesadillas?
No, they should consult a physician first. Black beans and cheese are naturally high in potassium and phosphorus, which may be restricted in renal diets.
How to prevent the tortilla from getting gummy when reheating?
Toss them back in a dry skillet over medium heat. Cook for 10 minutes per side to restore the mahogany colored crunch.
Is it true that I should microwave leftovers to save time?
No, this is a common misconception. Microwaving makes flour tortillas rubbery and destroys the crisp exterior.
How to make the bean filling spreadable?
Crush about half of the beans with a potato masher and stir in water or lime juice. This creates a thick paste that won't slide out of the tortilla.
Can I use a different type of cheese?
Yes, any high melt cheese works. If you enjoyed the savory flavor balancing here, see how we apply similar principles in our savory squash pasta sauce.
Bean And Cheese Quesadilla

