Zebra Layer Cake Recipe: Silky Contrast
- Time: Active 25 minutes, Passive 35 minutes, Total 1 hour
- Flavor/Texture Hook: Silky vanilla punctuated by deep, earthy chocolate notes
- Perfect for: Sophisticated birthday parties or elegant dinner gatherings
- The Elegant Zebra Layer Cake Technique
- The Physics of Concentric Circles
- Essential Specs for Baking Success
- Analyzing Our Key Cake Components
- Essential Elements and Simple Swaps
- Tools for Achieving Professional Results
- Steps to Achieve Striped Perfection
- Solving Common Striping Texture Issues
- Adjusting the Recipe for Crowds
- Debunking Classic Baking Misconceptions
- Keeping Slices Fresh and Moist
- Elegant Garnishing and Color Accents
- Recipe FAQs
- 📝 Recipe Card
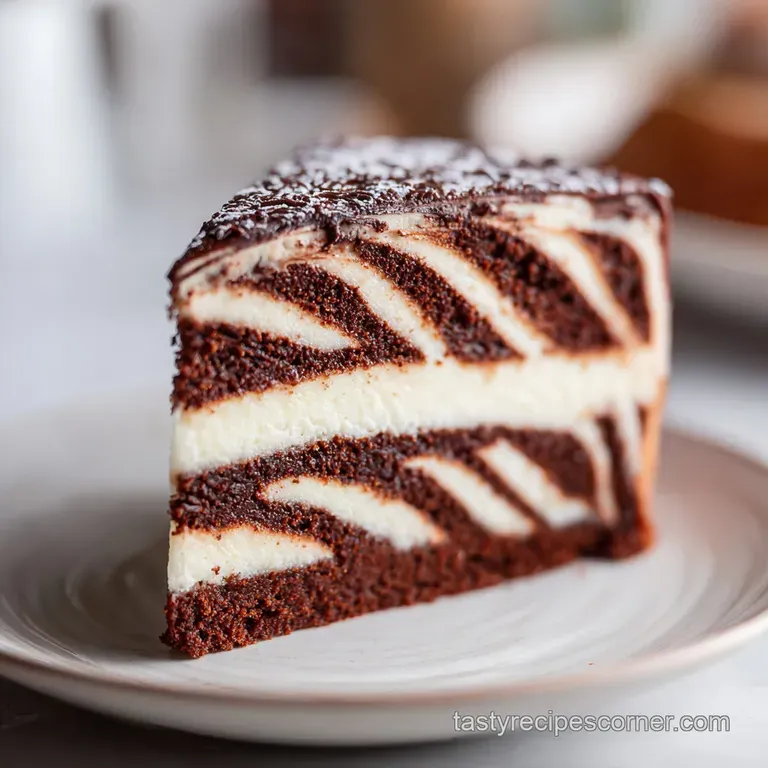
The Elegant Zebra Layer Cake Technique
I still remember the silence that fell over the room during my sister's birthday dinner when I made my first Zebra Layer Cake. As the knife slid through the white frosting and revealed those rhythmic, monochrome stripes, my friends actually stopped mid sentence.
They were convinced I had spent hours in a professional kitchen or ordered it from a boutique bakery, but the truth is much simpler.
The magic of this cake isn't in complex equipment or hidden ingredients. It’s all about the rhythm of the pour and understanding how batter behaves when it hits the pan. Once you get that first concentric circle right, the rest of the process becomes almost meditative.
We are going for a look that is sophisticated and intentional, moving away from messy swirls into something that looks like architectural art.
This recipe uses a specific oil to milk ratio that ensures the crumb stays moist for days, unlike butter cakes that can turn into a brick in the fridge. We're going to use Dutch process cocoa for that deep, almost obsidian contrast against the pale vanilla.
It is a reliable, high impact bake that never fails to impress guests while keeping the actual work quite manageable.
The Physics of Concentric Circles
The layering relies on the varying densities and viscosities of the vanilla and chocolate batters, allowing them to push each other outward without mixing. By using neutral oil instead of solid fats, we ensure the batter remains fluid enough to spread evenly into these rhythmic rings under the force of gravity.
- Viscosity Balance: Adding hot water to the cocoa powder ensures the chocolate batter matches the vanilla's weight, preventing one from sinking into the other.
- Emulsification Stability: Whisking the 4 large eggs with 250g sugar for a full 3 minutes creates a stable foam that supports the heavy oil and milk.
- Maillard Enhancement: The 15ml of maple syrup in the chocolate batter doesn't just add sweetness, it deepens the color during the bake for sharper visual lines.
- Crumb Structure: The 12g of baking powder provides enough lift to keep the layers distinct while maintaining a tight enough crumb to hold the pattern.
| Method | Time | Texture | Best For |
|---|---|---|---|
| Standard Oven | 35 minutes | Fluffy with a slight golden crust | Traditional sharp stripe definition |
| Stovetop (Steam) | 45 minutes | Dense, fudgy, and incredibly moist | A "melt in-the mouth" pudding like cake |
| Convection | 30 minutes | Very dry exterior, high rise | Quick bakes, but may dome excessively |
Choosing the right method depends on your texture preference. For this specific Zebra Layer Cake, the standard oven at 180°C is the gold standard because it sets the stripes quickly before they have a chance to drift or bleed into one another.
Essential Specs for Baking Success
To get those sharp lines, we need to be precise about our components. We aren't just mixing things together; we are creating two distinct batters that must behave like twins in the oven. If one is thicker than the other, your stripes will look like blobs instead of elegant ribbons.
The Science of Blooming Cocoa Powder
When we mix the 30g of Dutch process cocoa with 45ml of hot water, we are "blooming" it. This process dissolves the solids and releases trapped flavor compounds, resulting in a darker color and a more intense chocolate profile. This is vital for the visual contrast in our Zebra Layer Cake.
Benefits of Oil Over Butter
Using 240ml of neutral oil ensures a velvety mouthfeel even when the cake is cold. Butter contains water and milk solids that can make a cake feel coarse or dry, but oil coats the flour proteins more efficiently, limiting gluten development for a more tender bite. This technique is quite similar to the moisture control methods used in our Tuxedo Bar Cake recipe.
Analyzing Our Key Cake Components
| Ingredient | Science Role | Pro Secret |
|---|---|---|
| Dutch process Cocoa | Alkalized for neutral pH | Sift it twice to avoid "freckles" in the dark stripes |
| Neutral Oil | Prevents starch retrogradation | Use grapeseed oil for the cleanest flavor profile |
| low-fat Greek Yogurt | Provides acidity for leavening | Strain it for 10 mins to ensure the frosting isn't runny |
| Baking Powder | Provides 100% of the lift | Check freshness by dropping a pinch in hot water |
The choice of Dutch process cocoa over natural cocoa is non negotiable here. Natural cocoa is acidic and would react differently with the baking powder, potentially muddying the colors. We want that deep, dark obsidian shade to pop against the cream colored vanilla batter.
Essential Elements and Simple Swaps
To get started, gather your 375g all purpose flour and 250g granulated cane sugar. These form the structural backbone of our bake. Don't forget the 3g of sea salt, as it's the secret to making the chocolate actually taste like chocolate rather than just "sweet."
- All purpose flour (375g): Cake flour | Provides a more delicate, fragile crumb.
- Whole milk (240ml): Soy milk | Works well, though the cake may brown slightly faster. Why this? The fat in whole milk adds richness and helps emulsify the oil.
- Neutral oil (240ml): Melted coconut oil | Adds a subtle tropical scent and a firmer texture when cold.
- Greek yogurt (240g): Sour cream | Offers a similar tang with a slightly higher fat content. Why this? Yogurt provides a stable, creamy base for a lighter frosting.
- Pure vanilla extract (10ml): Vanilla bean paste | Adds beautiful black specks to the vanilla layers.
Tools for Achieving Professional Results

You won't need anything fancy, but a few specific items make the striping process much easier. A standard 23cm (9 inch) round cake pan is the baseline, but I prefer using two pans to create a true layer cake.
- Two identical spoons: This is my favorite trick. Use one spoon for vanilla and one for chocolate to keep the colors pure.
- Whisk or Stand Mixer: A KitchenAid with the paddle attachment is excellent for getting the eggs and sugar to that pale, thick stage.
- Sifter: Essential for the 30g of cocoa powder. Clumps are the enemy of a smooth zebra pattern.
- Offset spatula: For smoothing the Greek yogurt frosting without dragging the cake crumbs into the finish.
Steps to Achieve Striped Perfection
- Prep the contrast. Mix 30g cocoa powder with 45ml hot water and 15ml maple syrup until a smooth, glossy paste forms. Note: This prevents the chocolate batter from being too dry.
- Whisk the base. Beat 4 eggs and 250g sugar for 3 minutes until the mixture is pale and leaves a trail.
- Incorporate liquids. Slowly stream in 240ml oil and 10ml vanilla, then stir in 240ml milk.
- Fold in solids. Sift 375g flour, 12g baking powder, and 3g salt into the wet ingredients until no streaks of flour remain.
- Divide the batter. Pour exactly 400g of the vanilla batter into a separate bowl and fold in the cocoa paste.
- Start the pattern. Place 2 tablespoons of vanilla batter in the center of the greased pan.
- Layer the chocolate. Place 2 tablespoons of chocolate batter directly on top of the vanilla center until the vanilla pushes toward the edges.
- Repeat the rhythm. Continue alternating colors in the center until all batter is used and the pan is filled with rings.
- Bake the cake. Place in a 180°C oven for 35 minutes until a skewer comes out clean and the top springs back.
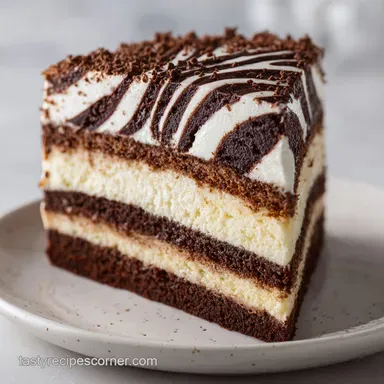
- Frost and garnish. Once cooled, whip 225g cream cheese, 240g yogurt, and 60g powdered sugar; spread over the cake and top with 10g dark chocolate shavings.
Chef's Tip: If the batter isn't spreading into circles on its own, give the pan a very gentle tap on the counter between every three layers. This encourages gravity to do the work for you.
Solving Common Striping Texture Issues
Causes of Blended Batter Stripes
If your stripes look more like a marble cake than a zebra, the batters likely had different temperatures or thicknesses. If the vanilla is too runny, the chocolate will just sink through it. Always ensure your milk and eggs are at room temperature so the fats don't seize and change the viscosity.
Techniques for Achieving Flat Layers
A domed cake is a nightmare for layering. This happens when the edges set too quickly while the middle keeps rising. To fix this, you can wrap the outside of your pan with a damp towel (or professional cake strips) to insulate the edges, ensuring the whole cake rises at the same pace.
| Problem | Root Cause | Solution |
|---|---|---|
| Blurry Stripes | Batters were mixed too vigorously | Use a gentle hand when dropping the batter into the center |
| Dry Crumb | Overbaked by even 5 minutes | Pull the cake when internal temp hits 95°C |
| Frosting Slumping | Yogurt wasn't strained | Place yogurt in a paper towel lined sieve for 15 mins before mixing |
Common Mistakes Checklist
- ✓ Forgot to sift the cocoa powder, resulting in bitter brown lumps.
- ✓ Used a cold egg, which caused the oil to separate from the batter.
- ✓ Overfilled the pan; only fill to about 2/3 to allow for the rise.
- ✓ Moved the pan too much while layering, breaking the concentric rings.
- ✓ Skipped the hot water in the cocoa paste, making the chocolate layers too heavy.
Adjusting the Recipe for Crowds
If you are hosting a larger party, you can easily double this recipe. However, don't just throw everything in one giant bowl. Scale the ingredients, but mix in two batches to ensure the aeration of the eggs remains consistent.
- Scaling Up (2x): Use 750g flour and 8 eggs. Only increase salt to 4g (1.5x) to avoid an overly savory cake. Bake in two separate pans rather than one deep one.
- Scaling Down (0.5x): Use 2 eggs and roughly 187g flour. Use a smaller 15cm (6 inch) pan and reduce the bake time by about 8 minutes.
- Baking Adjustment: If doubling and using a larger pan, lower the oven temperature to 170°C and extend the time by 15 minutes to ensure the center cooks without burning the edges.
Debunking Classic Baking Misconceptions
One major myth is that you need a special "zebra pan" or divider to get these lines. You absolutely don't. Gravity is your best friend here. As long as you drop the batter exactly in the center of the previous dollop, the weight of the new batter will naturally push the old batter outward in a perfect circle.
Another common belief is that the chocolate batter will always be denser. While cocoa solids are heavy, the addition of 45ml hot water and 15ml maple syrup compensates for that weight. This creates a "specific gravity" balance that is the real secret to the Zebra Layer Cake.
Without that extra liquid, the chocolate layers would simply sink to the bottom.
Keeping Slices Fresh and Moist
Because of the 240ml of neutral oil, this cake stays incredibly moist. You can store it in an airtight container at room temperature for up to 2 days, or in the fridge for up to 5 days. If you've already frosted it with the Greek yogurt and cream cheese mixture, it must stay in the fridge.
- Freezing: You can freeze the unfrosted layers for up to 3 months. Wrap them in a double layer of plastic wrap and then foil. Thaw overnight in the fridge before frosting.
- Zero Waste: If you have leftover scraps from leveling the cake, crumble them up! Mix with a little leftover frosting to make "Zebra Cake Pops" or use them as a crunchy topping for yogurt bowls.
- Reheating: If you prefer a warm slice, 10 seconds in the microwave will soften the fats and make the crumb feel freshly baked again.
Elegant Garnishing and Color Accents
For a truly sophisticated presentation, the garnish should be as intentional as the stripes inside. I like to keep the frosting white and minimal to contrast with the dark chocolate elements. Adding a few thoughtfully placed accents can transform this from a simple bake into a centerpiece. This approach to presentation is a hallmark of The Italian Love recipe, where color contrast is key.
- 1. Obsidian Black
- Use the 10g dark chocolate shavings clustered in the center or a light dusting of cocoa powder on one half for a modern geometric look.
- 2. Emerald Green
- A few sprigs of fresh mint near the base of the cake add a vibrant, organic feel that makes the monochrome stripes pop.
- 3. Ruby Red
- A handful of fresh, tart raspberries placed on top just before serving provides a sharp flavor contrast and a stunning visual punch.
Add these accents only right before you serve to keep the fruit and herbs looking their absolute best. The combination of the velvety white frosting, the dark chocolate, and a hit of color makes the first slice feel like a true celebration. Right then, you're ready to bake!
Trust me, the effort of those concentric circles is worth every second when you see your guests' faces.

Recipe FAQs
Can I use butter instead of neutral oil for a richer flavor?
No, stick with oil for structural integrity. Butter's water content and milk solids can interfere with the fine density required to create distinct stripes, often leading to a heavier, less velvety crumb.
How do I ensure the vanilla and chocolate batters have the exact same viscosity?
Mix the chocolate batter with hot water and maple syrup. This step "blooms" the cocoa and thins the chocolate batter, ensuring it matches the weight and fluidity of the vanilla base, preventing sinking.
Is it true that I must use a specialty pan to achieve perfect concentric circles?
No, gravity is the primary tool here. By carefully dropping the batters directly into the center of the previous dollop, the weight of the new batter naturally pushes the old batter outward into rings.
How do I prevent the cake from doming during baking, which can ruin the flat layers?
Wrap the exterior of the pan with damp cake strips. This insulates the edges, allowing the entire cake to set evenly, thus promoting a flatter top surface for easy layering.
What should I do if my batter stripes look blurry instead of sharp after baking?
Reduce vigorous stirring when combining batters. Blurry lines result from mixing the batters too much after the final fold, which allows the colors to bleed prematurely before setting in the oven.
Can I substitute the Greek yogurt in the frosting with something else?
Yes, sour cream works well as a substitute. It provides a similar necessary acidity for tang, though you may need to strain it for 15 minutes first, much like we strain yogurt to control moisture in our Sticky Toffee Pudding recipe.
What is the proper baking temperature and time for the most defined stripes?
Bake at 180°C (350°F) for approximately 35 minutes. This medium high heat sets the outside layers quickly, locking the pattern in place before the batters have time to shift significantly.
Zebra Layer Cake Recipe
Ingredients:
Instructions:
Nutrition Facts:
| Calories | 478 kcal |
|---|---|
| Protein | 10.0g |
| Fat | 24.4g |
| Carbs | 56.2g |
| Fiber | 1.4g |
| Sugar | 29.1g |
| Sodium | 215mg |
