Waffled Cheesecake: Crisp Exterior, Velvety Center
- Time: Active 50 minutes, Passive 15 minutes, Total 1 hour 5 mins
- Flavor/Texture Hook: Shattering crisp exterior with a velvety, citrus scented center
- Perfect for: Impressive brunch hosting or an elegant weekend dessert
- Thermal Principles of the Crunch
- Component Deep Dive Analysis
- Elements for the Success
- Tools for the Job
- The Step-by-Step Guide
- Fixing Common Baking Errors
- Creative Flavor Twists
- Scaling the Recipe Yield
- Myths About Waffle Irons
- Storage and Waste Tips
- Elegant Serving Suggestions
- Recipe FAQs
- 📝 Recipe Card
Imagine the high pitched hiss as cold batter meets a scorching waffle iron, followed instantly by the scent of toasted vanilla bean and warm lemon zest. I remember the first time I tried to make this dish for a brunch party.
I actually tried to put a whole slice of leftover cheesecake into my waffle maker, thinking it would be a "shortcut." It was a sticky, charred mess that took two hours to scrub off the plates. It was a total disaster, and my friends ended up eating plain toast while I apologized profusely.
But that failure taught me something important. You can't just waffle a cake; you have to engineer a delivery system for that creamy filling. This version uses a clever "stuffing" technique where we freeze small discs of honey sweetened Neufchâtel and tuck them inside a whole wheat pastry batter.
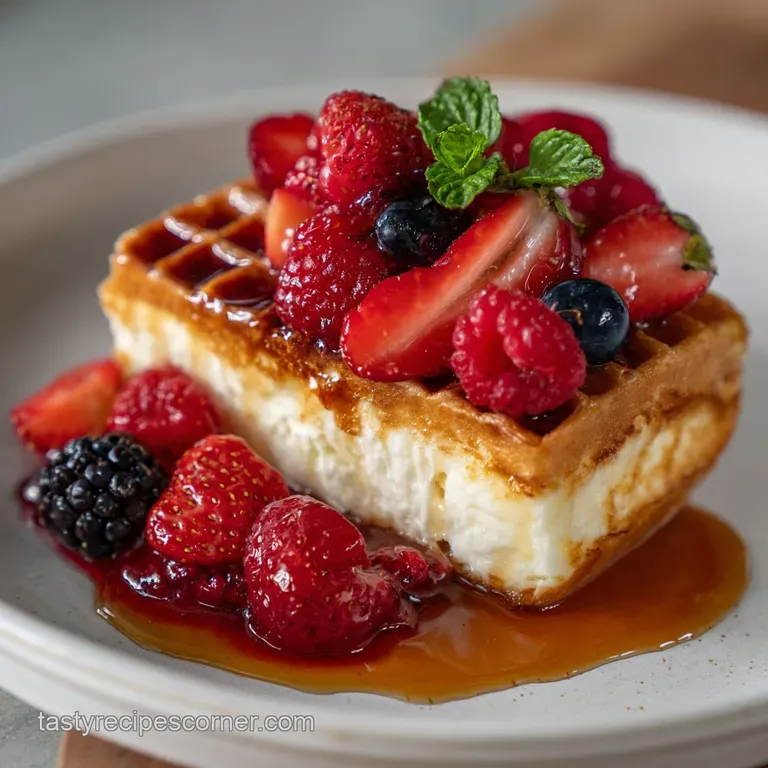
The result is a contrast that feels sophisticated, with a shell that shatters like glass and a center that flows like silk. It’s elegant enough for a wedding morning but simple enough for you to master on a Saturday.
Trust me on this, once you hear that first crunch and see the molten center, you’ll never go back to basic toppings. We aren't just making breakfast here; we're creating a textures first experience that will genuinely wow guests.
It’s about that specific moment when the fork breaks through the golden crust into the tangy heart of the waffle. Let's get into the mechanics of why this actually works.
Thermal Principles of the Crunch
Carbonation Expansion: The CO2 bubbles in sparkling water expand rapidly when hitting the 375°F (190°C) iron, creating instant air pockets for a lighter crumb.
Starch Retrogradation: Adding cornstarch interferes with gluten development, ensuring the exterior becomes crisp and brittle rather than bread like or chewy.
Thermal Lag: Freezing the cheesecake filling creates a temperature delay, allowing the batter to cook fully before the center reaches a melting point.
| Servings | Ingredient Adjustments | Iron Type | Cook Time |
|---|---|---|---|
| 2 People | Use 0.5 egg (beaten), 0.5 cup water | Standard Round | 12 minutes |
| 4 People | 1 egg, 1.5 cups flour, 1 cup water | Belgian Square | 15 minutes |
| 8 People | 2 eggs, 3 cups flour, 2 cups water | Double Belgian | 25 minutes |
Scaling this recipe is straightforward as long as you maintain the hydration ratio. For the best results, stick to the 1 cup of sparkling water per 1.5 cups of flour. If you try to double it for a crowd, keep your coconut oil at exactly 2/3 cup to ensure the batter remains emulsified.
Always preheat your iron for at least 5 minutes before the first drop of batter hits the surface. A cold iron is the primary reason for sticking and pale, limp results.
If you are serving more than four people, keep the finished waffles in a single layer on a wire rack in a 200°F (95°C) oven to maintain that shattering texture.
Component Deep Dive Analysis
| Ingredient | Science Role | Pro Secret |
|---|---|---|
| Neufchâtel Cheese | Lower fat/higher moisture | Beats smoother than standard cream cheese when cold |
| Whole Wheat Pastry Flour | Low protein (8-9%) | Provides nutty flavor without the heavy gluten bite |
| Sparkling Water | Leavening agent | Use highly carbonated mineral water for maximum lift |
| Egg White | Structural foam | Whip to stiff peaks for a "soufflé" waffle effect |
When selecting your ingredients, the quality of the vanilla bean paste makes a massive difference. Since we are using honey as a sweetener, the floral notes of the honey and the vanilla work together to create a complex flavor profile that sugar just can't match.
Elements for the Success
For the Tangy Cheesecake Core: 8 oz Neufchâtel cream cheese, softened Why this? It has a tangier profile than regular cream cheese. 1/4 cup plain non fat Greek yogurt Why this? Adds moisture and a sharp acidic lift. 3 tbsp honey Why
this? Provides a mellow, floral sweetness. 1 tsp vanilla bean paste Why this? Intense flavor and beautiful black speckles. 1 tsp lemon zest Why this? Cuts through the richness of the fat.
For the Shattering Waffle Shell: 1.5 cups whole wheat pastry flour Why this? Maintains a delicate, light crumb. 1/4 cup cornstarch Why this? Essential for achieving a glass like crunch. 2 tsp baking powder Why this? Primary chemical
leavener for height. 0.5 tsp baking soda Why this? Reacts with yogurt for browning. 1 cup chilled sparkling water Why this? Provides physical leavening through steam. 1/3 cup melted coconut oil Why this? High saturated fat
creates a crispier shell. 1 large egg, separated Why this? The yolk adds richness while the white adds air.
| Premium Choice | Budget Alternative | Flavor Impact |
|---|---|---|
| Vanilla Bean Paste | Pure Vanilla Extract | Less intense aroma, no speckles |
| Neufchâtel Cheese | Standard Cream Cheese | Slightly denser, less tangy center |
| Sparkling Water | Club Soda | Identical results, slightly saltier |
Using fresh lemon zest is non negotiable here. The oils in the skin provide a brightness that bottled juice simply lacks. If you can find Meyer lemons, they add an even more elegant, floral note to the Waffled Cheesecake that your guests will definitely notice.
Tools for the Job
You will need a high-quality waffle iron, preferably one with deep pockets like a Belgian style. This allows enough room for the cheesecake center to sit comfortably without being squeezed out the sides. A stand mixer or a hand mixer is helpful for whipping the egg white to those essential stiff peaks.
Don't forget a small cookie scoop (about 1 tablespoon size). This ensures every waffle has the exact same amount of filling, which is crucial for even cooking. You'll also need parchment paper and a flat tray to freeze the cheesecake "coins" before they go into the batter.
The step-by-step Guide
Phase 1: Preparing the Cheesecake "Coins"
- Combine softened Neufchâtel, Greek yogurt, honey, vanilla, and lemon zest in a bowl.
- Beat the mixture until silky and completely smooth with no visible lumps.
- Scoop 1 tablespoon mounds onto a parchment lined tray.
- Flatten each mound slightly into a disc shape. Note: This helps them sit flat in the iron.
- Freeze the discs for 45 minutes until firm to the touch.
Phase 2: Building the Structural Batter
- Whisk the pastry flour, cornstarch, baking powder, and baking soda in a large bowl.
- Mix the egg yolk, sparkling water, and melted coconut oil in a separate jug.
- Combine the wet and dry ingredients until just moistened (a few lumps are okay).
- Whip the egg white in a clean bowl until stiff, glossy peaks form.
- Fold the egg white gently into the batter. Note: Don't overmix or you'll lose the air.
Phase 3: The Assembly and Press
- Preheat your iron to a medium high setting.
- Pour 2 tablespoons of batter into the center of the iron.
- Place one frozen cheesecake disc directly onto the wet batter.
- Top with another 2 tablespoons of batter, covering the cheese completely.
- Close the lid and cook for 4 minutes until the steam stops rising.
- Remove carefully once the exterior is deep golden and rigid.
Chef's Tip: Use a "pincer" movement with two forks to lift the waffles out. This prevents the delicate, hot crust from collapsing before it hits the cooling rack.
Fixing Common Baking Errors

Why Your Cheesecake Leaks
If the filling is oozing out of the sides, it usually means the "coins" weren't frozen long enough or the batter wasn't thick enough to seal the edges. The batter needs to act like a gasket.
Always ensure you are placing the frozen disc in the center and leaving a generous margin of batter around the perimeter before closing the lid.
Why Your Waffles Are Soft
Soft, floppy waffles are the result of either a cold iron or trapped steam. Once the waffle is done, don't stack them! Stacking creates a steam chamber that turns that shattering crust into a soggy mess within seconds. Use a wire rack to let air circulate around the entire waffle.
| Problem | Root Cause | Solution |
|---|---|---|
| Batter sticks to iron | Iron not hot enough | Wait for the "ready" light + 1 minute |
| Center is still frozen | Filling discs too thick | Flatten them to 1/4 inch before freezing |
| Waffle looks pale | Low sugar in batter | Add a pinch of sugar or use honey water brush |
Common Mistakes Checklist ✓ Freeze the cheesecake discs until they are rock hard (prevents premature melting). ✓ Use chilled sparkling water to delay the reaction of the baking powder. ✓ Never over mix the batter; stop as soon as the flour streaks disappear.
✓ Clean the waffle iron between batches if any honey or cheese leaks out. ✓ Ensure the coconut oil is melted but not hot when adding to the yolk.
Creative Flavor Twists
Strawberry Cheesecake Waffles
Fold 1/4 cup of finely freeze dried strawberry powder into the dry ingredients. This adds a concentrated punch of fruit flavor without adding extra moisture that could ruin the texture. Serve with fresh macerated berries and a dollop of whipped cream for a classic profile.
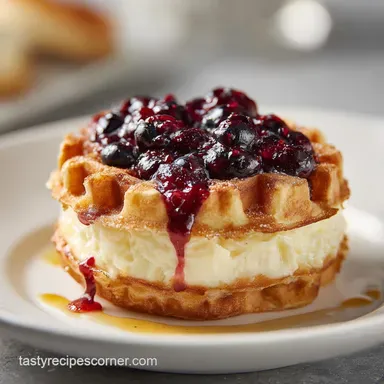
Blueberry Lemon Cheesecake Waffles
Add an extra teaspoon of lemon zest to the batter and press 3-4 fresh blueberries into the top layer of batter right before closing the iron. The berries will burst and create "jam pockets" that complement the tangy Neufchâtel center perfectly.
Diet Friendly Swaps
If you need to avoid certain ingredients, these swaps have been tested and work well. Just keep in mind that the texture will shift slightly depending on the fat and protein content of your chosen substitutes.
| Original Ingredient | Substitute | Why It Works |
|---|---|---|
| Honey | Maple Syrup | Thinner consistency; adds a woody, autumnal sweetness. |
| Coconut Oil | Ghee (Clarified Butter) | High smoke point; adds a rich, toasted nutty flavor. |
| Whole Wheat Pastry Flour | All Purpose Flour | Higher gluten; results in a slightly chewier, less nutty shell. |
If you want a crunchier exterior, increase the cornstarch by 1 tablespoon. If you want a richer flavor, swap the sparkling water for whole milk (though you will lose some of the "shatter" effect).
If you want a sweeter bite, add 1 tablespoon of pearl sugar to the batter just before folding in the whites.
Scaling the Recipe Yield
When cutting this recipe in half, the most difficult part is the egg. Beat the whole egg in a small bowl, then use exactly 2 tablespoons of the mixture for your batter. You'll lose the "whipped white" effect, but the waffle will still be delicious.
Reduce the cooking time by about 30 seconds as the iron will maintain heat more aggressively with fewer batches.
To double the recipe for a large brunch, do not double the baking soda; keep it at 0.75 tsp to avoid a metallic aftertaste. Work in batches and keep the finished waffles in a warm oven.
If you find the batter thickening too much as it sits, whisk in 1 tablespoon of sparkling water to loosen it back up before the final few waffles.
Myths About Waffle Irons
One common misconception is that you need to grease a non stick waffle iron with cooking spray. Actually, the lecithin in many sprays can build up and create a sticky film over time. Since our batter has 1/3 cup of coconut oil, the Waffled Cheesecake should release easily on its own.
If you must grease it, use a pastry brush with a tiny bit of melted coconut oil.
Another myth is that you should never open the iron until the light turns green. While you shouldn't peek in the first 2 minutes, checking at the 3 minute mark is actually smart.
Every iron runs at a different temperature, and your eyes are better judges of "golden and crackling" than a factory set timer.
Storage and Waste Tips
Storage: These are best eaten fresh, but you can store them in the fridge for up to 3 days. To reheat, use a toaster oven or the actual waffle iron for 1-2 minutes. Avoid the microwave, as it will turn the crust into rubber.
You can also freeze the cooked waffles for up to 2 months; just toast them directly from frozen.
Zero Waste: If you have leftover cheesecake filling, don't toss it! It makes an incredible spread for toast or a filling for crepes the next morning. If you have extra batter, stir in some cinnamon and bake it as a "pancake" in a skillet.
Even the lemon peels can be tossed into a jar of sugar to make citrus infused sugar for your coffee.
Elegant Serving Suggestions
Presentation is everything when you want to impress guests. I like to think of plating in three distinct levels depending on the occasion.
Simple Plating
Place two waffles on a warm plate and dust lightly with powdered sugar. This is perfect for a cozy family breakfast where the focus is on the warmth and the immediate crunch.
Polished Presentation
Stack the waffles slightly offset. Top with a spoonful of Greek yogurt, a drizzle of warm honey, and a sprig of fresh mint. The white yogurt against the golden waffle looks clean and professional.
Restaurant Style
Place a single waffle in the center of a large white plate. Use a spoon to "swoosh" a berry coulis across the side. Add a few edible flowers, some fresh berries, and a tiny pinch of flaky sea salt to make the flavors pop.
| Plating Level | Key Garnish | Visual Goal |
|---|---|---|
| Simple | Powdered Sugar | Homey/Rustic |
| Polished | Mint & Honey | Modern/Clean |
| Restaurant | Berry Coulis | High End/Artistic |
Using a sifter for the powdered sugar ensures a fine "snow" effect rather than clumps. If you're going for the restaurant look, keep the plate edges clean it makes the golden color of the Waffled Cheesecake the absolute star of the show.
Enjoy the process, and don't forget to listen for that satisfying crunch on the first bite!

Recipe FAQs
What is a cheesecake waffle?
It is a hybrid dessert. This recipe involves encasing frozen discs of sweet, tangy cheesecake filling within a carbonated, crisp pastry batter before cooking it in a hot waffle iron.
What is so special about Basque cheesecake?
It is characterized by its deeply caramelized, almost burnt exterior. Unlike New York style, Basque cheesecake is intentionally baked at a very high temperature to achieve this dark crust and a creamy, often molten, center.
What are the three types of cheesecake?
The three main categories are Baked, No-Bake, and Japanese. Baked styles are dense (like NY style), No-Bake rely on gelatin or stabilizers, and Japanese varieties are known for their unique, fluffy, soufflé like texture.
What is the fluffy Japanese cheesecake called?
It is typically called Soufflé Cheesecake or Cotton Cheesecake. This results from whipping the egg whites to stiff peaks, similar to a meringue, which creates an exceptionally light and airy crumb structure.
How do I prevent the cheesecake filling from leaking out while cooking?
Freeze the filling discs until rock hard before assembly. Ensure the frozen cheese is fully encased by the surrounding batter, leaving a margin so the batter seals the edges before the center begins to melt.
Should I use a cold waffle iron to avoid making the outside soggy?
No, always use a ripping hot iron for the best texture. The high initial heat causes the sparkling water in the batter to flash steam rapidly, creating the required shattering, crisp exterior.
How can I make the shell crunchier than usual?
Increase the cornstarch content by one tablespoon in the dry mix. The starch interferes with gluten development, which helps the exterior structure become brittle and glass like upon cooling.
Waffled Cheesecake Recipe
Ingredients:
Instructions:
Nutrition Facts:
| Calories | 531 kcal |
|---|---|
| Protein | 13g |
| Fat | 31g |
| Carbs | 50g |
| Fiber | 5g |
| Sugar | 12g |
| Sodium | 480 mg |
