Sourdough Focaccia Bread: Airy and Crispy
- Time: Active 275 minutes, Passive 25 minutes, Total 300 minutes
- Flavor/Texture Hook: Airy, olive oil soaked, and remarkably crispy
- Perfect for: Elegant dinner parties or weekend brunch spreads
- Mastering the Ultimate Sourdough Focaccia Bread
- Why This Works
- Core Metrics for Your Bake
- Essential Elements for Your Success
- Moving from Raw Dough to Golden Crust
- Solving Problems for the Home Baker
- Adjusting the Recipe Size
- Debunking Sourdough Focaccia Myths
- Creative Toppings to Suit Every Occasion
- Keeping Your Leftovers Fresh and Tasty
- Pairing Ideas for Your Next Party
- Recipe FAQs
- 📝 Recipe Card
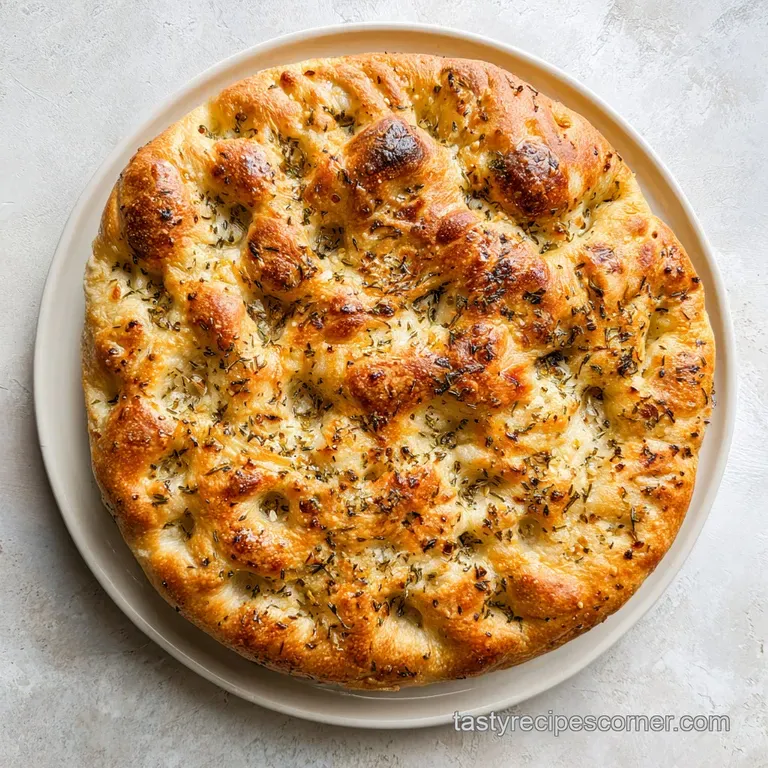
Mastering the Ultimate Sourdough Focaccia Bread
The first time you hear the sound of a knife gliding through a fresh slab of sourdough focaccia bread, it changes you. It isn't just a crunch; it is a resonant shatter that echoes through the kitchen, signaling that the olive oil and high heat have done their magic.
I remember standing over my cooling rack, watching the steam rise from those deep, oil filled dimples, and realizing that bread doesn't have to be a chore it can be an event.
We aren't just making a side dish here; we are building a texture rich masterpiece that thrives on patience and high-quality fat. If you've ever struggled with flat, dense loaves that feel more like a brick than a cloud, it usually comes down to hydration and how you handle the delicate bubbles.
We're going to treat this dough with the respect it deserves, using a series of gentle folds rather than aggressive kneading to keep those air pockets intact.
Forget the dry, cakey focaccia you might find in a plastic grocery bag. This version is all about the contrast between the velvety, porous crumb and the fried bottom crust that comes from a generous pour of extra virgin olive oil.
It is impressive enough to wow guests at a formal dinner, yet simple enough to tear apart with your hands while standing over the counter on a lazy Sunday afternoon. Let's get into how we make this happen.
Why This Works
Hydration Tension: The high water content in this dough creates steam during the bake, which expands the gluten network into a light, honeycomb structure.
Oil Fried Base: Using 30g of olive oil in the pan essentially fries the bottom of the dough, creating a thick, golden crust that stands up to heavy toppings.
Long Fermentation: A total of 300 minutes of processing allows enzymes to break down starches, resulting in a more complex flavor and a crust that browns deeply.
Active Starter Lift: Relying on a bubbly, active starter instead of commercial yeast provides a more resilient rise that supports the weight of the oil.
| Method | Time | Texture | Best For |
|---|---|---|---|
| Room Temp | 5 hours | Open, airy, light | Same day serving |
| Cold Proof | 24 hours | Complex, sour, chewy | Maximum flavor depth |
| Quick Start | 3.5 hours | Tighter crumb, soft | Last minute hosting |
The choice of method depends entirely on your schedule, though the room temperature approach outlined here strikes a perfect balance between convenience and that signature sourdough tang. If you find yourself enjoying the process of slow fermented doughs, you might also find my Rustic Whole Wheat Bread to be a satisfying project for your next baking day.
Core Metrics for Your Bake
| Component | Science Role | Pro Secret |
|---|---|---|
| Bread Flour | Provides high protein for a strong gluten matrix. | Use flour with at least 12% protein for the best height. |
| Warm Water | Hydrates flour and awakens the wild yeast. | Keep it at 85°F to ensure steady, predictable fermentation. |
| Olive Oil | Conducts heat and tenderizes the crumb. | Use high-quality extra virgin oil for better "fried" flavor. |
| Fine Sea Salt | Regulates yeast activity and strengthens gluten. | Add it after the autolyse to prevent early gluten tightening. |
Choosing the right ingredients is the difference between a good loaf and an elegant one. While all purpose flour works in a pinch, bread flour is the secret to that chewy, stretchy texture that defines great sourdough focaccia bread.
The higher protein content allows the dough to hold onto the gases produced by your starter, preventing the loaf from collapsing under its own weight during the final proofing stage.
Essential Elements for Your Success
- 100g active sourdough starter: Ensure it is fed and at its peak bubbles. Why this? Provides the lift and characteristic tang.
- 375g warm water: Aim for approximately 85°F. Why this? Warmth accelerates fermentation without killing yeast.
- 500g bread flour: Use a high protein variety. Why this? Creates the strength needed for large bubbles.
- 10g fine sea salt: Essential for flavor and structure. Why this? Tightens gluten strands for better bounce.
- 60g extra virgin olive oil: Divided into two portions. Why this? Half for the pan, half for the dimpling.
- 5g flaky sea salt: For the final finish. Why this? Adds a necessary textural crunch to the top.
- 2 sprigs fresh rosemary: Stripped of leaves. Why this? Infuses the oil with an earthy, woodsy aroma.
Substitutions for the Home Baker
| Original Ingredient | Substitute | Why It Works |
|---|---|---|
| Bread Flour | All Purpose Flour | Produces a softer, more delicate crumb but less chew. |
| Fine Sea Salt | Kosher Salt | Use 1.5x the volume; provides a clean, salty profile. |
| Fresh Rosemary | Dried Thyme | Use half the amount; adds a floral, savory note. |
While you can technically use a sourdough discard for flavor, this specific recipe requires an active, bubbly starter to achieve the necessary height. If your starter is a bit sluggish, give it two feedings before you start. For those who enjoy the specific texture of artisan loaves, comparing this to a Homemade Sandwich Bread will show you just how much hydration changes the final product.
Moving from Raw Dough to Golden Crust
- Dissolve the starter. Whisk your 100g of active starter into the 375g of warm water until it looks like milky, opaque water with no lumps remaining.
- Combine the base. Incorporate the 500g of bread flour and 10g of fine sea salt into the liquid using your hands or a sturdy spatula until a shaggy mass forms. Note: Don't worry about lumps yet; the autolyse will fix them.
- Perform the autolyse. Cover the bowl with a damp cloth and let the mixture rest for 30 minutes. This allows the flour to fully hydrate and the gluten to begin forming on its own.
- Strengthen the dough. Over the next 90 minutes, perform 3 sets of stretch and folds (one set every 30 minutes) by pulling the edge of the dough up and over into the center.
- Bulk ferment the batch. Let the dough sit undisturbed at room temperature for 4 to 6 hours until it has doubled in size and looks like a bubbly cloud.
- Prep the pan. Pour 30g of extra virgin olive oil into a 9x13 inch metal baking pan, ensuring the sides are well coated to prevent sticking.
- Transfer and proof. Move the dough to the pan, flip it once to coat both sides in oil, and let it proof for 1 to 2 hours until the dough naturally fills the corners.
- Preheat and prep. Set your oven to 425°F (218°C) and drizzle the remaining 30g of olive oil over the surface of the proofed dough.
- Perform the dimple dance. Use your fingertips to press deeply into the dough, creating craters. Watch for large bubbles to form as you press down.
- Bake to mahogany. Top with flaky salt and rosemary, then bake for 25 minutes until the top is dark golden and the bottom sounds hollow when tapped.
Solving Problems for the Home Baker
Why Your Focaccia Is Dense
If your sourdough focaccia bread feels heavy rather than airy, the culprit is almost always an under active starter or a rushed bulk fermentation. Sourdough relies entirely on the strength of the wild yeast to push against the weight of the flour and oil.
If you don't see visible bubbles on the surface of the dough before it goes into the oven, it simply won't have the internal pressure to expand.
Why the Bread Sticks to the Pan
This is a heartbreaking mistake but easily fixed. Often, home cooks use glass or ceramic dishes which don't conduct heat as quickly as metal, or they are too shy with the oil. The 30g of oil in the bottom of the pan isn't just for flavor; it’s a non stick barrier.
If you find your bread is stuck, let it sit for 5 minutes after taking it out of the oven; sometimes the steam will help release the bottom.
| Problem | Root Cause | Solution |
|---|---|---|
| Soggy Bottom | Not enough heat or too much oil. | Use a metal pan and ensure the oven is fully preheated. |
| No Large Bubbles | Dough was handled too roughly. | Use only your fingertips during dimpling and don't degas. |
| Pale Crust | Oven temperature was too low. | Check your oven with a thermometer; it must be 425°F. |
Common Mistakes Checklist
- ✓ Use a metal baking pan rather than glass for a crispier bottom crust.
- ✓ Ensure your starter is "peak" (doubled in the jar) before mixing.
- ✓ Don't skimp on the olive oil; it is a primary ingredient, not just a lubricant.
- ✓ Let the dough fill the pan corners naturally; don't force it or you'll tear the gluten.
- ✓ Wait at least 15 minutes before slicing to allow the internal structure to set.
Adjusting the Recipe Size
When scaling this recipe down for a smaller household, you can easily halve the ingredients and use an 8x8 inch square pan. You should reduce the baking time by about 20%, but keep a close eye on the color.
For a smaller batch, I recommend beating one egg and using only half if you are using an egg wash variation, though the standard oil top doesn't require this.
If you are scaling up for a large gathering (2x or 3x), work in batches for the stretch and folds. Large masses of dough can be difficult to manage by hand and may require a longer bulk fermentation time because the core of the dough takes longer to reach room temperature.
When doubling, I suggest using two separate 9x13 pans rather than one giant one to ensure the heat penetrates the center of the bread evenly.
Debunking Sourdough Focaccia Myths
Many people believe that sourdough focaccia bread must be sour to be authentic. In reality, the "sour" flavor is a result of acetic acid production during long, cold ferments. A same day focaccia will be mild, buttery, and slightly nutty.
The fermentation is more about the texture and digestibility than it is about a mouth puckering flavor profile.
Another myth is that you need to knead the dough until it is smooth like a traditional sandwich loaf. In high hydration baking, kneading actually works against you. The stretch and fold method is much more effective because it builds strength without knocking out the precious air that creates those iconic "nooks and crannies." Trust the process of time over the effort of your muscles.
Creative Toppings to Suit Every Occasion
For the Ultimate Sourdough Focaccia Pizza
Transform your bread into a meal by topping it with thinly sliced tomatoes, fresh mozzarella pearls, and a drizzle of balsamic glaze after it comes out of the oven. Because the dough is so sturdy, it can handle the weight of heavy toppings better than a standard thin crust pizza.
Just be sure to pat your tomatoes dry so they don't add excess moisture to the top of the dough.
For a Sweet and Savory Twist
Try topping the dough with halved seedless grapes, sprigs of thyme, and a drizzle of honey immediately after baking. This variation is elegant and pairs beautifully with a cheese board or a glass of crisp white wine.
The natural tang of the sourdough balances the sweetness of the fruit, making it a sophisticated addition to a brunch spread.
Keeping Your Leftovers Fresh and Tasty
Storage Guidelines Sourdough focaccia bread is best eaten within 24 hours of baking while the crust is at its peak. However, you can store leftovers in an airtight container at room temperature for up to 2 days.
If you find the crust has softened, a quick 5 minute toast in a 350°F oven will bring back that shattering texture. I do not recommend refrigerating the bread as it accelerates staling.
Zero Waste Tips If you have pieces that have gone completely hard, don't throw them away. Focaccia makes the best croutons in the world. Tear the bread into bite sized chunks, toss them with a little more olive oil and garlic powder, and bake until they are completely dry and golden.
You can also blitz stale pieces in a food processor to create "gold standard" breadcrumbs for coating chicken or topping pasta dishes.
Pairing Ideas for Your Next Party
When it comes to serving, this bread is a chameleon. It is elegant enough to be the centerpiece of a bread basket, served alongside a small bowl of high-quality balsamic vinegar and olive oil.
Because it is so rich, it pairs perfectly with acidic or bright flavors, such as a sharp arugula salad or a bowl of tomato based soup.
If you are hosting a larger event, I love slicing the focaccia horizontally and using it as the base for giant sandwiches. The sturdy crust holds up to deli meats, pesto, and roasted peppers without getting soggy.
No matter how you serve it, remember that the "wow" factor comes from the contrast of the mahogany top and the soft, airy middle so make sure your guests get a piece that showcases both!

Recipe FAQs
Is there such a thing as sourdough focaccia?
Yes, it is a traditional method for leavening this bread. Using active sourdough starter instead of commercial yeast provides a superior depth of flavor and improved texture to the finished crust.
Is focaccia bread healthier than sourdough?
They are not mutually exclusive categories. Sourdough focaccia combines the digestive benefits of fermented starter with the classic profile of Italian flatbread, making it a distinct choice from standard yeast risen options.
Is sourdough bread ok for diabetics?
It is often considered a better option. The long fermentation process associated with sourdough may lead to a lower glycemic response compared to white breads made with commercial yeast, though portion control remains necessary.
Is focaccia bread ok for diabetics?
Yes, when consumed in moderation. Because this recipe uses bread flour and olive oil, it contains carbohydrates that impact blood sugar, so it is best paired with protein or fiber rich sides.
How to ensure the bottom of the bread gets crispy?
Use a metal baking pan rather than glass for the bake. Metal conducts heat more efficiently, which is crucial for achieving a golden, crisp bottom in the required 25-minute bake time at 425°F. If you enjoyed mastering texture control here, you will find similar heat transfer principles useful when cooking other high crust items.
How to know if the sourdough starter is ready for mixing?
Check that your starter has doubled in volume in its jar. It must be active and bubbly to provide the lift needed for this recipe during the 4-6 hour bulk fermentation period.
How to prevent tearing the dough while stretching into the pan?
Allow the dough to fill the pan corners naturally during the final proof. Forcing the dough to stretch before it is fully relaxed will break the gluten strands you worked to build during the initial 3 sets of stretch and folds.
Sourdough Focaccia Bread
Ingredients:
Instructions:
Nutrition Facts:
| Calories | 210 kcal |
|---|---|
| Protein | 5.5 g |
| Fat | 5.5 g |
| Carbs | 33.5 g |
| Fiber | 1.2 g |
| Sugar | 0.2 g |
| Sodium | 485 mg |
