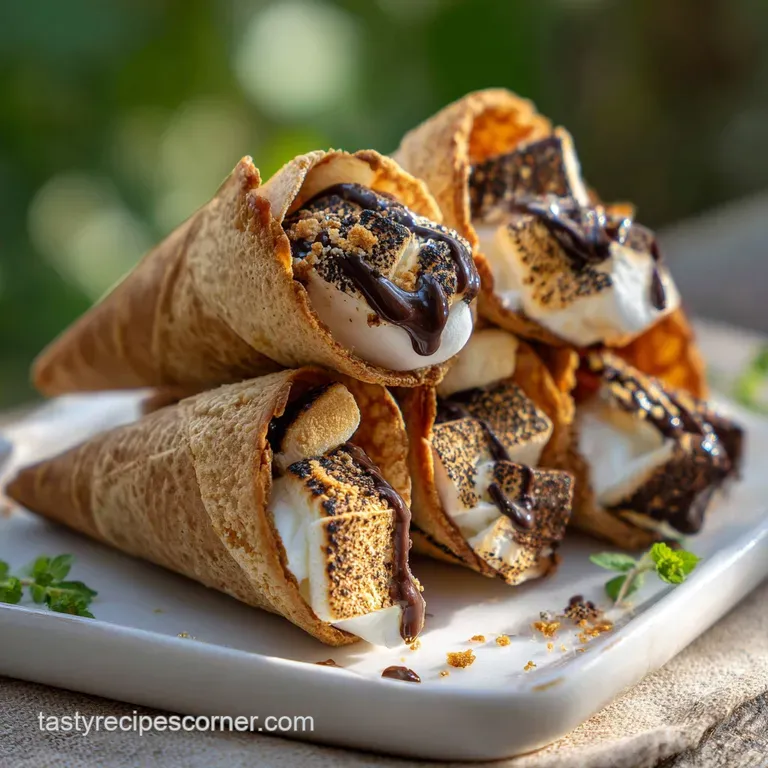
S'mores Campfire Cones: Molten Marshmallow Delight
- Time: Active 10 minutes, Passive 8 minutes, Total 18 minutes
- Flavor/Texture Hook: Shatter crisp waffle exterior with a molten, salty sweet center
- Perfect for: Elegant backyard gatherings or sophisticated camping trips
- Crafting Your S'mores Campfire Cones
- The Secret to Melty Perfection
- Essential Cooking Benchmarks
- Curated Ingredients for Balance
- The Necessary Fireproof Tools
- Steps to Molten Bliss
- Solving Common S'mores Blunders
- Creative Flavor Profile Twists
- Keeping the Crunch Intact
- Stunning Plating for Guests
- Recipe FAQs
- 📝 Recipe Card
Crafting Your S'mores Campfire Cones
Picture the crackle of a dying fire and the intoxicating scent of singed sugar drifting through the cool night air. We have all struggled with the traditional s'more, the graham cracker snapping under pressure and the chocolate remaining stubbornly cold while the marshmallow slides onto your lap.
This is where the magic of the cone comes in, turning a chaotic snack into an elegant, handheld experience that guests will find truly impressive.
By packing the campfire cones ingredients into a sturdy waffle shell, we create a self contained oven that protects the delicate fillings from direct flame. The result is a consistent, gooey interior that stays warm much longer than a standard sandwich.
I have served these at countless garden parties, and the look of surprise when guests realize there is a hidden layer of creamy peanut butter inside is always the highlight of the evening.
This recipe relies on the contrast between the salty snap of pretzels and the deep, rich notes of semi sweet chocolate. While I love exploring these sweet profiles, if you find yourself wanting something savory for a weekend brunch, you might enjoy the techniques used in these discard recipes for a different kind of flaky satisfaction. But for tonight, we are focusing on the art of the perfect melt and the joy of a toasted treat that actually stays together.
The Secret to Melty Perfection
The beauty of this method lies in how the ingredients interact within the confined space of the foil wrapped cone. Unlike an open flame, which targets only the surface, this technique uses trapped heat to create a uniform texture.
- Sugar Liquefaction: The high sugar content in marshmallows allows them to transition from a solid to a viscous syrup at relatively low temperatures.
- Thermal Conduction: The waffle cone acts as a buffer, slowly transferring heat to the center to prevent the chocolate from seizing.
- Fat Emulsification: Peanut butter provides a stable fat base that helps the chocolate chips melt into a silky, spoonable consistency.
- Moisture Retention: The foil wrap prevents the marshmallows from drying out, ensuring they stay light and airy rather than becoming tough.
| Method | Time | Texture | Best For |
|---|---|---|---|
| Campfire | 5-8 minutes | Charred and smoky | Traditional outdoor vibe |
| Oven | 8-10 minutes | Evenly molten | Large batches at home |
| Grill | 6-7 minutes | Crispy and toasted | Summer backyard parties |
Choosing the right heat source depends entirely on your environment. If you are making s'mores cones in the oven, set it to 350°F to ensure the cone remains flaky while the insides turn to liquid gold.
The oven provides a level of control that a flickering fire cannot, making it the preferred choice when you want a polished result for a larger group.
Essential Cooking Benchmarks
To ensure your homemade smores campfire cones turn out beautifully every time, keep these three numeric checkpoints in mind during the process. First, never cook these for more than 10 minutes; the sugar in the cones can burn quickly once it reaches a certain threshold.
Second, aim for a medium low heat if using a grill or campfire, roughly 325°F if you were to measure it. Finally, let the cones rest for exactly 2 minutes after removing them from the heat to allow the molten center to set slightly.
| Cooking Metric | Target Value | Visual Cue |
|---|---|---|
| Internal Temp | 160°F | Marshmallows are completely slumped |
| Foil Temperature | Hot to touch | Exterior foil looks slightly matte |
| Resting Time | 2 minutes | Chocolate stops flowing like liquid |
Curated Ingredients for Balance
The key to a sophisticated dessert is the balance of flavors, which is why we include salty pretzel pieces and creamy peanut butter to offset the intense sweetness of the marshmallows and chocolate.
| Component | Science Role | Pro Secret |
|---|---|---|
| Waffle Cones | Structural vessel | Lightly coat the bottom with chocolate to seal any holes. |
| Mini Marshmallows | Aerated sweetener | Use fresh bags only; stale marshmallows won't melt into a velvety texture. |
| Peanut Butter | Flavor emulsifier | Choose creamy varieties to ensure a smooth mouthfeel when combined with chocolate. |
- 6 large waffle cones Why this? Sturdier than sugar cones and provides a deeper, toasted flavor profile. (Substitute: Sugar cones for a smaller, sweeter portion)
- 2 cups mini marshmallows Why this? They distribute more evenly than large ones, ensuring every bite has gooey coverage. (Substitute: Chopped large marshmallows)
- 1.5 cups semi sweet chocolate chips Why this? The 60% cacao range balances the sugar without being too bitter. (Substitute: Milk chocolate for a more traditional kid friendly taste)
- 0.5 cup creamy peanut butter Why this? Adds a savory richness that cuts through the sugar. (Substitute: Almond butter or sunflower butter)
- 0.5 cup crushed graham crackers Why this? Maintains the classic flavor profile while adding a sandy, pleasant grit. (Substitute: Biscoff cookie crumbs)
- 0.25 cup salted pretzel pieces Why this? Provides the essential "snap" and salt to balance the palate. (Substitute: Chopped toasted pecans)
The Necessary Fireproof Tools
You do not need an arsenal of expensive equipment to master this quick smores campfire cones recipe, but a few specific items will make your life much easier. Sturdy aluminum foil is non negotiable; you want the heavy duty version to prevent tearing when moving the cones around the grates.
A pair of long handled tongs is essential for safety, allowing you to rotate the cones without getting too close to the heat. If you are working in a kitchen, a standard baking sheet will suffice for the oven method.
I also recommend a small spoon or a narrow offset spatula for packing the peanut butter deep into the tip of the cone, ensuring no space is wasted.
Steps to Molten Bliss
- Clean the cones. Check each waffle cone for cracks. If the bottom is broken, don't worry we will seal it in the next step.
- Seal the base. Drop a few chocolate chips into the very bottom of each cone. Note: This creates a "plug" that prevents molten peanut butter from leaking out.
- Layer the peanut butter. Spoon about 1 tablespoon of creamy peanut butter over the chocolate plug.
- Build the core. Toss the marshmallows, remaining chocolate chips, graham crumbs, and pretzels in a bowl to mix.
- Pack the cones. Fill each cone to the brim with the mixture. Pack them tightly to avoid large air pockets.
- Wrap in foil. Place each cone on a square of heavy duty foil. Fold the foil over the top and twist the ends, leaving a little room for steam.
- Apply the heat. Place the cones on a grill grate or over indirect campfire coals. Cook for 8 minutes, rotating halfway through for even melting.
- Check for doneness. Carefully peek inside one foil packet. The marshmallows should be translucent and slumped into the chocolate.
- Rest the cones. Remove from heat and let them sit for 2 minutes. Note: This prevents burns and lets the flavors meld.
- Unwrap and serve. Peel back the foil carefully, as steam will escape. Serve while the center is still flowing and aromatic.
Chef Tip
Freeze your chocolate chips for 15 minutes before assembling the cones. This slight delay in melting ensures the marshmallows reach peak gooiness at the exact moment the chocolate turns silky, preventing the chocolate from overcooking.
Solving Common S'mores Blunders
The most frequent issue people face with this easy smores campfire cones recipe is a burnt exterior. Because waffle cones contain sugar, they can go from toasted to scorched in seconds if they are placed directly on a hot coal. Always aim for a "warm zone" rather than the heart of the fire.
Avoiding the Soggy Mess
If your cone loses its crunch, it is usually because too much moisture was trapped inside the foil or the heat wasn't high enough to crisp the shell. Make sure your marshmallows are fresh; older ones can release more moisture as they break down.
Preventing a Scorched Base
The tip of the cone is the most vulnerable part. If you find the bottoms are consistently burning, try standing the cones upright in a cast iron skillet or a specialized cone rack rather than laying them flat on the grill grates.
| Problem | Root Cause | Solution |
|---|---|---|
| Soggy cone | Steam trapped too long | Open the foil for the last 60 seconds of cooking. |
| Unmelted center | Heat too low | Ensure the foil is wrapped snugly to conduct heat better. |
| Sticky foil | Marshmallow contact | Lightly grease the inside of the foil with butter or oil. |
Common Mistakes Checklist ✓ Never use "thin" or "cheap" foil; it will fuse to the cone. ✓ Avoid packing the marshmallows too loosely; the filling will shrink as it melts. ✓ Don't place cones directly on glowing red coals; use indirect heat.
✓ Forget to rest the cones; the 2 minute wait is crucial for the texture. ✓ Overlook the salt; the pretzels are what make this recipe taste professional.
Creative Flavor Profile Twists
Once you have mastered the basic campfire s'mores cones, the variations are endless. You can easily adapt this recipe to suit different dietary needs or more adventurous palates. For a dairy-free version, look for dark chocolate chips that are labeled vegan and swap the peanut butter for a creamy almond butter.
The waffle cones themselves are often vegan, but always check the label to be certain.
The Salted Caramel Variation
Swap the peanut butter for a thick caramel sauce and add a pinch of flaky sea salt. This creates a deeply sophisticated flavor that pairs beautifully with the toasted waffle shell. The caramel will be much hotter than peanut butter, so take extra care when serving.
Tangy Berry Cheesecake Twist
If you want something a bit brighter, replace half of the marshmallows with small dollops of cream cheese and add a handful of fresh raspberries. The fruit adds a necessary acidity that cuts through the rich chocolate, making it feel lighter and more refined.
| Original Ingredient | Substitute | Why It Works |
|---|---|---|
| Chocolate Chips | White Chocolate | Sweeter and creamier. Note: Melts much faster than dark chocolate. |
| Graham Crackers | Oreo Crumbs | Adds a dark, cocoa rich crunch. |
| Pretzels | Toasted Coconut | Adds a tropical, chewy texture. |
Keeping the Crunch Intact
While these are best enjoyed immediately, you can store assembled (but uncooked) cones in an airtight container for up to 24 hours. Keep them in a cool, dry place; the refrigerator is actually a bad choice as the humidity will make the waffle cones go soft before you even cook them.
If you have leftovers that are already cooked, they can be kept in the fridge for 2 days. To reheat, I suggest using an oven or air fryer at 300°F for about 5 minutes. This helps the cone regain some of its original shatter crisp texture.
For a zero waste tip, if you have broken cones at the bottom of the box, crush them up and use them as a crunchy topping for yogurt or ice cream nothing should go to waste in a well run kitchen!
Stunning Plating for Guests
Presentation is what separates a casual snack from a memorable dessert. Even a simple campfire recipe can look like it came from a high end bakery with just a few small tweaks.
Simple: The Rustic Wrap
Keep the cones in their foil but peel the tops back neatly to create a silver "holder." Place them in a parchment lined basket. This is perfect for casual backyard hangouts where guests want to stay mobile.
Polished: The Ceramic Display
Remove the foil entirely and place the cones on a white ceramic platter. Dust the entire plate with a fine layer of graham cracker crumbs and cocoa powder. Serve with a side of fresh strawberries to add a pop of color.
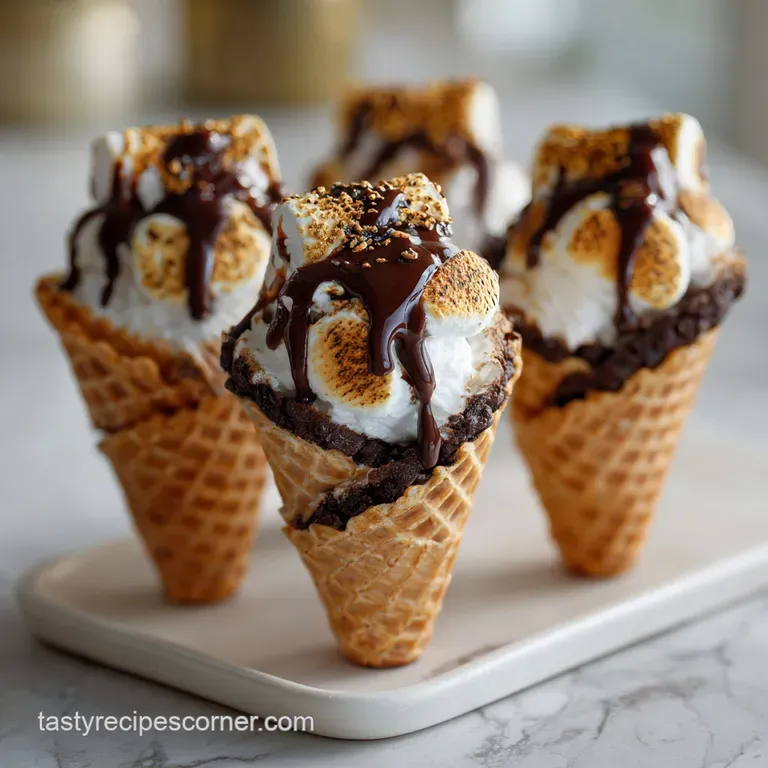
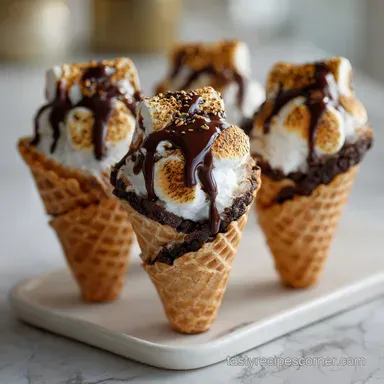
Restaurant: The Vertical Presentation
If you want to truly wow guests, serve the cones vertically. You can use a dedicated cone holder or even a glass filled with clean pebbles or coffee beans to stand the cones upright. Garnish the top with a single charred marshmallow and a sprig of fresh mint.
| Level | Tool | Extra Garnish |
|---|---|---|
| Simple | Napkin | None |
| Polished | Plate | Graham cracker dust |
| Restaurant | Vertical Stand | Mint and sea salt |
These small touches make the experience feel intentional and refined. The contrast of the dark chocolate, the snowy white marshmallow, and the golden brown cone is naturally beautiful, so you don't need much to make it shine.
Trust your instincts, keep the heat indirect, and you will have a dessert that everyone will be talking about long after the fire has gone out.

Recipe FAQs
Can I assemble the s'mores cones ahead of time?
Yes, up to 4 hours before cooking. Assemble them and store them in a cool, dry place to maintain their crispness.
How do I prevent the cone from burning?
Cook over indirect heat, not directly on coals. This prevents the sugar in the waffle cone from scorching before the inside is melted.
What's the best way to ensure a molten center?
Pack the ingredients tightly and wrap snugly in foil. This traps heat effectively, allowing the chocolate and marshmallows to melt evenly.
How long should I cook s'mores campfire cones?
Cook for approximately 8 minutes. Rotate them halfway through to ensure even heating and melting of the internal ingredients.
What if the bottom of my waffle cone is cracked?
Seal the base with a few chocolate chips. Drop chocolate chips into the bottom before adding other fillings to create a plug and prevent leaks.
Can I use sugar cones instead of waffle cones?
Yes, but waffle cones offer better structure. Sugar cones are more delicate and can break more easily, but will result in a smaller, sweeter portion.
How should I store cooked s'mores cones?
Refrigerate for up to 2 days and reheat. Use an oven or air fryer at 300°F for about 5 minutes to help the cone regain some crispness.
S Mores Campfire Cones
Ingredients:
Instructions:
Nutrition Facts:
| Calories | 568 kcal |
|---|---|
| Protein | 9.9g |
| Fat | 25.3g |
| Carbs | 82.8g |
| Fiber | 4.2g |
| Sugar | 54.6g |
| Sodium | 485mg |
