Peanut Butter Cup Brownie Cake: Velvety and Rich
- Time: Active 15 minutes, Passive 35 minutes, Total 50 minutes
- Flavor/Texture Hook: A velvety, dark chocolate base with a shattering top crust and molten peanut butter pockets.
- Perfect for: Dinner parties, holiday gatherings, or whenever you need a high impact dessert with minimal effort.
- Elegant Peanut Butter Cup Brownie Cake
- Science of Fudgy Density
- Essential Recipe Metrics
- Selecting Quality Ingredients
- Required Professional Baking Tools
- Assembling the Brownie Layers
- Pro Tips and Pitfalls
- Sophisticated Flavor Variations
- Storing for Lasting Freshness
- Elegant Serving Suggestions
- Myths Regarding Brownie Baking
- Recipe FAQs
- 📝 Recipe Card
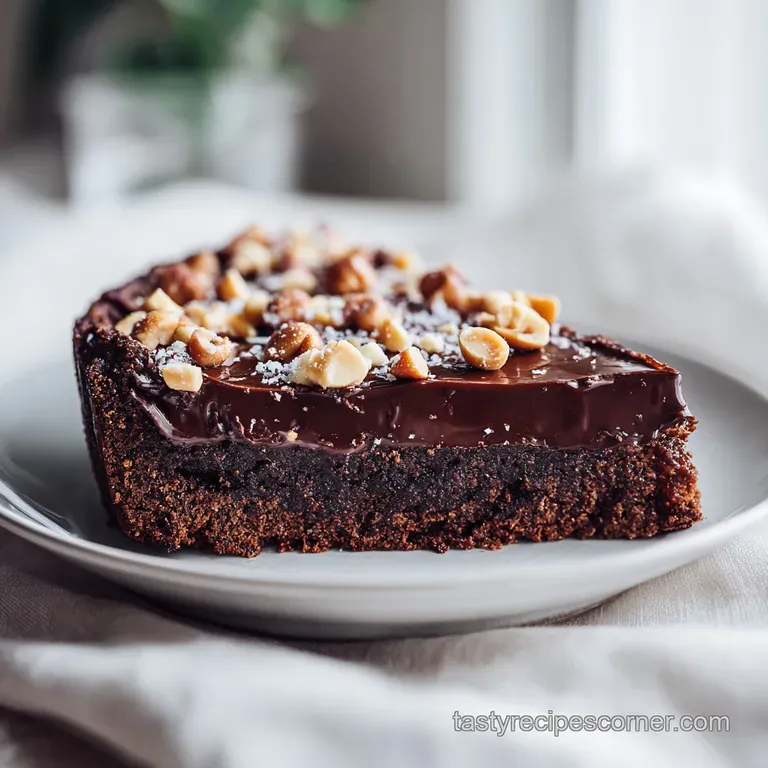
Elegant Peanut Butter Cup Brownie Cake
I remember the first time I pulled this specific bake out of the oven for a Saturday evening dinner party. The kitchen didn't just smell like chocolate; it smelled like one of those artisanal candy shops where they pour molten fudge onto cold marble slabs.
You know that heavy, intoxicating aroma of dark cocoa meeting roasted, salty nuts? It filled the house before the timer even went off, and I knew right then I had stumbled onto something special.
When I finally set the cake down on the table, garnished with those golden hued chopped peanut butter cups, the conversation just stopped. People expect a standard brownie to be casual, but this version has a certain weight to it a presence that feels truly sophisticated.
It’s the kind of dessert that makes guests ask for the recipe before they've even finished their first bite.
We aren't just making a snack here; we are crafting a decadent centerpiece. The secret lies in treating a humble box mix with the respect of a scratch made torte, making small but pivotal adjustments to the fat and liquid ratios.
Trust me, once you see that contrast between the obsidian dark chocolate and the warm ochre of the peanut butter swirl, you'll never go back to the basic instructions on the back of the box.
Science of Fudgy Density
The Lipid Protein Bond: Using melted butter and heavy cream instead of oil and water increases the fat solids, which inhibits excessive gluten development and results in a tighter, more velvety crumb.
Thermodynamic Buffering: Freezing the miniature peanut butter cups before folding them in ensures they don't disintegrate during the bake, creating distinct, molten pockets of salt and sugar.
| Method | Prep Time | Texture Result | Best Occasion |
|---|---|---|---|
| Fast Hack | 15 minutes | Dense, velvety, truffle like | Dinner parties and "wow" moments |
| Classic Scratch | 45 minutes | Chewy, aerated, traditional | Casual bake sales or lunchboxes |
| Flourless Style | 40 minutes | Wet, heavy, almost like fudge | gluten-free focused events |
Choosing the "Fast Hack" method provided in this recipe actually yields a superior texture for a cake style presentation. While scratch brownies are lovely for chewing, the specific emulsifiers in a high-quality fudge mix react beautifully with heavy cream to create an elegant, uniform slice.
Essential Recipe Metrics
To ensure your bake turns out with that signature shattering top and fudgy heart, we need to focus on a few specific checkpoints. Precision in temperature and timing is what separates a soggy middle from a professional grade dessert.
| Ingredient Component | Science Role | Pro Secret |
|---|---|---|
| Heavy Cream (1/4 cup) | Fat Emulsification | Creates a silky, ganache like interior that oil cannot achieve. |
| Frozen PB Cups (1.5 cups) | Texture Variation | Freezing prevents the chocolate from "bleeding" into the batter too early. |
| Melted Butter (1/2 cup) | Flavor Enrichment | Provides a nutty, toasted backnote that enhances the cocoa's depth. |
Adding the vanilla extract at the very end of the mixing process helps preserve its volatile aromatic compounds. This ensures that even after 35 minutes in the oven, you still get that floral, sweet scent hitting your palate alongside the rich chocolate.
Selecting Quality Ingredients
The beauty of this peanut butter cup brownie cake is that it uses accessible items but elevates them through careful selection.
- 1 box (18 oz) fudge brownie mix: Look for "double chocolate" or "fudge" varieties for the best color.
- 2 large eggs: Why this? They provide the structure and lift needed for a cake like height.
- 1/2 cup unsalted butter: Why this? Melted butter adds a richer mouthfeel than vegetable oil.
- 1/4 cup heavy cream: Why this? Substitutes water to create a decadent, truffle style crumb.
- 1.5 cups miniature peanut butter cups: These should be frozen solid before you start.
- 1 tbsp pure vanilla extract: Always use real vanilla for that elegant finish.
- 1/2 cup creamy peanut butter: Why this? Higher oil content allows for a smoother, more visual swirl.
- 1/4 cup powdered sugar: This stabilizes the peanut butter swirl so it doesn't sink.
- 6 full sized peanut butter cups: These are your primary color accent and garnish.
If you find yourself out of heavy cream, you can use whole milk, but the result will be slightly less "sturdy." For a different spin on the classic chocolate nut combo, you might even consider the flavor profiles found in my Peanut Butter Cake recipe, which focuses more on the sponge texture.
Required Professional Baking Tools
You don't need a kitchen full of gadgets, but a few specific tools will make the "achievable elegance" we are going for much easier to reach. I personally recommend using a light colored metal baking pan rather than glass, as metal conducts heat more evenly and prevents the edges from becoming too brittle before the center is set.
A sturdy silicone spatula is also a must have for folding in the frozen candies. You want to be gentle here; overworking the batter once the flour is hydrated will lead to a tough, bready cake rather than a tender one.
Finally, an offset spatula is your best friend for creating that artful, professional looking peanut butter marble on the top.
Assembling the Brownie Layers

Prepping the Foundation
- Preheat your oven to 350°F (180°C) and grease a 9 inch square baking pan. Note: Greasing and lining with parchment ensures the most elegant removal.
- Melt the 1/2 cup of unsalted butter and set it aside to cool slightly.
- In a large bowl, whisk together the 2 large eggs and 1/4 cup of heavy cream until pale and frothy.
Integrating the Flavor Elements
- Stir in the 1 tbsp of pure vanilla extract into the egg mixture.
- Add the dry brownie mix and the melted butter.
- Gently fold the batter until just combined until no dry streaks of flour remain.
- Fold in the 1.5 cups of frozen miniature peanut butter cups quickly. Note: Work fast so they don't begin to thaw and smear.
Creating the Marble Effect
- Mix the 1/2 cup of creamy peanut butter with 1/4 cup of powdered sugar in a small bowl.
- Pour the chocolate batter into the pan and drop dollops of the peanut butter mixture on top.
- Use a knife to swirl the two until a marbled pattern emerges on the surface.
Achieving the Perfect Bake
- Bake for 35 minutes until the edges are set and the top looks crackled.
- Allow the cake to cool completely in the pan for at least 1 hour.
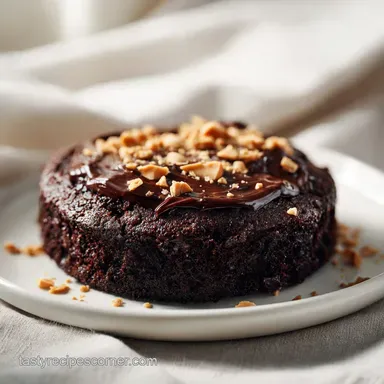
- Garnish with the 6 chopped full sized peanut butter cups before slicing.
Pro Tips and Pitfalls
One unconventional trick I’ve learned is to hit the pan against the counter once or twice halfway through the baking time. This collapses any large air bubbles and ensures the center stays dense and fudgy rather than airy.
Also, for the cleanest, most elegant slices, try freezing the entire cake for 20 minutes before cutting. Use a large chef's knife dipped in hot water and wiped dry between every single cut. It's an extra step, but the "wow" factor of a perfectly square, sharp edged slice is worth it.
Preventing the "Sunken Center"
A common issue with "loaded" brownies is the middle collapsing. This usually happens because the peanut butter swirl is too heavy or the oven temperature fluctuated. Ensure your peanut butter is mixed with that bit of powdered sugar it acts as a stabilizer to keep the swirl suspended in the batter.
Mastering the Clean Slice
If you try to cut this cake while it's still even slightly warm, the peanut butter cups will smear, and the fudge will stick to the blade. Patience is your greatest ingredient here. Letting the residual heat finish the "carryover cooking" process is vital for the interior structure to set properly.
| Problem | Root Cause | Solution |
|---|---|---|
| Greasy surface | Butter was too hot when added | Let melted butter cool to room temp before mixing. |
| Dry, crumbly edges | Overbaked by 5+ minutes | Check doneness 3 minutes before the timer ends. |
| Swirl disappeared | Over swirled the mixture | Use only 3-4 "S" motions with your knife. |
Common Mistakes Checklist
- ✓ Ensure eggs are at room temperature to prevent the melted butter from seizing.
- ✓ Never skip freezing the mini peanut butter cups; it's the key to those molten pockets.
- ✓ Avoid overmixing after adding the dry mix to keep the texture velvety.
- ✓ Use a metal pan for even heat distribution glass often leads to burnt edges.
- ✓ Resist the urge to slice early; a 60 minute cool time is mandatory for clean edges.
Sophisticated Flavor Variations
While this recipe is a classic, you can easily adapt it to suit different palates. For an "extra salty" twist, sprinkle a pinch of Maldon flaky sea salt over the peanut butter swirl before it goes into the oven. The salt crystals won't melt, providing a sharp, sophisticated contrast to the rich sugar. If you are looking for something with a bit more of a traditional cookie crumb texture, you might enjoy experimenting with techniques used in a Peanut Butter Cookies recipe.
Another elegant variation is the "Espresso Deep Dive." Add 1 teaspoon of instant espresso powder to the dry brownie mix. This doesn't make the cake taste like coffee; instead, it acts as a chemical flavor enhancer that makes the chocolate taste more intense and "darker." It’s a trick used by professional pastry chefs to add complexity to box mix bases.
Storing for Lasting Freshness
Because of the high fat content from the butter and cream, this cake stays moist much longer than a standard brownie. You can keep it at room temperature in an airtight container for up to 3 days.
If you want to keep it longer, the refrigerator is actually a great option here; the cold firms up the fudge and makes it taste like a dense truffle. It will last about a week in the fridge.
For zero waste baking, if you have any leftover crumbs or broken pieces, don't toss them! I love to crumble them over high-quality vanilla bean ice cream or fold them into a chocolate mousse for a "brownie dirt" effect.
You can also freeze the entire cake, sliced and wrapped in individual portions of plastic wrap, for up to 2 months. Just thaw at room temperature for about 30 minutes before serving.
Elegant Serving Suggestions
To truly lean into the "presentation" archetype, I suggest serving each slice with a small dollop of unsweetened whipped cream or a splash of cold heavy cream poured right into the bowl. The bitterness of the cocoa and the saltiness of the peanut butter benefit from a neutral, creamy element.
You can also pair this with a strong, dark roast coffee or a glass of cold milk.
If you are hosting a formal event, try the "Deconstructed Garnish." Instead of just tossing the chopped peanut butter cups on top, place them in a small, artful cluster in one corner of the slice and add a single mint leaf for a pop of color. For more inspiration on peanut based treats that guests love, check out my Peanut Butter Cake recipe for a lighter, more traditional cake experience.
Deciding Your Perfect Finish
- For a molten center: Serve the slice slightly warmed (10 seconds in the microwave).
- For a truffle texture: Serve directly from the refrigerator.
- For the "Shatter" top: Ensure you bake on the middle rack for maximum air circulation.
Myths Regarding Brownie Baking
One of the biggest misconceptions in the baking world is that you should always use oil for "moist" brownies. While oil does keep cakes soft at room temperature, it lacks the structural protein and flavor complexity of butter.
By using butter and heavy cream together, we get the best of both worlds: the flavor of a scratch made dessert and the lasting moisture of a professional bake.
Another myth is that "more swirling is better" for a marble cake. In reality, the more you move the knife through the batter, the more the two colors blend into a muddy brown. For that elegant, high contrast look, you want to see distinct ribbons of gold peanut butter against the dark chocolate.
Limit yourself to just a few bold strokes to maintain the visual integrity of the dish.

Recipe FAQs
Can I add peanut butter cups to brownie mix?
Yes, absolutely, and you should freeze them first. Freezing the miniature cups prevents the chocolate from bleeding color into the batter during the initial mixing stage. This preserves the visual contrast in your final cake layer.
What exactly is a tandy cake?
A Tandy Cake is a specific regional term for a chocolate cake layered with peanut butter frosting. This recipe adapts that concept by integrating the peanut butter directly into the fudge brownie batter for a marbled effect, offering a similar flavor profile in a denser texture.
How to turn brownie mix into a cake?
Substitute water for heavy cream and increase the egg count by one. Adding fat (cream) and protein (extra egg) inhibits gluten development, resulting in a cake like rise and a velvety, less chewy crumb structure.
How do you make pb2 brownie mug cake?
Whisk 2 tablespoons of PB2 powder with 1 tablespoon of powdered sugar and enough milk or water to form a thick paste first. Mix this paste directly into your standard mug brownie ingredients before microwaving.
Is it true I must use melted butter instead of oil for fudgier results?
No, this is a common misconception that oil always yields moisture. Melted butter provides superior flavor and its milk solids contribute to a richer mouthfeel, which is essential for the density we aim for in this cake style.
What is the best method for achieving a clean, professional slice?
Chill the finished, cooled cake completely, preferably in the freezer for 20 minutes before cutting. Use a long, sharp chef's knife dipped in hot water and wiped dry between every single cut for perfectly sharp edges.
Why did my peanut butter swirl sink to the bottom?
You likely over mixed the batter after adding the peanut butter swirl component. To prevent this next time, ensure your peanut butter component is stabilized with powdered sugar and use only a few gentle strokes to create the marble effect.
Peanut Butter Cup Brownie Cake
Ingredients:
Instructions:
Nutrition Facts:
| Calories | 508 kcal |
|---|---|
| Protein | 8.2 g |
| Fat | 27.9 g |
| Carbs | 57.6 g |
| Fiber | 2.1 g |
| Sugar | 43.3 g |
| Sodium | 315 mg |
