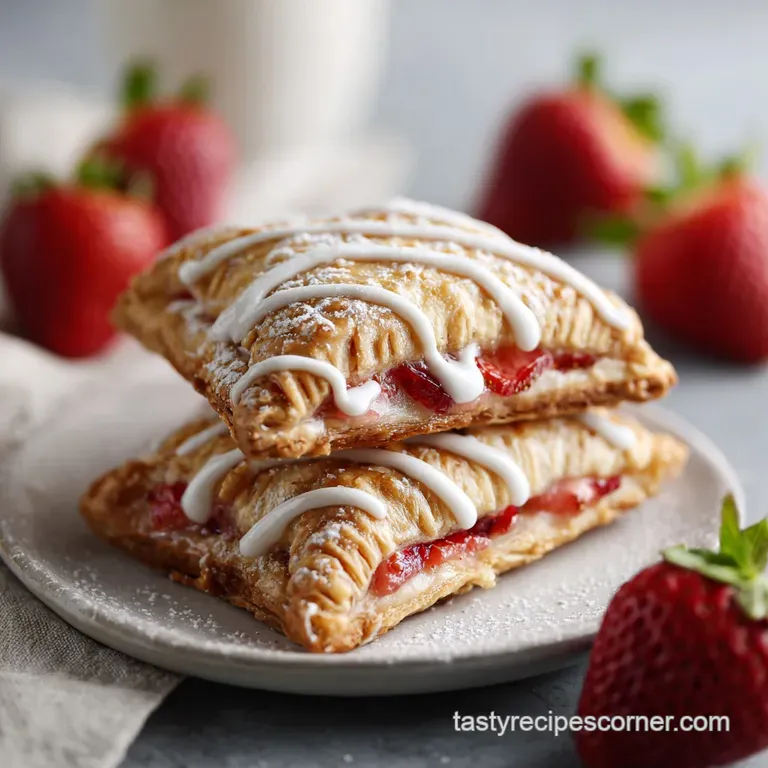
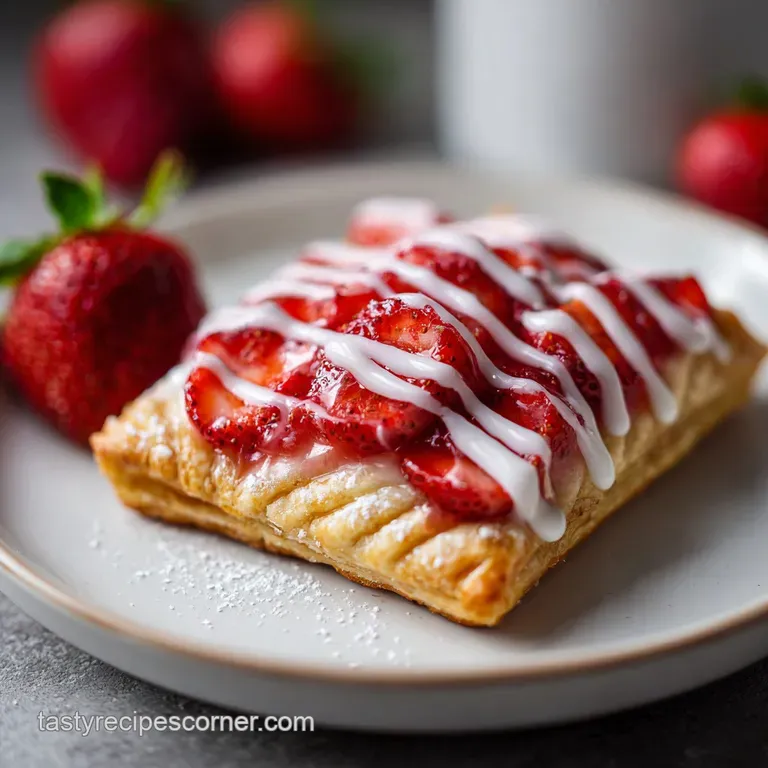
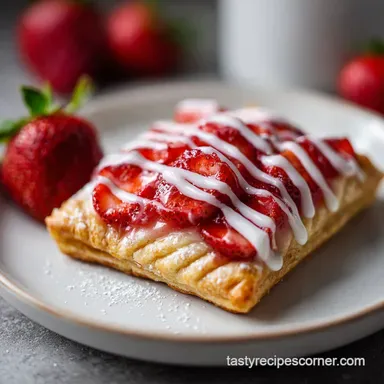
Homemade Strawberry Pop Tart Recipe
- Time: Active 45 minutes, Passive 25 minutes, Total 1 hours 10 mins
- Flavor/Texture Hook: Shattering, buttery crust with a jammy strawberry center
- Perfect for: Elegant weekend brunch or impressive hosting
- Why This Texture Succeeds
- Analyzing the Essential Components
- Selecting Your Elegant Components
- Tools Required for Success
- The Precision Cooking Method
- Troubleshooting Your Pastry Hurdles
- Scaling Your Batch Size
- Debunking Common Baking Myths
- Variations and Smart Substitutions
- Storage and Zero Waste Tips
- Elegant Presentation and Serving
- Recipe FAQs
- 📝 Recipe Card
The kitchen air completely changes the moment these hit the oven. It starts with the scent of toasted butter, followed by that sweet, unmistakable aroma of simmering strawberries that reminds me of lazy Saturday mornings.
I used to think the foil wrapped version was the peak of breakfast luxury until I tried making them from scratch and realized what we were all missing: texture.
My first attempt at a homemade strawberry pop tart was a total disaster because I treated the dough like bread. I over kneaded it, and instead of a flaky pastry, I ended up with something resembling a dry cracker.
It was a heart breaking lesson in gluten development, but it led me to the secret of the "shatter" keeping that butter cold enough to create steam pockets.
We are going for achievable elegance here. This isn't just a snack; it's a pastry you would be proud to serve at a bridal shower or a fancy brunch. You'll get that satisfying "crack" when you bite into the edge, followed by a velvety, fruit forward filling that actually tastes like strawberries rather than red food coloring.
Let’s get into the mechanics of making this work every single time.
Why This Texture Succeeds
The Physics of the Flake: When cold butter hits the hot oven, the water content evaporates instantly, creating tiny steam pockets that lift the flour layers. This is what creates that signature shattering crust rather than a dense, crumbly one.
Starch Gelatinization: Adding cornstarch to the preserves ensures the filling sets into a jammy consistency that doesn't leak during the bake. Without it, the heat would turn your filling into a runny mess that escapes the crimped edges.
Gluten Suppression: Using a minimal amount of ice water prevents the proteins in the flour from bonding too tightly. This keeps the pastry tender and "short," much like the delicate crumb you'd find in a high-quality Bisquick Shortcake Recipe.
Maillard Reaction Control: The small amount of sugar in the dough isn't just for sweetness; it encourages the crust to turn a deep, golden brown. This creates a complex, toasted flavor that balances the sugary glaze on top.
Cook Method Performance Comparison
| Method | Time | Texture | Best For |
|---|---|---|---|
| Conventional Oven | 25 minutes | Uniformly golden and crisp | Maximum flakiness and large batches |
| Toaster Oven | 20 minutes | Extra crispy bottom | Quick individual servings |
| Air Fryer | 12 minutes | Very crunchy, less flaky | Speed, but watch for burning |
Analyzing the Essential Components
Selecting the right elements is the difference between a soggy pastry and a masterpiece. We are looking for high fat butter and high-quality preserves to ensure the flavor is as impressive as the presentation.
| Ingredient | Science Role | Pro Secret |
|---|---|---|
| Unsalted Butter | Creates flaky layers through steam | Freeze for 10 mins before grating into flour |
| Cornstarch | Thickens fruit juices to prevent leaks | Whisk into cold water before adding to jam |
| All purpose Flour | Provides structure and "short" crumb | Measure by weight to avoid a dry, tough dough |
| Heavy Cream | Softens the glaze and adds shine | Use it as a wash for a professional, glossy finish |
Selecting Your Elegant Components
You don't need a massive pantry for this, but you do need the right stuff. Don't even bother with low-fat butter here; we need that fat content for the structure.
- 2.5 cups All purpose flour: The backbone of our pastry. Why this? Provides enough protein for structure without becoming tough. (Sub: Pastry flour for a more delicate bite)
- 1 cup Unsalted butter: Must be extremely cold and cubed. Why this? Cold fat is the only way to get those flaky layers. (Sub: high-quality vegan butter sticks)
- 0.75 cup Strawberry preserves: Look for one with real fruit pieces. Why this? Provides the concentrated sweetness and base flavor. (Sub: Raspberry or blueberry preserves)
- 0.25 cup Fresh strawberries: Finely diced for texture. Why this? Adds a bright, acidic pop to the cooked filling. (Sub: Freeze dried strawberry powder)
- 1 cup Powdered sugar: For the signature smooth glaze. Why this? Dissolves instantly for a velvety finish. (Sub: Granulated sugar blitzed in a blender)
- 7 tbsp Ice water: Essential for binding the dough without melting the fat.
- 1 tbsp Cornstarch: Our "glue" for the internal filling.
- 1 tsp Fine sea salt: Balances the sugar in the dough and glaze.
Tools Required for Success
You don't need fancy gadgets, but a few specific items make the process much smoother. I personally love using a bench scraper to handle the dough it keeps the heat from my hands away from the butter.
- Large Mixing Bowl: For cutting the butter into the flour.
- Pastry Cutter: Or two forks, to incorporate the fat until it's "pea sized."
- Rolling Pin: To achieve that uniform 1/8 inch thickness.
- Ruler: Trust me, measuring your rectangles makes the assembly so much easier.
- Parchment Paper: Essential to prevent the glaze from sticking to your pans.
- Small Saucepan: For reducing the filling into a thick, jammy concentrate.
The Precision Cooking Method
Right then, let's get to work. The secret is speed you want to move quickly so the dough stays cold. If at any point the butter feels greasy or soft, pop the whole tray in the fridge for 15 minutes before continuing.
- Whisk dry ingredients. Combine the flour, sugar, and salt in your bowl. Note: This ensures even distribution of the seasoning.
- Cut the butter. Use your pastry cutter to work the cold butter into the flour until the mixture looks like coarse crumbs with some pea sized chunks.
- Hydrate the dough. Add ice water one tablespoon at a time, mixing with a spatula until the dough just barely holds together when squeezed.
- Chill the pastry. Divide the dough into two discs, wrap in plastic, and refrigerate for 30 minutes. Note: This relaxes the gluten and re chills the fat.
- Simmer the filling. Combine preserves, diced strawberries, cornstarch, water, and lemon juice in a pan; simmer for 5 minutes until thick and glossy. Let it cool completely.
- Roll and cut. Roll one disc into a large rectangle about 1/8 inch thick. Cut into eight 3x4-inch rectangles. Repeat with the second disc.
- Assemble and seal. Place a tablespoon of filling in the center of 8 rectangles. Top with the remaining rectangles and crimp the edges firmly with a fork to seal.
- Prick and vent. Use a toothpick to poke a few holes in the top of each tart. Note: This allows steam to escape so the tarts don't explode.
- Bake for 25 minutes. Place on a parchment lined sheet and bake at 375°F until the edges are golden and the pastry feels firm.
- Glaze and garnish. Whisk powdered sugar and heavy cream until smooth. Spread over cooled tarts and immediately top with sprinkles before the glaze sets.
Troubleshooting Your Pastry Hurdles
Even experienced bakers run into issues with pastry. The most common problem is the "soggy bottom," which usually happens if the filling is too hot or the oven isn't preheated properly.
Why Your Crust Is Tough
If your pastry feels more like a chewy cookie than a flaky tart, you likely over mixed the dough. Over mixing develops gluten, which is great for sourdough but terrible for tarts. Always stop mixing the moment the dough can be pressed into a ball.
Solving Filling Leaks
Leaking usually happens because of a poor seal or a lack of venting. If your filling is bubbling out the sides, ensure you are leaving a half inch border around the jam and pressing those fork tines down hard.
| Problem | Root Cause | Solution |
|---|---|---|
| Soggy Bottom | Filling was too wet or warm | Cool filling completely and use cornstarch |
| Shrinking Pastry | Gluten wasn't relaxed | Chill dough for at least 30 mins before rolling |
| Glaze Melting | Tarts were too hot | Wait at least 20 mins before glazing |
Common Mistakes Checklist
- ✓ Never use room temperature butter (it will blend into the flour and ruin the flakes).
- ✓ Don't skip the lemon juice in the filling (the acidity balances the sugar).
- ✓ Avoid over filling (one tablespoon is plenty; more will cause a mess).
- ✓ Prick the tops (steam needs a way out or the edges will burst).
- ✓ Use a ruler (even rectangles bake more uniformly than wonky shapes).
Scaling Your Batch Size
If you are hosting a large brunch, you'll definitely want to double this. It's surprisingly easy to scale, but there are a few rules to keep the texture consistent.
- Scaling Down (1/2 batch): This is perfect for a cozy breakfast for two. Beat one egg and use exactly half by weight if you're using an egg wash. Reduce the bake time by about 5 minutes as smaller batches can brown faster in some ovens.
- Scaling Up (2x or 3x): When doubling the dough, work in batches. Don't try to roll out enough dough for 16 tarts at once, or the butter will melt before you're finished. Increase the salt and spices to only 1.5x the original amount to avoid overpowering the fruit.
- Baking Multiple Trays: If baking 24 tarts at once, lower your oven temperature by 25°F and rotate the pans halfway through to ensure even browning.
Debunking Common Baking Myths
Myth 1: You must use a food processor for pastry. Actually, doing it by hand or with a pastry cutter gives you much better control. A food processor can easily turn your butter into a paste, which destroys the flakiness.
Myth 2: Strawberry preserves are enough for the filling. If you use just jam, the filling will be flat and one dimensional. Adding fresh diced berries and a splash of lemon juice provides the acidity needed to make the "strawberry" flavor actually pop.
Myth 3: Searing the edges seals the juice. In the world of tarts, "sealing" is about mechanical bonding. Crimping with a fork creates a physical barrier. If the filling is too watery, no amount of crimping will stop it from steaming its way out.
Variations and Smart Substitutions
Once you master the base, you can get creative. If you want something truly decadent, you could try making 3 Ingredient Chocolate Covered strawberry inspired tarts by adding cocoa powder to the dough and using a chocolate ganache glaze.
| Original Ingredient | Substitute | Why It Works |
|---|---|---|
| Heavy Cream | Coconut Milk | Similar fat content. Note: Adds a slight tropical nutty note to the glaze. |
| All purpose Flour | Almond Flour (half) | Adds a nutty, rich crumb. Note: Makes the pastry much more fragile. |
| Strawberry Jam | Fig Jam | Provides a sophisticated, less sweet profile. Works beautifully with the buttery crust. |
Creative Flavor Expansions
- Strawberry Pop Tart Cookies: Crumble unbaked pastry dough over sugar cookie dough and swirl in a teaspoon of strawberry reduction before baking.
- Strawberry Pop Tart Ice Cream: Chop baked (and cooled) tarts into small chunks and fold them into softened vanilla bean ice cream. It's an incredible texture contrast.
- The Brunch Platter: Serve mini versions (2x2 inches) alongside a bowl of Greek yogurt and honey for a sophisticated breakfast spread.
Storage and Zero Waste Tips
These tarts are best on day one, but they hold up surprisingly well if stored correctly.
- Fridge: Store in an airtight container for up to 5 days. The crust will soften slightly, so I recommend a quick toast before eating.
- Freezer: You can freeze these unbaked for up to 1 month. Bake directly from frozen, adding about 5-8 minutes to the total time.
- Zero Waste: Don't throw away those dough scraps! Ball them up, roll them thin, sprinkle with cinnamon sugar, and bake for 10 minutes. We call these "pastry fries" in my house, and they are the best cook's treat. Also, any leftover strawberry reduction is amazing swirled into morning oatmeal.
Elegant Presentation and Serving
To really wow your guests, presentation is everything. Instead of just smearing the glaze, try a "drizzle" technique or use a piping bag for a clean, thick border.
If you're serving these at a formal event, pair them with a dry sparkling Rosé. The acidity in the wine cuts through the richness of the butter and highlights the bright strawberry notes in the filling.
For a more traditional route, a strong Earl Grey tea with a splash of milk is the ultimate companion to a warm Strawberry Pop Tart. Trust me, once you go homemade, those blue boxes in the grocery store will never look the same again.

Recipe FAQs
Is there a strawberry Pop-Tart?
Yes, strawberry is a core, classic flavor. It remains one of the most consistently available varieties in the United States since the product line began.
What Pop-Tart flavor was discontinued?
Several, but the most famous recent discontinuation was Chocolate Chip. This flavor was retired, often prompting fan petitions to bring it back, though Kellogg’s regularly rotates limited editions.
What is the oldest Pop-Tart flavor?
Brown Sugar Cinnamon is widely considered the oldest and most enduring flavor. It was one of the original four flavors released when Pop-Tarts launched in 1964, predating strawberry by a short time.
How healthy are strawberry Pop-Tarts?
No, they are not a health food, but homemade versions are much better. Commercially produced tarts are high in sugar and refined flour, lacking necessary fiber; mastering the cold fat technique in the homemade recipe ensures flakiness without excessive additives.
How do I prevent the homemade strawberry filling from leaking out during baking?
Cool the filling completely before assembly and crimp the edges aggressively with a fork. Ensuring the filling is thick and jammy, often by using cornstarch, prevents it from becoming overly liquid under high heat.
How can I make the crust shatteringly flaky like a professional pastry?
Keep your butter extremely cold, ideally frozen, and incorporate it into the flour mixture until pea-sized chunks remain. If you enjoyed controlling cookie spread here, see how the same principle of cold fat application applies to achieving perfect texture in our Football Brownies recipe.
How do I make the glaze glossy and smooth, not streaky?
Use heavy cream instead of milk and wait until the tarts are mostly cooled before applying the glaze. Whisk the powdered sugar slowly into the cold cream until just combined; this creates a stable emulsion that sets into a beautiful, shiny finish.
Homemade Strawberry Pop Tart
Ingredients:
Instructions:
Nutrition Facts:
| Calories | 488 kcal |
|---|---|
| Protein | 4.6 g |
| Fat | 25.2 g |
| Carbs | 63.5 g |
| Fiber | 1.4 g |
| Sugar | 37.8 g |
| Sodium | 295 mg |
