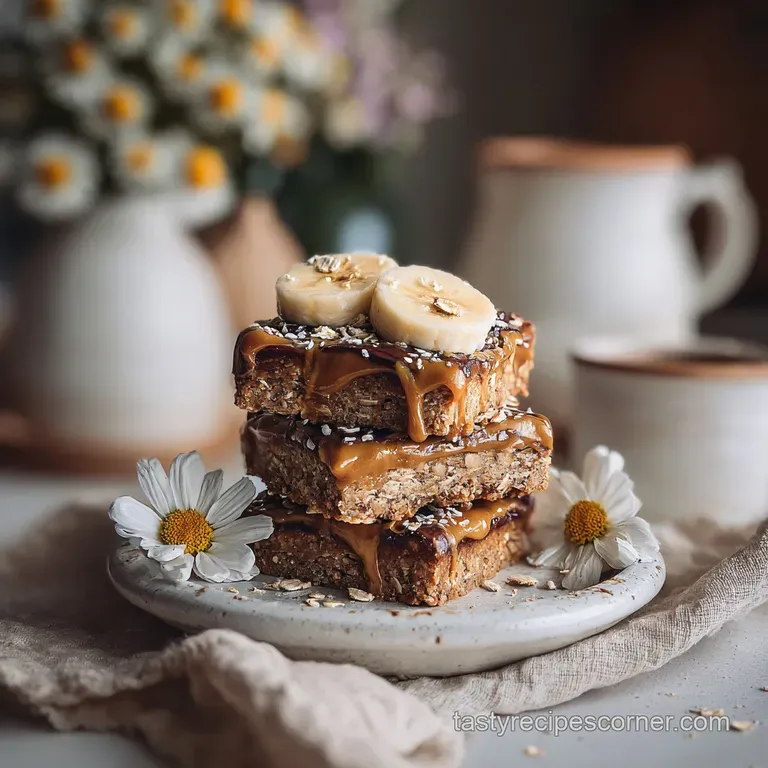
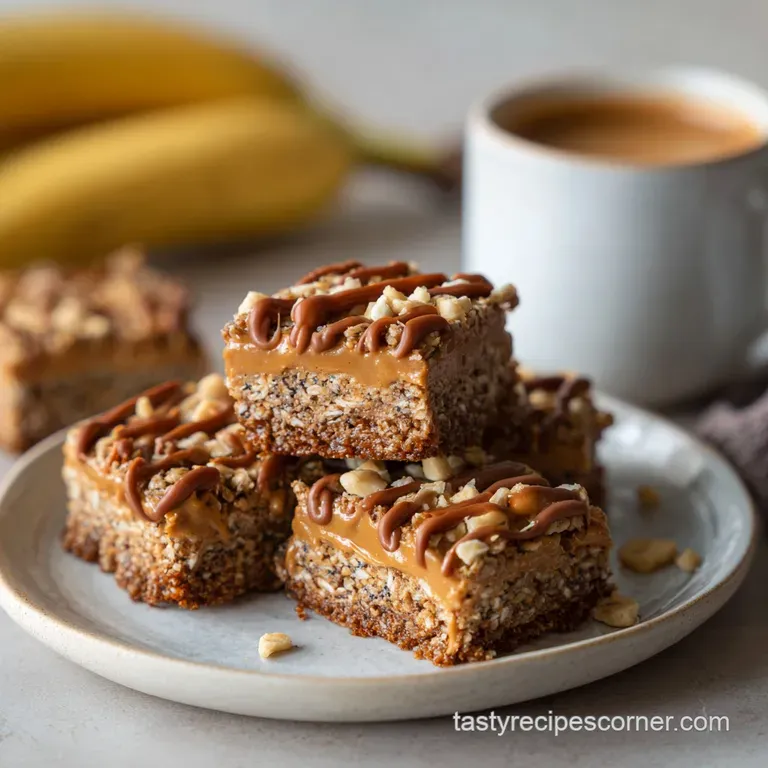
Energizing Banana Oatmeal Bar with Peanut Butter
- Time: Active 15 minutes, Passive 30 minutes, Total 45 minutes
- Flavor/Texture Hook: Hearty, cinnamon spiced, and chewy with a fudgy center
- Perfect for: Speedy morning fuel, post workout recovery, or busy parents
- Energizing Banana Oatmeal Bar with Peanut Butter for a Healthy Snack
- Making the Most of Your Morning Prep
- Choosing Quality Oats and Nut Butters
- Selecting Your Healthy Snack Elements
- Simple Kitchen Tools for Fast Success
- How to Bake These Golden Bars
- Solving Texture and Flavor Issues
- Tailoring the Batch to Your Needs
- Clearing Up Healthy Baking Myths
- Keeping Your Bars Fresh and Tasty
- Best Morning Pairings for Energy
- Recipe FAQs
- 📝 Recipe Card
Energizing Banana Oatmeal Bar with Peanut Butter for a Healthy Snack
Imagine waking up to the smell of warm cinnamon and toasted oats drifting through your house before you've even had your first cup of coffee. Most of us have been there staring at a bunch of brown spotted bananas on the counter, wondering if we really have the energy for a full baking project before the day starts.
This article shares a simple recipe for an Energizing Banana Oatmeal Bar with Peanut Butter for a Healthy Snack. It is the exact solution for those mornings when you need something fast, filling, and actually good for you.
I used to struggle with store-bought protein bars that tasted like chalky cardboard or "healthy" snacks that left me crashing by 10:00 AM. After a lot of trial and error in my own kitchen, I realized the secret isn't some fancy supplement; it is the humble combination of complex carbs and healthy fats.
These bars aren't light and airy like a cake they are substantial, dense, and designed to keep you moving.
What I love most about this recipe is how forgiving it is. If your bananas are extra mushy, the bars just get fudgier. If you like a bit more crunch, you can toast the oats first. We are going for a texture that is "shatter proof" the kind of snack you can toss into a gym bag or a backpack without it turning into a pile of crumbs by lunchtime.
Right then, let's dive into why this specific combination of ingredients works so well for your body and your taste buds.
Making the Most of Your Morning Prep
When we talk about an Energizing Banana Oatmeal Bar with Peanut Butter for a Healthy Snack, we are really talking about a slow release fuel system. The oats provide a steady stream of glucose to your brain, while the fats from the peanut butter slow down digestion so you don't feel hungry again in twenty minutes.
It is a morning win that feels like a treat but acts like a meal.
- Starch Gelatinization: The heat during baking causes the oat starches to swell and trap moisture from the bananas, creating a cohesive, chewy structure without needing eggs.
- Maillard Reaction: The natural sugars in the honey and bananas react with the protein in the peanut butter to create a golden brown crust and deep, nutty aromas.
- Emulsification Stability: The natural oils in creamy peanut butter act as a binder, surrounding the oat fibers to prevent the bars from becoming dry or brittle.
- Hydrophilic Bonding: Chia seeds absorb up to ten times their weight in liquid, acting as a secondary "glue" that keeps the bars moist during storage.
| Method | Time | Texture | Best For |
|---|---|---|---|
| Baked (Standard) | 45 minutes | Toasty, firm, and easy to hold | Commuter breakfasts and lunchboxes |
| No Bake (Chilled) | 15 minutes | Fudgy, soft, and slightly sticky | Quick home snacks or dessert bars |
| Toaster Oven | 20 minutes | Extra crispy edges, soft middle | Small batches for single servings |
Finding the right balance of moisture is the biggest hurdle for most home cooks. If you use bananas that are too green, the bars will be starchy and bland. If you use a peanut butter with added oils and sugars, the bars might become greasy. I always suggest using "natural" peanut butter the kind where the only ingredients are peanuts and salt. It has a much better flavor profile and a runnier consistency that mixes perfectly with the oats. If you are looking for more ways to use that jar of PB, you might enjoy trying my Peanut Butter Cookies recipe later this week!
Choosing Quality Oats and Nut Butters
Not all ingredients are created equal when you are trying to build a bar that survives a commute. The science behind each component determines whether you get a velvety bite or something that feels like eating a bowl of cold porridge. We want to be intentional with every addition to ensure maximum flavor and energy.
| Component | Science Role | Pro Secret |
|---|---|---|
| Overripe Bananas | Primary binder and sweetener | Use bananas with "leopard spots" for the highest sugar to starch ratio. |
| Old Fashioned Oats | Structural fiber | Never use instant oats; they lack the surface area to create a satisfying chew. |
| Chia Seeds | Moisture retention | These act as a "fat mimic" to keep the bars feeling rich without excess oil. |
| Natural Peanut Butter | Protein and fat base | Stir the jar thoroughly to ensure the oil is fully incorporated before measuring. |
Choosing the right oats is non negotiable here. Steel cut oats are too hard and won't soften in time, while quick cook oats turn into mush. Rolled oats are the "Goldilocks" choice they hold their shape but soften just enough to create a beautiful, dense crumb. This is similar to the texture balance I look for when making my Creamy Blueberry Overnight recipe for an easy, no cook morning option.
Selecting Your Healthy Snack Elements
Before we start mashing, make sure your ingredients are at room temperature. Cold peanut butter is a nightmare to mix, and you'll end up with big clumps of oats that aren't coated in the banana PB mixture. This recipe makes 12 generous bars, which is usually enough to get a small family through a busy work week.
- 3 medium overripe bananas (approx. 300g)
- Substitute: 1.25 cups of unsweetened applesauce. Why this? Provides moisture and natural sweetness without adding refined sugars.
- 1 cup creamy natural peanut butter (250g)
- Substitute: Almond butter or sunflower seed butter. Why this? Healthy fats act as the primary structural glue for the bars.
- 2.5 cups old fashioned rolled oats (225g)
- Substitute: gluten-free certified rolled oats. Why this? Provides the complex carbohydrates and hearty texture needed for satiety.
- 2 tablespoons honey or maple syrup (42g)
- Substitute: Agave nectar or brown rice syrup. Why this? Enhances the Maillard reaction for a better golden crust.
- 1 teaspoon ground cinnamon
- Substitute: Pumpkin pie spice. Why this? Adds warmth and masks the "green" flavor of oats.
- 2 tablespoons chia seeds (24g)
- Substitute: Ground flaxseeds. Why this? Boosts fiber and omega-3s while helping the bars set firmly.
- 1 teaspoon vanilla extract
- Substitute: Almond extract (use only 1/4 teaspoon). Why this? Rounds out the sweetness and adds aromatic depth.
- 0.5 teaspoon sea salt
- Substitute: Himalayan pink salt. Why this? Balances the sweetness and makes the peanut butter flavor pop.
- 0.25 cup dark chocolate chips (40g)
- Substitute: Cacao nibs or raisins. Why this? Adds a tiny bit of indulgence and extra antioxidants.
Simple Kitchen Tools for Fast Success
You don't need a high end stand mixer for these bars. In fact, a fork and a sturdy bowl are often better because you can control the texture of the bananas. We want some small chunks of banana left in the mix they turn into little pockets of sweetness when they bake.
- 9x9 inch baking pan: This size gives the bars the perfect thickness. A larger pan will make them too thin and prone to burning.
- Parchment paper: This is essential. Don't just grease the pan; the honey and banana make these bars sticky. You want to be able to lift the whole block out for easy slicing.
- Large mixing bowl: Give yourself plenty of room to stir so you don't send oats flying across the counter.
- Sturdy silicone spatula: Great for scraping every bit of that sticky peanut butter out of the measuring cup and folding the chocolate chips in evenly.
- Digital scale (optional): While cups work, weighing your bananas and peanut butter ensures the bars turn out exactly the same every single time.
How to Bake These Golden Bars
The flow of this recipe is all about building an emulsion first and then adding the bulk. If you throw the oats in with the whole bananas, you'll have a hard time getting everything evenly coated. Follow this sequence for the best results.
- Preheat oven. Set your oven to 350°F (175°C) and line your 9x9 inch pan with parchment paper, leaving an overhang on two sides.
- Mash bananas. In your large bowl, smash the 3 medium bananas with a fork until mostly smooth with a few small lumps. Note: These lumps provide bursts of flavor.
- Create the wet base. Whisk in the 1 cup peanut butter, 2 tablespoons honey, 1 teaspoon vanilla, and 0.5 teaspoon salt until the mixture looks glossy and smooth.
- Season the mix. Stir in the 1 teaspoon cinnamon and 2 tablespoons chia seeds.
- Fold in oats. Add the 2.5 cups rolled oats. Use a spatula to fold them in until every single oat is coated in the wet mixture. Note: Dry oats will cause the bars to fall apart.
- Add chocolate. Fold in the 0.25 cup dark chocolate chips.
- Press into pan. Transfer the mixture to the prepared pan. Press it down firmly with the back of your spatula until the surface is even and the corners are filled.
- Bake the bars. Bake for 25-30 minutes until the edges are golden brown and the center feels firm to the touch.
- Cool completely. This is the hardest part. Let the bars cool in the pan for at least 20 minutes before lifting them out.
- Slice and serve. Use a sharp knife to cut into 12 even bars. The bars will "set" further as they cool, becoming easier to handle.
Solving Texture and Flavor Issues
Even a simple snack can have its bad days. Usually, the culprit is the moisture level in the fruit or the consistency of the nut butter. If your bars feel like they are "weeping" moisture or if they are so hard they could break a tooth, it is almost always an easy fix.
My bars are too mushy in the middle
If the center feels soft or "squishy" after 30 minutes, it is likely due to extra large bananas or under baked oats. Bananas vary wildly in size; if yours were huge, you might need an extra 1/4 cup of oats.
| Problem | Root Cause | Solution |
|---|---|---|
| Crumbling apart | Not enough "glue" or oats were too dry | Add an extra tablespoon of peanut butter or mash the bananas more thoroughly next time. |
| Too oily | Separated natural peanut butter | Always stir your peanut butter jar until the oil is completely emulsified before measuring. |
| Bland flavor | Under ripe bananas | Ensure your bananas have plenty of brown spots; this is where the sweetness comes from. |
My chocolate chips all melted and disappeared
This happens if you mix the chocolate chips into the warm banana mixture before adding the oats. The heat from the mashed bananas can melt the chips instantly.
Chef Tip: Wait until the oats are fully mixed in before adding your chocolate chips. The oats act as an insulator, keeping the chocolate bits intact so you get those nice "studs" of cocoa in every bite.
Common Mistakes Checklist
- ✓ Pat your bananas dry? No, but do make sure they aren't "leaking" water. If they were frozen and thawed, drain the excess liquid first.
- ✓ Avoid Instant Oats. They will absorb the liquid too quickly and turn the bars into a gummy mess.
- ✓ Press firmly. Don't just spread the mixture; press it into the pan like you're making a pie crust to ensure they don't crumble.
- ✓ The 20 Minute Rule. Never slice these while they are hot. The starches need time to "set" or the bars will fall apart.
- ✓ Check your spices. Old cinnamon loses its punch; if your spice jar has been open for a year, use a little extra.
Tailoring the Batch to Your Needs
If you are cooking for a crowd or just trying to use up a single lonely banana, you can easily scale this recipe. However, keep in mind that the thickness of the bar is what preserves that fudgy center we all love.
- Making a Half Batch (6 bars): Use a standard loaf pan (9x5 inch). Use 1.5 bananas, 1/2 cup peanut butter, and 1.25 cups oats. Reduce baking time by about 5 minutes, as the smaller pan can heat up faster.
- Doubling the Recipe (24 bars): Use a 9x13 inch baking pan. You don't need to double the salt or cinnamon exactly 1.5x the spices is usually plenty. You may need to add 5-10 minutes to the baking time since the pan is more crowded.
- Baking Adjustments: If you are doubling the batch, I recommend lowering the oven temp to 325°F and baking for 40 minutes. This prevents the edges from burning while the middle is still trying to set.
| Original Ingredient | Substitute | Why It Works |
|---|---|---|
| Honey (2 tbsp) | Maple Syrup (2 tbsp) | Similar viscosity. Note: Adds a slightly woody, autumnal flavor profile. |
| Peanut Butter (1 cup) | SunButter (1 cup) | Nut free alternative. Note: Reacts with baking soda (if added) to turn green but safe! |
| Chia Seeds (2 tbsp) | Flax Meal (2 tbsp) | Similar binding power. Note: Adds a heartier, more "earthy" grain flavor. |
Clearing Up Healthy Baking Myths
One common misconception is that you need an "egg replacer" or a chemical leavener like baking powder to make these bars. You don't! The bananas provide enough moisture and structure on their own. Searing or cooking the bananas beforehand also doesn't "lock in" sugar; it just changes the flavor profile.
The real magic happens in the oven as the fruit sugars caramelize.
Another myth is that "healthy" means "low-fat." In this recipe, the fat from the peanut butter is actually what makes the snack healthy it keeps your blood sugar stable. Without that fat, the oats and bananas would cause a quick spike and an even quicker crash.
Trust the peanut butter; it is doing the heavy lifting here!
Keeping Your Bars Fresh and Tasty
Because these bars have such a high moisture content from the bananas, they shouldn't sit on the counter for more than a day or two, especially in humid weather. They are essentially a "fresh" product.
- Fridge Storage: Once cooled and sliced, place them in an airtight container with layers of parchment paper between them. They stay perfect for up to 7 days. I actually think they taste even better on day two!
- Freezer Life: Wrap individual bars in plastic wrap and store them in a freezer bag. They will last for 3 months. To eat, just pull one out the night before or pop it in the microwave for 20 seconds.
- Zero Waste Tip: Don't throw away those banana peels! You can soak them in water for 24 hours to create a nutrient rich "tea" for your houseplants. Also, if you have leftover "crumbles" at the bottom of the pan after slicing, save them! They make an incredible topping for Greek yogurt or a bowl of warm oatmeal the next day.
Best Morning Pairings for Energy
These bars are quite dense, so they pair beautifully with something hydrating. Since I’m all about that "speedy morning" life, I usually grab one of these alongside a tall glass of cold brew or a quick green smoothie. The bitterness of coffee cuts through the richness of the peanut butter perfectly.
If you have an extra two minutes, try spreading a little extra Greek yogurt on top of a bar for a "frosting" effect that adds a punch of protein. You could even crumble a bar over a bowl of fresh berries for a deconstructed breakfast crisp.
However you choose to eat them, you’re getting a balanced start that actually tastes like you’re eating a treat. Let’s get baking and reclaim our morning energy!

Recipe FAQs
Can I make these bars without peanut butter?
Yes, you can substitute. Almond butter, cashew butter, or sunflower seed butter are excellent alternatives that provide healthy fats and binding properties, similar to the function of peanut butter in maintaining the bar's structure.
What's the best type of oats to use?
Use old-fashioned rolled oats. They provide the ideal texture, holding their shape while softening just enough to create a satisfying chewiness that is crucial for the bar's density.
How do I prevent the bars from being too crumbly?
Ensure enough moisture and proper pressing. Overripe bananas are key binders; if yours aren't very moist, mash them thoroughly. Press the mixture firmly into the pan to create a cohesive block before baking.
Can I freeze these bars?
Yes, they freeze beautifully. Wrap individual cooled bars tightly and store them in an airtight container for up to 3 months, making them a convenient grab and-go snack.
Why are my bars too mushy in the middle?
Likely due to banana size or underbaking. If your bananas were particularly large or juicy, consider adding an extra tablespoon or two of oats. Also, ensure the center feels firm to the touch before removing from the oven.
Can I use unripe bananas?
No, stick with overripe bananas. Unripe bananas are starchy and lack the natural sugars needed for sweetness and the moisture required for binding the oats and creating a dense, chewy texture.
How long do these bars last when stored?
Up to 7 days in the refrigerator. Store them in an airtight container with parchment paper between layers to prevent sticking. They often taste even better on the second day!
Energizing Banana Oatmeal Bar

Ingredients:
Instructions:
Nutrition Facts:
| Calories | 254 kcal |
|---|---|
| Protein | 8.5 g |
| Fat | 13.5 g |
| Carbs | 28.4 g |
| Fiber | 4.7 g |
| Sugar | 7.4 g |
| Sodium | 104 mg |
