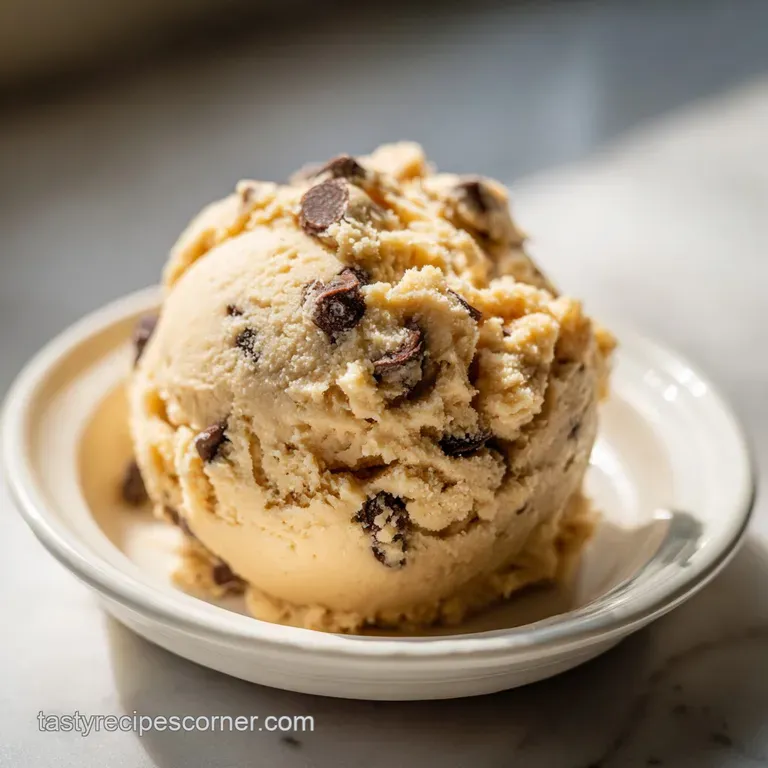
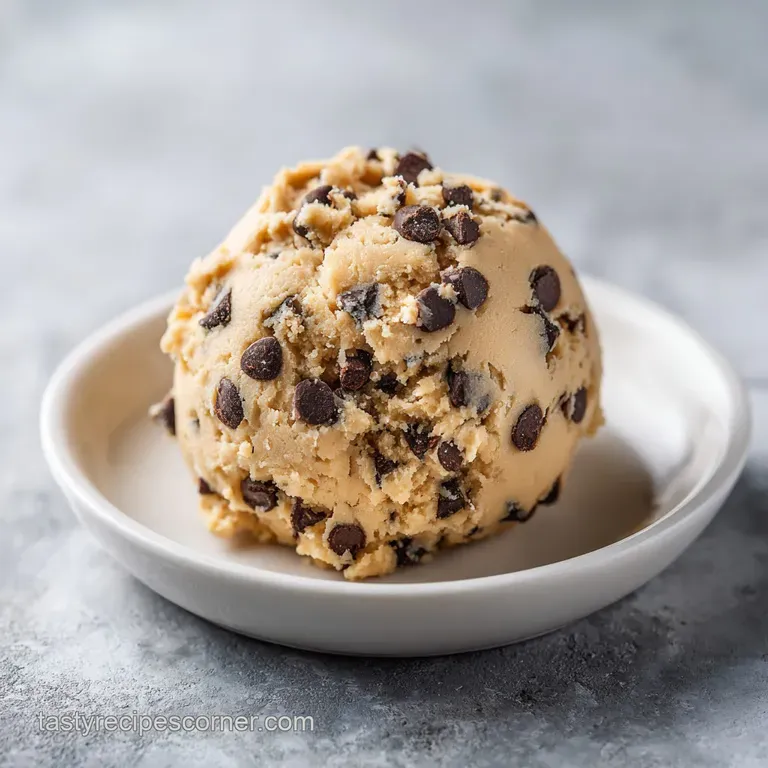
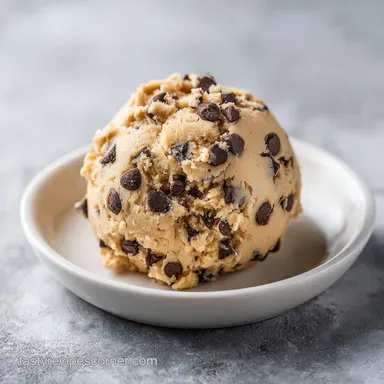
Dough Edible Cookie Dough Recipe
- Time: Active 5 mins, Passive 5 mins, Total 10 mins
- Flavor/Texture Hook: Buttery, brown sugar-rich dough with a melt in-the mouth finish
- Perfect for: Movie nights, quick cravings, or as a sophisticated dessert base
- Mastering the Best Dough Edible Cookie Dough
- The Physics of the Toasted Grain
- Timing and Yield for Cookie Dough
- Selecting Ingredients for Better Cookie Dough
- Essential Tools for Smooth Cookie Dough
- Steps for Perfect Edible Cookie Dough
- Fixing Your Edible Cookie Dough Texture
- Flavor Variations for Edible Cookie Dough
- Storing Your Edible Cookie Dough Safely
- Plating Your Dough for Every Occasion
- Recipe FAQs
- 📝 Recipe Card
Mastering the Best Dough Edible Cookie Dough
Have you ever stood in the kitchen, spoon in hand, debating if that single bite of raw dough is worth the stomach ache? We've all been there. It starts with the aroma of vanilla hitting the air as you cream the butter, and suddenly, the actual "baked" cookie feels like an afterthought.
I remember my grandmother gently slapping my hand away from the bowl, warning me about "tummy troubles" from the raw flour. It felt like a culinary tragedy.
But what if we could bypass the risk and keep the reward? That’s exactly what this dough edible cookie dough is all about. It’s not just a compromise; it’s a refined version of that childhood indulgence.
We’re stripping away the eggs and treating the flour with heat to make it entirely safe, while focusing on a texture that is silky rather than gritty.
Right then, let's get into why this works. We aren't just mixing ingredients; we're creating a stable emulsion that mimics the richness of a standard dough without the structural need for baking. You'll find that once you learn how to handle the flour properly, you'll never look back at those store-bought tubs again.
The Physics of the Toasted Grain
Understanding the "why" behind your dough edible cookie dough changes everything. It’s the difference between a chalky mess and a velvety treat.
- Thermal Neutralization: Heating the flour to 74°C (165°F) doesn't just kill bacteria; it denatures the proteins slightly, which helps eliminate that "raw" cereal taste that often ruins homemade versions.
- Hygroscopic Balance: The light brown sugar contains molasses, which pulls moisture from the air, ensuring the dough stays moist and chewy rather than drying out into a crumbly pile.
- Fat Emulsification: By creaming the butter at exactly 18°C (65°F), we create tiny air pockets that carry the vanilla and salt flavors across your palate more effectively.
| Level | Effort | Visual Cue | Best For |
|---|---|---|---|
| Simple | Low | Soft, rustic mounds | Late night solo snacking |
| Polished | Medium | Uniform, rounded scoops | Casual weekend get togethers |
| Restaurant | High | Cocoa dusted truffles | Elegant dinner parties |
Choosing the right presentation level depends on your mood, but the base recipe remains the same. If you are looking for something even faster, you might want to see my How To Make recipe for a 12 minute version.
Timing and Yield for Cookie Dough
To get the most out of your dough, precision is key. This isn't a recipe where you want to "wing it" with the measurements, especially when it comes to the temperature of your ingredients.
| Metric | Checkpoint | Visual/Sensory Cue |
|---|---|---|
| Flour Temperature | 74°C | Flour smells slightly nutty |
| Butter Texture | 18°C | Thumb leaves a clean indent |
| Chill Time | 20 mins | Dough holds a firm shape |
Unlike a traditional bake, we aren't worried about leavening, but we are worried about the "mouthfeel." If the flour is too hot when you add the butter, it will melt and turn your dough into a greasy puddle. If it's too cold, it won't incorporate the sugars properly.
| Feature | Fresh Homemade | store-bought Tub |
|---|---|---|
| Flavor | Deep butter and vanilla | Often artificial or overly sugary |
| Texture | Velvety and customizable | Can be stiff or waxy |
| Safety | Controlled heat treatment | Industrial pasteurization |
Selecting Ingredients for Better Cookie Dough
The beauty of this dough edible cookie dough lies in its simplicity. Since we aren't baking it, the quality of each component is front and center.
- 160g All Purpose FlourWhy this? Provides the essential structure and body for the dough.
- 113g Unsalted ButterWhy this? The fat source that delivers flavor and a silky mouthfeel.
- 100g Light Brown SugarWhy this? Adds moisture and a deep caramel like sweetness.
- 50g Granulated White SugarWhy this? Provides a slight crunch and balances the molasses flavor.
- 30ml Whole MilkWhy this? Replaces the liquid lost by removing the eggs.
- 5ml Pure Vanilla ExtractWhy this? The primary aromatic that makes it taste like "real" cookies.
- 1.5g Fine Sea SaltWhy this? Sharpens the sweetness and prevents the dough from being cloying.
- 90g Mini Semi Sweet Chocolate ChipsWhy this? Mini chips ensure chocolate in every single bite.
| Ingredient | Science Role | Pro Secret |
|---|---|---|
| Butter | Fat Emulsifier | Use European style butter for higher fat content |
| Brown Sugar | Moisture Retainer | Pack it tightly to ensure accurate volume |
| Sea Salt | Flavor Enhancer | Use fine salt so it dissolves instantly |
For the best results, use a high-quality vanilla. Since there is no heat to cook off the alcohol, you will really taste the difference between imitation and the real deal.
| Original Ingredient | Substitute | Why It Works |
|---|---|---|
| Unsalted Butter | Coconut Oil (Refined) | Stays solid at room temp; Note: Subtle coconut scent. |
| Whole Milk | Oat Milk | High fat content maintains the creamy texture. |
| Brown Sugar | Coconut Sugar | Similar moisture profile; adds a deeper earthy tone. |
Essential Tools for Smooth Cookie Dough
You don't need a professional kitchen, but a few specific tools will make this process much smoother. I once tried to cream butter with a fork because I was too lazy to wash the mixer, and trust me, your forearm will regret it.
1. The Heat Source
A simple baking sheet is all you need to heat treat the flour. You could use a microwave, but the oven provides a more even "toast." A digital thermometer is your best friend here to ensure you hit that 74°C mark.
2. The Mixing Station
A stand mixer is great, but a hand mixer is often easier for this smaller batch. It gives you more control over the "creaming" phase, where we want to whip the butter and sugar until they're pale and fluffy.
3. The Finishing Kit
Spatulas are non negotiable. You want a flexible silicone one to scrape every bit of that buttery goodness from the sides of the bowl. Also, a small cookie scoop (about 1 tablespoon size) is the secret to those "polished" plating levels we discussed.
Steps for Perfect Edible Cookie Dough
Follow these steps closely to ensure your dough edible cookie dough has the right texture and safety standards.
- Spread the 160g of flour onto a baking sheet.
- Bake at 180°C (350°F) for 5-7 mins until the flour reaches 74°C and smells toasted. Note: This kills any lingering bacteria.
- Sift the warm flour into a bowl. Note: This removes any clumps caused by the heat.
- Beat the 113g butter and both sugars in a large bowl. Cook 3 mins until the mixture is pale and light.
- Add the 5ml vanilla, 1.5g salt, and 30ml milk. Mix until the liquid is fully incorporated and smooth.
- Fold in the sifted (and cooled!) flour slowly. Stir until no white streaks remain. Note: Don't overmix, or the dough can become gummy.
- Pour in the 90g mini chocolate chips. Fold gently so they stay intact.
- Chill the dough in the fridge for at least 20 mins until firm enough to scoop.
Chef's Tip: If you find the dough is too stiff after chilling, let it sit on the counter for 5 mins or add 1 teaspoon of milk to loosen it up.
If you enjoy the process of making dough, you'll love my Chocolate Chunk Cookies recipe which uses a similar browning technique for the butter.
Fixing Your Edible Cookie Dough Texture
Even simple recipes can hit a snag. The most common issue with this recipe is usually related to the temperature of the flour or butter.
Why Your Dough is Gritty
If you feel the sugar crystals when you eat the dough, it means they didn't dissolve into the butter. This happens if the butter was too cold or you didn't beat it long enough.
Why Your Dough is Greasy
If there’s a film of oil on your spoon, your flour was likely too hot when you mixed it in. This melts the butter's fat structure. It’s still safe to eat, but the texture will be heavy rather than fluffy.
| Problem | Root Cause | Solution |
|---|---|---|
| Crumbly dough | Not enough liquid | Add milk 1 tsp at a time |
| Floury taste | Under heated flour | Ensure flour hits 74°C |
| Sticky mess | Too much milk | Add 1 tbsp toasted flour |
Common Mistakes Checklist:
- ✓ Always sift the flour after heating (it clumps up in the oven!)
- ✓ Let the flour cool completely before adding it to the butter
- ✓ Use a kitchen scale for the flour; 160g is easy to overshoot with a cup
- ✓ Don't skip the salt - it's the bridge between "sweet" and "complex"
Flavor Variations for Edible Cookie Dough
Once you've mastered the base, you can start playing with the profile. This dough is a blank canvas for your pantry.
1. Healthy Edible Cookie Dough Twist
If you're looking for something with a bit more substance, you can swap half the all purpose flour for oat flour (also heat treated!) and use dark chocolate chunks. It adds a nutty dimension that is surprisingly satisfying.
2. The Dark and Salty Variation
Substitute the mini chips for high-quality dark chocolate (70% cocoa) and add a pinch of flaky Maldon salt on top right before serving. It cuts through the sugar and makes it feel very sophisticated.
3. Peanut Butter Power Up
Replace 30g of the butter with 30g of smooth peanut butter. You'll get a dense, protein rich dough that tastes exactly like a peanut butter cup.
Decision Shortcut: If you want a classic snack, stick to the recipe as written. If you want to make truffles, chill the dough for 1 hour before rolling. If you want a dessert dip, increase the milk to 45ml for a softer consistency.
Storing Your Edible Cookie Dough Safely
Because we've removed the eggs and treated the flour, this dough actually lasts quite well. However, it is a high fat dairy product, so treat it with care.
Storage: Keep the dough in an airtight container in the fridge for up to 5 days. The flavors actually deepen after 24 hours as the sugar and vanilla meld together.
Freezing: You can freeze this dough for up to 3 months. I like to scoop it into individual balls and freeze them on a tray first, then toss them into a freezer bag. It’s the ultimate "emergency snack."
Zero Waste Tip: If you have leftover dough that’s getting a bit dry, crumble it over vanilla bean ice cream or fold it into brownie batter before baking. The heat treated flour means it won't ruin the texture of your other bakes.
Plating Your Dough for Every Occasion
To truly impress your guests, move beyond the bowl. Since this is a "presentation" focused recipe, let's look at how to make it look as good as it tastes.
The Simple Level
Serve a generous scoop in a small glass ramekin. Dust the top with a tiny bit of extra sea salt. It’s honest, rustic, and focuses purely on the flavor.
The Polished Level
Use a small cookie scoop to create perfect spheres. Place three spheres in a shallow bowl and drizzle with a little bit of melted chocolate. It looks intentional and professional.
The Restaurant Level
Roll the chilled dough into small truffles and roll them in unsweetened cocoa powder or crushed toasted hazelnuts. Serve them on a slate board with a sprig of mint and a few fresh raspberries.
| Style | Finishing Touch | Aesthetic |
|---|---|---|
| Simple | Extra mini chips | Homey/Rustic |
| Polished | Caramel drizzle | Trendy Cafe |
| Restaurant | Gold leaf or Salt flakes | Fine Dining |
Whatever way you choose to serve it, the most important thing is that it’s safe, delicious, and exactly what you were craving. Enjoy every buttery bite!

Recipe FAQs
Is it safe to eat cookie dough that hasn't been heat treated?
No, consuming untreated dough is unsafe. Raw flour can contain E. coli, and raw eggs carry Salmonella risk, which this recipe eliminates through heat treatment.
What temperature must the flour reach to be considered safe?
Heat the flour to exactly 74°C (165°F). This temperature is necessary to denature any potential pathogens in the grain, making it safe for raw consumption.
How to achieve a smooth, non-gritty texture in the dough?
Cream the butter and sugars thoroughly until pale and fluffy. This process incorporates air and allows the sugar crystals to partially dissolve before the flour is added, mimicking the aeration step in our Peanut Butter Blossoms recipe.
Can I substitute the milk with water for a lower fat version?
No, milk is strongly recommended for texture. Water will not provide the necessary fat content, leading to a dough that tastes dull and has a crumbly texture, unlike the richness of our 7Ingredient Christmas Butter recipe.
What is the best way to store leftover edible cookie dough?
Store it airtight in the refrigerator for up to 5 days. Ensure the container is sealed well to prevent the butter from absorbing any refrigerator odors.
Why did my dough turn out too oily or greasy after mixing?
The flour was likely too hot when you mixed it in. If the heat treated flour is added while still warm, it melts the creamed butter structure, resulting in an overly greasy final product.
How do I make this dough vegan friendly?
Swap butter for a solid coconut oil and use a plant based milk. Ensure you chill the coconut oil slightly before creaming so it holds its structure, similar to how you manage fat ratios in pastry work.
Dough Edible Cookie Dough
Ingredients:
Instructions:
Nutrition Facts:
| Calories | 607 kcal |
|---|---|
| Protein | 5.3 g |
| Fat | 29.8 g |
| Carbs | 82.3 g |
| Fiber | 2.4 g |
| Sugar | 50.1 g |
| Sodium | 145 mg |
