Coconut Pie with Cream of Coconut: the Ultimate Rich, Silky Custard
- Unveiling The Tropical 'Crème de la Crème' Coconut Pie
- The Science of Silky Texture: Why Cream of Coconut is Key
- Essential Components for the Coconut Pie with Cream of Coconut
- Detailed Step-by-Step Guide to Making the Silky Coconut Pie
- Troubleshooting and Expert Tips for Your Cream of Coconut Pie
- Practical Guide: Storage, Shelf Life, and Freezing This Dessert
- Perfect Pairings and Presentation for the Tropical Coconut Pie
- Recipe FAQs
- 📝 Recipe Card
Unveiling The Tropical 'Crème de la Crème' Coconut Pie
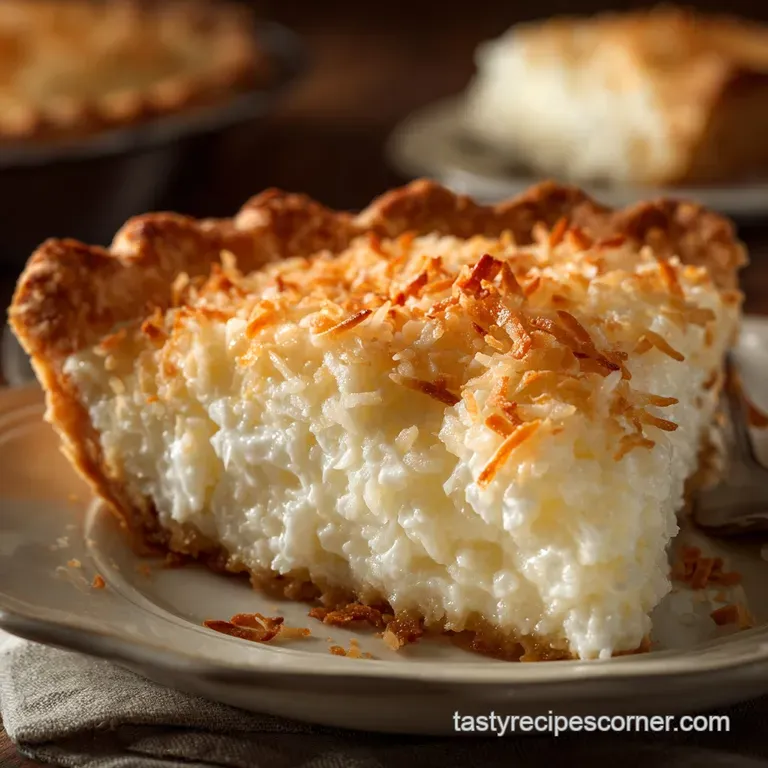
Have you ever opened your oven door and been immediately transported to a white sand beach? That’s exactly what happens when you bake this Coconut Pie with Cream of Coconut . The aroma is ridiculously addictive warm, vanilla laced, and intensely tropical. The filling itself?
Forget thin, watery custards; this pie is pure, satiny luxury that melts the second it hits your tongue.
Look, I’m obsessed with dessert, but I’m often too lazy for anything that requires three days of prep. This recipe is your tropical lifesaver because it’s fast on the hands-on time and uses one powerhouse secret weapon ingredient that does all the heavy lifting.
You get maximum flavour impact for minimal fuss, making it perfect for those unexpected Sunday dinner guests.
So, ditch that dusty old recipe that calls for powdered mixes and let’s make a rich coconut cream pie that tastes genuinely homemade. We’re aiming for elegant simplicity and intense, sweet coconut flavour here. Trust me, once you taste this filling, you will never go back.
The Science of Silky Texture: Why Cream of Coconut is Key
What Sets This Coconut Pie Recipe Apart? (Hint: It’s the Elixir)
Most traditional coconut pies rely on sweetened condensed milk or standard full fat coconut milk, which often results in a texture that is either too sticky or too loose. We are using Cream of Coconut, that thick, intensely sweetened nectar usually reserved for Piña Coladas.
This ingredient is already stabilized, sweetened, and contains a higher concentration of coconut solids and natural emulsifiers, guaranteeing a filling that is impossibly silky, rich, and deeply flavoured. It’s what transforms this from a standard dessert into a truly decadent rich coconut cream pie.
Navigating the Recipe: Preparation Time and Difficulty Rating
The active cooking time here is surprisingly short, but you cannot skip the waiting game. Pastry needs chilling, and custard absolutely needs time to set up completely in the fridge. This easy coconut pie recipe is not difficult, but it requires patience and adherence to the cooling stages.
If you try to cut this pie warm, it will weep and spill everywhere; you must commit to the chill.
Achieving the Perfect Custard Set Without Overbaking
The secret lies in proper tempering and low-temperature baking. We temper the eggs slowly to prevent scrambling, and then we cook the custard gently on the stovetop until it’s thick enough to coat a spoon. The oven time is merely the final gentle push to set the filling completely.
Baking it too long will lead to a grainy texture, so keep that heat low and watch for the crucial "jiggle test" we’ll discuss later.
Balancing Sweetness: Taming the Intensity of the Coconut Base
Because Cream of Coconut is already heavily sweetened, we significantly reduce the amount of granulated sugar added to the custard base. This is crucial. A standard custard recipe might call for ½ cup or more, but we only use ¼ cup here to prevent an overwhelmingly sugary dessert.
If you prefer a less sweet dessert, try using unsweetened evaporated milk to provide an excellent counterbalance to the cream of coconut’s intensity.
The Importance of Resting Time and Temperature in Pie Setting
A warm custard is a liquid custard; a chilled custard is a sliceable, perfect pie. The egg proteins and cornstarch in the filling need several hours at refrigeration temperature to form the final stable structure. Seriously, bake this pie in the morning or, even better, the night before you plan to serve it.
This wait is essential for achieving the perfect slice.
Essential Components for the Coconut Pie with Cream of Coconut
The Cream of Coconut Deep Dive: Choosing the Best Brand
Look specifically for "Cream of Coconut" in a can or bottle, usually near cocktail mixers or international foods. Do not confuse this with Coconut Cream, which is unsweetened. I prefer the famous Coco López brand it has the perfect viscosity and flavour profile for this dessert.
Using a high-quality product is non-negotiable for this recipe to truly shine.
Pastry Perfection: Options for the Flaky Shortcrust Base
I advocate for a classic, buttery shortcrust pastry (pâte sucrée) because its slight sweetness pairs beautifully with the rich filling. However, blind baking a pastry can be tricky. If you need a shortcut, a ready-made, high-quality frozen pie shell works great.
Alternatively, a simple graham cracker or vanilla wafer crumb base also offers a fantastic, crisp texture that contrasts the creamy filling.
Sweeteners and Dairy: Handling Eggs and Sugar Ratios
We rely on three egg yolks and one whole egg for maximum richness and binding power. Always use room temperature eggs; they mix into the custard base more smoothly, reducing the chance of lumps. As mentioned, the added sugar is minimal, letting the coconut flavour take center stage.
For the dairy, evaporated milk provides excellent richness without adding excessive fat, making the filling lighter than if we used all heavy cream.
Emergency Substitutions for Specific Coconut Products
If you are missing a key ingredient, don't panic! Here are some tried and true swaps:
| Missing Ingredient | Viable Substitute | Notes on Texture/Flavor |
|---|---|---|
| Cream of Coconut | Coconut Cream + 3 Tbsp Extra Sugar | Filling will be less glossy; adjust vanilla to taste. |
| Evaporated Milk | Whole Milk or Half and Half | Whole milk works fine, but the custard might need a few extra minutes of cooking to thicken fully. |
| Cornstarch | All-Purpose Flour (Use 1 Tbsp More) | Flour requires slightly longer cooking time to activate and may result in a cloudier finish. |
| Pastry Dough | Vanilla Wafer or Graham Cracker Crust | Press crumbs and melted butter into the pan and bake for 10 minutes. Much faster! |
Detailed step-by-step Guide to Making the Silky Coconut Pie
Stage 1: Prepping and Blind Baking the Essential Pie Crust
Start cold, stay cold. This is my golden rule for pastry. Use icy cold butter cubes and just enough ice water to bring the dough together. Once mixed, handle it as little as possible. Wrap the disc tightly and chill it for at least an hour seriously, do not rush this part.
Roll the dough and fit it into your deep dish plate, then crimp those edges beautifully. Line the shell with parchment and pie weights (dried beans work too!) and blind bake at 375°F (190°C) for 15 minutes.
Remove the weights and bake for 8 10 more minutes until it’s lightly golden and dry. Cool it completely before filling.
Stage 2: Creating the Intense Cream of Coconut Filling Base
First, whisk your thickening agents: the egg yolks, whole egg, cornstarch, and sugar must be perfectly combined in a bowl. Now, gently heat the Cream of Coconut and evaporated milk in a saucepan until steam rises and it just begins to simmer. Do not let it boil fiercely.
Now comes the part where most people fail: Tempering. Slowly drizzle about a cup of the hot liquid into the egg mixture while whisking like crazy. This brings the eggs up to temperature gently. Once tempered, pour the entire egg mixture back into the saucepan.
Chef’s Note: Keep stirring this custard constantly over medium low heat. It will transform from thin milk to a thick, spoon coating pudding in about 5 to 7 minutes.
When it looks like thick soup, remove it from the heat and stir in your vanilla and the shredded coconut.
Stage 3: The Critical Baking Phase and Monitoring the Edges
Pour the warm filling directly into your pre-baked crust. Reduce the oven temperature significantly to 325°F (160°C). Lower, gentler heat prevents the eggs from setting too fast and curdling. Bake for 25 to 30 minutes.
You want the edges to look firmly set, almost rigid, while the very center about the size of a golf ball should still have a very slight, delicate wobble. Take it out immediately when it hits that point.
I learned this the hard way: I once overbaked a similar custard pie and the filling developed tiny air bubbles and tasted faintly rubbery. Never again!
Stage 4: Cooling and Achieving the Necessary Post Bake Chill
Place the hot pie on a wire rack and let it cool completely to room temperature, which usually takes about two hours. This step allows the steam to dissipate without trapping moisture, which would make the crust soggy.
After it’s fully cooled, cover it gently with plastic wrap (don't let the wrap touch the surface!) and transfer it to the fridge. Four hours is the bare minimum for setting, but overnight is the real magic. You need that deep chill to achieve the perfect, non-weeping slice.
Troubleshooting and Expert Tips for Your Cream of Coconut Pie
Preventing the Dreaded Soggy Bottom Syndrome
Soggy bottoms happen when the crust isn't fully set before the liquid filling goes in, or when the filling traps steam. Blind baking is non-negotiable —bake the crust until it is truly golden and dry, not just pale white. Also, don't pour steaming hot filling into a hot crust; let both components cool slightly before assembly. If I’m making a hearty meal beforehand, like my ultimate CattleRanch Casserole: The Ultimate Cheesy, Comfort Dinner Pie , I always prepare the crust the day before to ensure it’s rock hard and ready to fight moisture.
How to Tell When the Filling is Perfectly Set (The Jiggle Test)
Don't use a toothpick! You use the jiggle test. Gently tap the side of the pie plate with a wooden spoon. If the entire filling waves like a ripple in a pond, it needs more time. If only the exact center wiggles like firm gelatin, it’s done.
Remember, the residual heat will continue to set the center as it cools on the counter.
Rescuing a Split or Curdled Custard Filling
If you notice the filling has small white lumps (curdled egg) after heating on the stovetop, you can try this emergency fix: remove it immediately and blitz it quickly with an immersion blender. This can sometimes smooth out small splits, though you risk incorporating more air.
If it splits badly in the oven, you can't save the texture, but you can hide it with plenty of whipped cream and toasted coconut!
Practical Guide: Storage, Shelf Life, and Freezing This Dessert
Refrigeration vs. Countertop: Optimal Freshness Guidelines
Because this pie relies heavily on eggs and dairy, it must be stored in the refrigerator. Store any un-sliced pie, covered loosely (preferably in a dome or box), for up to 4 days. If the pie has already been topped with whipped cream, the shelf life reduces slightly to about 2 3 days, as the whipped cream may start weeping slightly.
Never leave this coconut custard pie with cream of coconut out at room temperature for more than two hours.
The Best Way to Freeze Slices for Future Indulgence
But does it freeze well? You bet, but only the baked pie without the whipped cream topping. Once the pie is fully chilled, cut it into individual serving slices. Wrap each slice tightly in plastic wrap, followed by a layer of aluminum foil, removing as much air as possible.
Label and date the slices; they’ll keep well for up to three months. This method is great if you want a little slice of tropical indulgence without making a whole pie.
Safely Thawing and Serving Frozen Pie
To thaw a frozen slice, transfer it directly from the freezer to the refrigerator the night before you want to eat it. Do not thaw it on the counter, as this can create too much condensation and make the crust soggy. Once thawed, you can whip up a fresh dollop of cream and toasted coconut right before serving.
It will taste practically as good as the day you baked it.
Perfect Pairings and Presentation for the Tropical Coconut Pie
This rich coconut cream pie demands an equally intense pairing. For a sophisticated meal, serve it after a sharp appetizer that provides contrast, like a rich, savory spread. It makes a beautiful follow-up to something robust, maybe even after indulging in a silky Chicken Liver Pâté: Silky Smooth Bistro Classic with Port Wine .
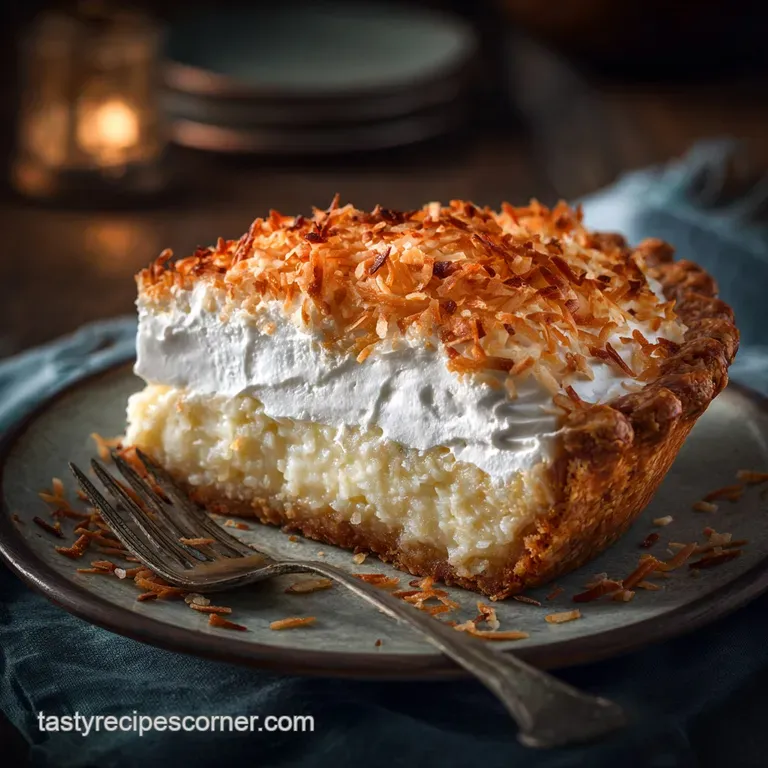
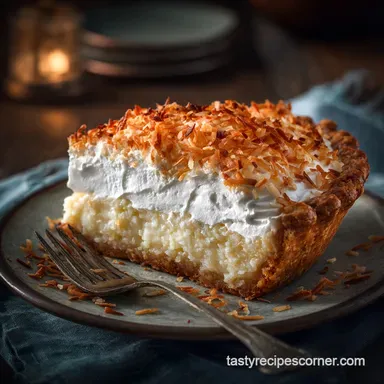
Garnish is everything here. Always top this pie with generous amounts of freshly whipped cream sweetened with a tiny bit of icing sugar and those crunchy, golden toasted coconut flakes. A dusting of fresh lime zest or a few delicate curls of white chocolate can really make the presentation pop. Enjoy!

Recipe FAQs
Why did my pie filling turn out grainy or rubbery instead of silky smooth?
This texture issue usually happens if the eggs or cornstarch were cooked too quickly or at too high a temperature, causing them to scramble or seize. Ensure you temper the eggs properly by gradually whisking in a small amount of the warm coconut mixture before adding the rest back to the saucepan.
Slow, even heating is key to a smooth custard.
Can I substitute standard coconut milk or sweetened condensed milk for the Cream of Coconut?
No, Cream of Coconut (often labeled as a cocktail mixer like Coco López) is essential for the specific richness, intensity, and high sugar content required for this pie. Standard coconut milk lacks the necessary viscosity and sweetness, resulting in a thin, watery filling that will not set correctly.
How long can I store this Coconut Pie, and does it need to be refrigerated?
Due to the high content of dairy and eggs in the filling, the pie must be stored in the refrigerator immediately after cooling. When properly covered, it will maintain its optimal quality and texture for 3 to 4 days.
My crust soaked up the filling and became soggy. How can I prevent a soggy bottom?
A soggy bottom is often caused by under baking the pastry or failing to seal it properly before adding the wet filling. Ensure you fully blind bake the pastry shell until it is golden brown and dry.
For extra insurance, brush the base of the hot, blind baked shell with a thin layer of egg white or melted butter to create a moisture barrier.
Can I use a graham cracker or vanilla wafer crust instead of the standard shortcrust pastry?
Yes, a crunchy, sweet graham cracker or vanilla wafer crust provides an excellent complementary texture and tropical flavor to the rich coconut filling. If substituting, ensure the prepared crumb crust is fully chilled or baked according to its recipe instructions before adding the custard mixture.
The Cream of Coconut makes the pie very rich. How can I balance the intense sweetness?
To cut through the richness and sweetness, incorporate a tablespoon of fresh lime or lemon juice into the custard mixture before baking. Serving the pie topped with a dollop of unsweetened whipped cream or fresh, tart berries like raspberries also provides a refreshing contrast.
Is it possible to freeze the finished Coconut Pie for later consumption?
While technically possible, freezing is generally not recommended for custard based pies, as the delicate structure can weep, separate, and become grainy upon thawing. If you must freeze it, wrap the cooled pie tightly in plastic wrap and then aluminum foil, and ensure it thaws slowly overnight in the refrigerator.
Cream Of Coconut Tropical Pie
Ingredients:
Instructions:
Nutrition Facts:
| Calories | 882 kcal |
|---|---|
| Protein | 18.6 g |
| Fat | 55.2 g |
| Carbs | 77.7 g |
