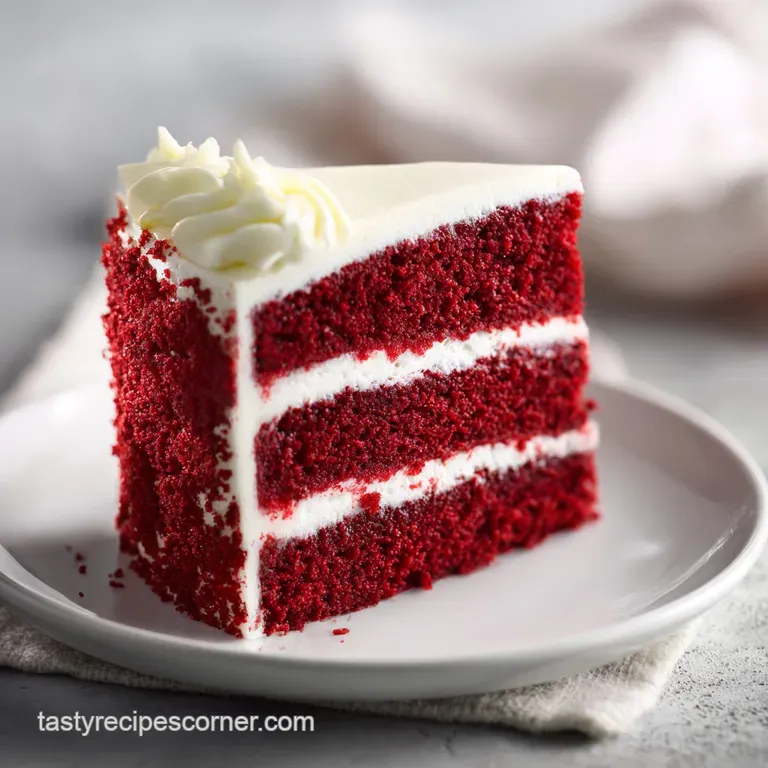
Classic Red Velvet Cake Recipe
- Time: Active 25 minutes, Passive 35 minutes, Total 1 hour
- Flavor/Texture Hook: Silky, tangy crumb with a buttery, rich cream cheese finish
- Perfect for: Elegant celebrations, dinner parties, or high end gifting
- Unlocking Science for a Velvety Crumb
- Detailed Technical Specifications for Success
- Component Analysis for Building Flavor
- Essential Tools for Professional Results
- Step-by-Step Guide for Flawless Assembly
- Fixing Texture and Appearance Issues
- Adapting the Bake for Dietary Needs
- Debunking Common Kitchen Myths
- Proper Storage for Lasting Freshness
- Elegant Presentation Styles to Wow Guests
- Recipe FAQs
- 📝 Recipe Card
Unlocking Science for a Velvety Crumb
The Acid Base Lift: The 5ml of white vinegar reacts instantly with the 5g of baking soda to create a rapid release of carbon dioxide, which provides a dramatic lift and a light, airy structure without needing a massive amount of eggs.
The Cocoa Bloom: While we only use 15g of cocoa powder, mixing it with the vegetable oil helps "bloom" the chocolate flavor, ensuring it permeates the entire batter without drying out the crumb like extra flour would.
Buttermilk Tenderness: The 240ml of buttermilk breaks down the long gluten strands in the 375g of cake flour, which is the secret behind that signature tender "shatter" when you take a bite.
Fat Emulsification: Using 360ml of vegetable oil instead of butter ensures the cake stays moist even when refrigerated, as oil remains liquid at colder temperatures while butter solidifies.
| Method | Time | Texture | Best For |
|---|---|---|---|
| Standard Oven | 35 minutes | Uniform, fluffy, and light | Traditional layered cakes |
| Stovetop (Steam) | 50 minutes | Extremely dense and fudgy | Small batches or humid climates |
| Convection Oven | 28 minutes | Crispy edges with soft center | Quick bakes for single layers |
The choice of method really depends on the final vibe you want. While the oven is my go to for that classic height, steaming the layers on a stovetop can actually result in a moisture level that is almost like a pudding.
But for this cake red cake, we want the structure that only a 180°C (350°F) oven can provide.
Detailed Technical Specifications for Success
When we talk about "achievable elegance," it comes down to three specific checkpoints. If you hit these numbers, your cake will be a success every single time. First, ensure your internal cake temperature reaches 98°C. This is the sweet spot where the crumb is set but hasn't begun to dry out.
Second, the weight of your cake flour is vital. We use 375g because even a 10g difference can turn "velvet" into "cardboard." Third, keep your cream cheese at exactly 20°C before whipping. If it's too cold, you'll get lumps; too warm, and it will slide right off the layers.
| Component | Science Role | Pro Secret |
|---|---|---|
| Cake Flour | Low protein content | Sift it three times to incorporate air for a lighter rise |
| Vegetable Oil | Moisture retention | Use a neutral oil like grapeseed to let the vanilla shine |
| Red Food Dye | Visual identity | Add it to the liquid ingredients first to ensure even color |
| Buttermilk | Gluten softener | If out, use whole milk with a squeeze of lemon sat for 10 mins |
Component Analysis for Building Flavor
Getting the ingredients right is half the battle. For this cake red cake, we aren't just tossing things in a bowl; we're selecting elements that play off each other to create a balanced flavor profile.
- 375g cake flour: Why this? Lower protein prevents toughness. (Sub: All purpose flour minus 2 tbsp per cup, replaced with cornstarch)
- 400g granulated sugar: Why this? Provides sweetness and structural stability. (Sub: Caster sugar)
- 15g unsweetened cocoa powder: Why this? Adds depth without overpowering the red. (Sub: Dutch processed cocoa)
- 5g baking soda: Why this? Reacts with acid for lift. (Sub: 15g baking powder, but skip the vinegar)
- 3g salt: Why this? Sharpens all other flavors. (Sub: Sea salt)
- 240ml buttermilk: Why this? The essential tangy tenderizer. (Sub: Plain yogurt thinned with milk)
- 360ml vegetable oil: Why this? Guaranteed moistness at any temp. (Sub: Melted coconut oil)
- 2 large eggs: Why this? Binds the fats and liquids. (Sub: Applesauce for a denser crumb)
- 5ml white distilled vinegar: Why this? Activates the soda and brightens color. (Sub: Apple cider vinegar)
- 10ml vanilla extract: Why this? The aromatic backbone of the bake. (Sub: Vanilla bean paste)
- 30ml red food coloring: Why this? For that iconic visual punch. (Sub: Beet powder for a muted, natural red)
- 450g full fat cream cheese: Why this? The classic tangy frosting base. (Sub: Mascarpone for a richer, less tangy finish)
- 115g unsalted butter: Why this? Provides structure to the frosting. (Sub: Salted butter, but omit the extra salt)
- 500g powdered sugar: Why this? Sweetens and thickens the icing. (Sub: Erythritol powder for lower sugar)
- 15ml heavy cream: Why this? Thins the frosting to a spreadable silk. (Sub: Whole milk)
For another decadent treat that uses a similar moisture rich base, you might want to try my German Chocolate Cake recipe. It’s a great way to see how different fats affect the final crumb.
Essential Tools for Professional Results
You don't need a professional laboratory, but a few specific tools will make your life much easier. I always use a stand mixer for the frosting because getting 450g of cream cheese to a velvety consistency by hand is a workout nobody needs.
- Two 9 inch round cake pans: Essential for those beautiful layers.
- Fine mesh sifter: For the flour and the 500g of powdered sugar.
- Offset spatula: This is the only way to get those smooth, bakery style sides.
- Kitchen scale: Measuring by weight (grams) is non negotiable for baking.
- Parchment paper: To ensure your layers don't stick and tear.
Chef's Tip: Freeze your mixing bowl and whisk attachment for 10 minutes before making the frosting. The cold metal helps the heavy cream and butter emulsify into a much more stable, airy cloud.
step-by-step Guide for Flawless Assembly

Phase 1: Preparing the "Velvet" Base
- Preheat your oven to 180°C and grease two 9 inch pans. Note: Using room temperature pans prevents the batter from shocking.
- Sift the 375g cake flour, 400g sugar, 15g cocoa, 5g soda, and 3g salt into a large bowl.
- Whisk until the dry ingredients are a uniform, pale sandy color.
Phase 2: Folding and Baking
- In a separate jug, whisk together the 360ml oil, 240ml buttermilk, 2 eggs, 30ml food dye, 10ml vanilla, and 5ml vinegar.
- Slowly pour the wet mixture into the dry, folding gently until no white streaks remain. Note: Over mixing here will make the cake tough.
- Divide the batter equally between the pans and bake for 35 minutes until a toothpick comes out clean.
- Let the cakes cool in the pans for 10 minutes, then move to a wire rack to cool completely.
Phase 3: Mastering the Frosting
- Beat the 450g cream cheese and 115g butter until smooth and pale.
- Gradually add the 500g powdered sugar and 5ml vanilla, then splash in the 15ml heavy cream.
- Whip on high for 2 minutes until it looks like a thick, silky cloud.
Phase 4: Assembly and Decoration
- Level the cooled cakes by slicing off the domed tops with a serrated knife.
- Place one layer down, cover with a thick layer of frosting, and top with the second layer.
- Apply a thin "crumb coat" of frosting, chill for 20 minutes, then finish with the remaining frosting.
Fixing Texture and Appearance Issues
Why Your Cake Red Cake is Dry
A dry cake is usually the result of over baking or over measuring the flour. If you aren't using a scale, you're likely packing too much flour into your measuring cup. Also, check your oven temperature with a separate thermometer; many ovens run hot, which "shatters" the delicate moisture balance.
Why Your Frosting is Runny
If your 450g of cream cheese was too warm or you used the "spreadable" kind from a tub, your frosting will lose its structure. It needs to be the block style, full fat version. If it's already runny, don't keep beating it; pop it in the fridge for 30 minutes to firm up the fats.
| Problem | Root Cause | Solution |
|---|---|---|
| Cake is brown | Too much cocoa or old soda | Stick to 15g cocoa and fresh baking soda |
| Layers are sunken | Under baked or opened oven too early | Keep the door shut until the 30 minute mark |
| Frosting is lumpy | Cold butter or cream cheese | Ensure both are exactly at room temperature |
Common Mistakes Checklist
- ✓ Never skip sifting the cake flour; it’s the key to the "velvet" texture.
- ✓ Don't substitute the buttermilk with regular milk unless you add acid.
- ✓ Always use room temperature eggs to ensure they emulsify with the oil.
- ✓ Let the cakes cool 100% before frosting, or the cream cheese will melt.
- ✓ Use gel food coloring if you want an even deeper, more intense red.
If you enjoy the process of building layered bakes, you should also check out my Yule Log Cake recipe. It uses a similar focus on texture but with a fun rolling technique.
Adapting the Bake for Dietary Needs
Scaling this recipe is fairly straightforward because it relies on oil rather than a creamed butter base. If you want to make a smaller 6 inch cake, simply halve all the ingredients. For the 2 eggs, beat one in a small bowl and use half of it by weight (about 25g).
Reduce the baking time by about 8 minutes, but keep the temperature at 180°C.
If you’re doubling the recipe for a massive party, don’t double the salt or spices exactly; use 1.5x the salt (about 4.5g) to avoid an overly savory note. You’ll also want to work in batches to ensure the baking soda doesn't lose its fizz while the first set of cakes is in the oven.
| Servings | Ingredient Adjustments | Pan Size | Cook Time |
|---|---|---|---|
| 6 People | Half all ingredients | One 8 inch pan | 30 minutes |
| 12 People | Standard recipe | Two 9 inch pans | 35 minutes |
| 24 People | Double all ingredients | Four 9 inch pans | 35-40 minutes |
Debunking Common Kitchen Myths
One big myth is that the red color comes purely from the cocoa. In the old days, non alkalized cocoa would react with vinegar to turn a reddish brown. Modern cocoa is usually Dutch processed, which means it won't change color. That’s why we need the 30ml of food coloring to get that iconic look.
Another misconception is that more mixing equals a fluffier cake. In reality, the more you mix that 375g of flour, the more gluten you develop. Gluten is great for bread, but it’s the enemy of velvet. Stop mixing the moment the flour disappears.
Proper Storage for Lasting Freshness
Because of the 450g of cream cheese in the frosting, this cake must be kept in the fridge. It will stay perfectly moist for up to 5 days if kept in an airtight container. If you have leftovers, I like to press a piece of plastic wrap directly against the sliced surface of the cake to prevent the fridge air from drying it out.
For long term storage, you can freeze the unfrosted layers for up to 3 months. Wrap them twice in plastic wrap and once in foil. To thaw, leave them in the fridge overnight. For zero waste, take any cake scraps from leveling the tops, crumble them up, and use them as a decorative "red dust" over the white frosting.
Elegant Presentation Styles to Wow Guests
Plating is where you can really let the "achievable elegance" shine. You can go from a simple family bake to a five star dessert with just a few small tweaks.
Simple Level
Just spread the frosting over the top and sides. Don't worry about it being perfectly smooth; a rustic, swirled look with the back of a spoon is charming and hides imperfections.
Polished Level
Use an offset spatula to get crisp, straight sides. Take those crumbs you saved from leveling the layers and press them into the bottom third of the cake. It creates a beautiful "ombre" effect from red to white.
Restaurant Level
Place a single slice on a white plate. Add three small dots of the cream cheese frosting using a piping bag. Place a fresh raspberry on each dot and sprinkle a tiny amount of the 15g cocoa powder through a stencil for a professional finish.
| Plating Level | Main Focus | Sensory Experience |
|---|---|---|
| Simple | Flavor first swirled icing | Homestyle, cozy, and inviting |
| Polished | Clean lines and crumb border | Bakery quality and sharp |
| Restaurant | Negative space and garnish | High end, sophisticated, and light |
If you're looking for a shorter shortcut for a party, you might like my Chocolate Chip Cookie recipe, which uses a cake mix base but still delivers that big "wow" factor. But for the purists, nothing beats the scratch made cake red cake we just built together.
Right then, you're ready to bake! Remember to keep your ingredients at room temp, don't over mix that flour, and enjoy that first velvety bite. You've got this!

Recipe FAQs
What kind of cake is red?
Red Velvet Cake is the primary cake defined by its red hue. It traditionally gets its color from the reaction between acidic buttermilk and non-Dutched cocoa, though modern recipes rely heavily on red food dye for the iconic shade.
What is the unhealthiest cake?
It is hard to definitively label one cake as the unhealthiest; it depends on frosting to fat ratio. However, this cake red cake is high in sugar (from the 400g sugar and 500g powdered sugar) and fat (from the oil and cream cheese frosting).
Is red velvet cake the same as chocolate cake with red dye?
No, they are chemically different, though the color hides the subtlety. Red velvet cake uses buttermilk and vinegar to create a tangy flavor and tender crumb, which is distinct from a standard chocolate cake base.
What does a red cake symbolize?
Historically, red shades in food often symbolized luxury, celebration, and romance. The deep color is visually striking, making the cake red cake a traditional choice for Valentine's Day or high end holiday gatherings.
Why is my red cake crumb dry even though I used oil?
No, dry crumb is usually caused by inaccurate flour measurement or over baking. If you enjoyed the technical precision required for a perfect crumb here, you can apply the same temperature focus to our Italian Cream Cake recipe for equally moist results.
How to stop the red food dye from fading during baking?
Add the liquid food coloring directly to the wet ingredients, particularly the buttermilk. The acid in the buttermilk helps set the dye, preventing it from dulling when exposed to the oven's heat.
Can I substitute the buttermilk in this recipe?
Yes, you can substitute buttermilk by adding an acid to whole milk. Mix 240ml of whole milk with 5ml of white vinegar, let it sit for 10 minutes until it slightly curdles, then use it in place of the buttermilk.
Classic Red Velvet Cake

Ingredients:
Instructions:
Nutrition Facts:
| Calories | 867 kcal |
|---|---|
| Protein | 6.3g |
| Fat | 49.4g |
| Carbs | 100.1g |
| Fiber | 0.8g |
| Sugar | 75.2g |
| Sodium | 337mg |
