Peanut Butter Balls Dipped in Chocolate
- Time: Active 25 minutes, Passive 45 minutes, Total 1 hour 10 mins
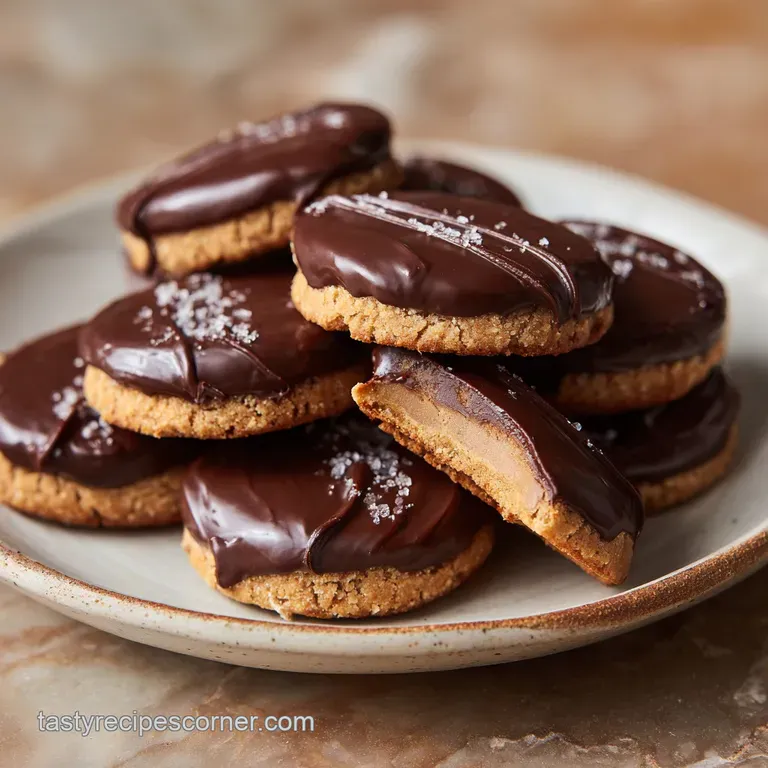
- Flavor/Texture Hook: Velvety roasted peanut center with a dark chocolate shatter
- Perfect for: Holiday gift boxes, elegant dinner parties, or high end meal prep snacks
- The Science Governing Truly Velvety Peanut Butter Balls
- Precise Measurements for Professional Grade Results
- Selecting the Finest Elements for Your Confection
- Tools for Crafting Professional Level Sweets
- Mastering the Art of the Hand Rolled Sphere
- Troubleshooting Texture and Coating Challenges
- Creative Variations and Dietary Customizations
- Preservation Secrets and Zero Waste
- Elegant Finishing Touches for Social Hosting
- Recipe FAQs
- 📝 Recipe Card
The Science Governing Truly Velvety Peanut Butter Balls
I still remember the first time I tried to make these for a holiday party. I was rushing, using a cheap brand of oily peanut butter, and I didn't bother sifting my sugar. The result? A grainy, greasy mess that looked more like sad mud than an elegant dessert.
I was so embarrassed that I hid the tray behind a stack of napkins and hoped nobody would notice. But that failure sent me down a rabbit hole of testing ratios until I found the sweet spot.
Now, I look forward to that specific moment when the cold, firm centers meet the warm, fluid chocolate. There is something almost therapeutic about the rhythmic rolling of the dough into perfectly uniform spheres. It is the kind of baking that doesn't just feed people, it calms the soul.
You'll find that once you master the temperature control, you will never go back to the store-bought versions.
This isn't just a snack, it's a lesson in confectionery balance. We are taking simple ingredients and using thermal management to transform them into something that feels expensive.
The salt cuts the richness, the vanilla adds a floral depth, and the dark chocolate provides the necessary bitterness to round out the palate. Right then, let's get into how this actually works.
Stabilizing the Lipid Structure
Lipid Bonding: The saturated fats in the softened butter act as a bridge between the liquid peanut butter and the crystalline structure of the powdered sugar. This prevents the oil from separating and ensures a firm, fudge like consistency.
Controlling Moisture with Precise Ratios
Sucrose Saturation: Powdered sugar contains a small amount of cornstarch, which absorbs the natural oils of the peanuts. This prevents the center from becoming "sweaty" or losing its shape when kept at room temperature.
Managing Thermal Shock
Fat Crystallization: Chilling the spheres before dipping is vital because it causes the fats to solidify. When these cold balls hit the warm chocolate, they help the coating set faster, creating that characteristic "snap" we're after.
| Coating Stage | Visual Cue | Temperature Goal | Rest Time |
|---|---|---|---|
| Rolling Phase | Soft, pliable dough | 65°F (Room Temp) | 10 minutes |
| Chilling Phase | Firm, matte surface | 38°F (Fridge) | 30 minutes |
| Dipping Phase | Chocolate stays thin | 90°F (Melted) | 15 minutes |
Choosing the right peanut butter is the most important decision you'll make today. For this specific recipe, we need the shelf stable, creamy variety. While I love the natural stuff on my morning toast, the oil separation in "stir" peanut butter will ruin the structural integrity of your Peanut Butter Balls.
If you use the natural kind, you'll end up with a puddle instead of a sphere, and nobody wants to eat a chocolate covered puddle.
Precise Measurements for Professional Grade Results
When we talk about achieving that "wow" factor for guests, it comes down to precision. I always tell my friends that baking is just delicious chemistry. For these treats, we are looking for a weight and size that feels substantial but allows for a single, elegant bite.
Using a small cookie scoop ensures that every single one of your 30 servings is identical, which isn't just about looks - it ensures they all chill and set at the same rate.
Chef's Tip: Freeze your butter for exactly 10 minutes before you start the softening process. This allows it to reach a "plastic" state where it's pliable enough to cream with the peanut butter but cold enough to hold air, preventing the centers from becoming too dense.
There are three major checkpoints to watch for during this process. First, your butter must be at 65°F - it should give slightly when pressed but still feel cool. Second, the dough must chill for a full 30 minutes before you even think about the chocolate.
Third, the chocolate should be melted gently until it reaches roughly 90°F, ensuring it stays fluid enough to coat thinly without melting the peanut butter center on contact.
| Component | Science Role | Pro Secret |
|---|---|---|
| Powdered Sugar | Structural Binder | Sift twice to remove all lumps for a silky mouthfeel. |
| Coconut Oil | Viscosity Modifier | Adds a glossy sheen and lowers the chocolate's melting point. |
| Fine Sea Salt | Flavor Enhancer | Use fine grain only; large crystals won't dissolve in the fat. |
Selecting the Finest Elements for Your Confection
For the best results, you want to use high-quality chocolate. I prefer a dark chocolate with at least 70% cocoa. It provides a sophisticated bitterness that counters the sweetness of the filling. If you're looking for a slightly different vibe, you might try the technique used in my Peanut Butter Blossoms recipe where the peanut butter is the star of the show.
- 1.5 cups creamy, unsalted peanut butter: The base of our flavor.
- 0.5 cup unsalted butter, softened: Provides the silky, melt away texture.
- 1 teaspoon pure vanilla extract: Adds a layer of aromatic complexity.
- 0.25 teaspoon fine grain sea salt: Essential for balancing the sugar.
- 3 cups powdered sugar, sifted: The "glue" that holds everything together.
- 12 oz dark chocolate (70% cocoa), chopped: Use a bar, not chips, for a smoother melt.
- 1 tablespoon coconut oil: Makes the chocolate coating "crack" when bitten.
| Original Ingredient | Substitute | Why It Works |
|---|---|---|
| Dark Chocolate | Milk Chocolate | Sweeter profile, though it stays softer at room temperature. |
| Coconut Oil | Vegetable Shortening | Provides the same thinning effect without the slight coconut scent. |
| Vanilla Extract | Almond Extract | Use half the amount; it adds a nutty, cherry like floral note. |
Tools for Crafting Professional Level Sweets
You don't need a professional kitchen to make these, but a few specific tools will make your life much easier. A stand mixer, such as a KitchenAid, is the best way to get the butter and peanut butter fully emulsified without wearing out your arm.
If you don't have one, a sturdy hand mixer will do the trick, just be prepared to spend an extra minute on the creaming step.
You'll also want a parchment lined baking sheet. This is non negotiable. If you place the dipped balls directly on a plate or a bare tray, they will stick, and you'll lose the bottom of your beautiful chocolate shell when you try to pick them up.
I also highly recommend using a dipping tool or even just a simple fork with the middle tines bent slightly. This allows the excess chocolate to drip back into the bowl, leaving you with a thin, elegant coating rather than a thick, clunky mess.
Mastering the Art of the Hand Rolled Sphere
- Cream the fats. Place the 1.5 cups of peanut butter and 0.5 cup of softened butter in your mixer bowl. Beat on medium speed for 3 minutes until the mixture looks pale and light. Note: This aeration makes the final center less heavy.
- Infuse the aromatics. Add the vanilla extract and sea salt. Mix for 30 seconds to distribute.
- Incorporate the sugar. Gradually add the 3 cups of sifted powdered sugar, one cup at a time, on low speed. Mix until a stiff, non sticky dough forms.
- Test the texture. Pinch a small piece of dough. It should hold its shape without sticking to your fingers. If it's too soft, add 2 more tablespoons of sugar.
- Form the spheres. Using a small scoop, portion the dough into 1 inch balls. Roll them between your palms until perfectly smooth and round.
- Execute the flash freeze. Place the balls on your lined tray and freeze for 20-30 minutes. Note: Cold centers are essential for a clean chocolate dip.
- Prepare the mahogany coating. Melt the 12 oz of dark chocolate and 1 tablespoon of coconut oil in a microwave safe bowl in 30 second bursts. Stir until velvety and completely fluid.
- Execute the dip. Drop one cold ball into the chocolate. Use a fork to lift it out, tapping the side of the bowl to remove excess.
- Set the shell. Place back on the parchment. If you're feeling fancy, add a tiny pinch of sea salt on top before the chocolate hardens.
- Final rest. Let the Dipped Peanut Butter Balls sit at room temperature for 30 minutes, or refrigerate for 10 minutes until the chocolate is firm and matte.
The dipping process is where most people get frustrated. If the chocolate starts to thicken, don't keep dipping! Pop it back in the microwave for 10 seconds. Working with cold centers and warm chocolate is a race against time, so work in small batches, keeping the rest of the balls in the fridge until you're ready for them. For a lighter snack version of these flavors, you might enjoy my 4 Ingredient Energy recipe which uses similar ingredients but in a no bake, un dipped format.
Troubleshooting Texture and Coating Challenges
Sometimes, despite our best efforts, things go a bit sideways in the kitchen. The most common issue I see with Peanut Butter Balls is the "footing" that little pool of chocolate that collects at the base of the ball. This happens if your chocolate is too thick or if you aren't tapping off enough excess.
If this happens, don't panic. Once they are fully set, you can gently trim the excess chocolate away with a warm paring knife.
Fixing Thick Gloopy Chocolate
If your dark chocolate feels more like paste than a liquid, it's likely overheated or has come into contact with a drop of water (seizing). To fix this, add a teaspoon of coconut oil and stir vigorously.
If it has seized due to water, you might need to start over, as seized chocolate rarely regains that silky dipping consistency.
Healing Cracked Shells
Do you see tiny cracks in your chocolate after it sets? This usually means the centers were too cold (frozen solid) and expanded slightly as they thawed, or the chocolate was too hot when you dipped them.
To avoid this, ensure the balls are "cold from the fridge" rather than "freezer frozen" and let the chocolate cool for a minute after melting.
| Problem | Root Cause | Solution |
|---|---|---|
| Greasy surface | Butter was too warm or liquid | Chill the dough for 1 hour before rolling. |
| Lumpy centers | Powdered sugar wasn't sifted | Sift sugar through a fine mesh sieve before adding. |
| Chocolate sliding off | Centers are too cold/moist | Pat balls with a paper towel before dipping to remove frost. |
Common Mistakes Checklist
- ✓ Never use "natural" or "crunchy" peanut butter if you want a smooth, stable sphere.
- ✓ Don't skip the sifting; powdered sugar clumps are nearly impossible to mix out later.
- ✓ Ensure the bowl used for melting chocolate is bone dry to prevent seizing.
- ✓ Avoid over handling the balls with warm hands, which can melt the butter.
- ✓ Use a high-quality chocolate bar rather than chocolate chips for a thinner, crispier shell.
- ✓ Let the excess chocolate drip off the fork for at least 5 seconds per ball.
Creative Variations and Dietary Customizations
While the classic dark chocolate version is my absolute favorite, you can certainly play around with the flavor profile. If you're a fan of a more classic cookie texture, you might want to look at my Chocolate Chip Cookies recipe for inspiration on how to balance sweet and salty.
Infusing Nutritional Texture
If you want a bit of a "crunch" without using chunky peanut butter, you can fold in half a cup of crispy rice cereal or finely crushed pretzels into the dough. This adds a fantastic structural contrast to the velvety center.
Just be aware that adding dry ingredients might require an extra tablespoon of peanut butter to keep the balls from becoming crumbly.
Swapping the Fat Profile
For those who want to avoid dairy, you can substitute the unsalted butter with a high-quality vegan butter stick. Look for one with a high fat content rather than a water based spread. The flavor will be slightly different, but the coconut oil in the coating will help maintain that signature snap.
Mastering Seasonal Variations
During the autumn months, I love adding half a teaspoon of pumpkin pie spice to the dough. It transforms the Peanut Butter Balls into a warm, cozy treat that pairs beautifully with a cup of coffee.
For the winter holidays, try dipping them in white chocolate and topping them with crushed candy canes for a festive look that will wow guests.
Preservation Secrets and Zero Waste
These treats are quite hardy, but they do have a "Goldilocks" temperature. If they are too warm, the chocolate gets messy. If they are too cold, you lose some of the nuanced peanut flavor.
I recommend storing them in the refrigerator but letting them sit on the counter for about 10 minutes before serving. This allows the center to soften just enough to feel luxurious.
- Storage
- Keep your Chocolate Dipped Peanut Butter Balls in an airtight container in the fridge for up to 2 weeks. Use parchment paper between layers to prevent the shells from scuffing each other.
- Freezing
- These freeze beautifully. Place them in a freezer safe bag for up to 3 months. Thaw them in the fridge overnight to prevent condensation from forming on the chocolate.
- Zero Waste
- If you have leftover melted chocolate, stir in some nuts or dried fruit and drop spoonfuls onto your parchment paper to make "croquant" or simple chocolate clusters. Never let good chocolate go to waste!
Elegant Finishing Touches for Social Hosting
When I’m serving these at a party, I like to lean into the "achievable elegance" vibe. Instead of just piling them on a plate, try placing each one in a mini metallic cupcake liner. It makes them look like they came from a high end chocolatier and keeps people's fingers clean.
To really impress your guests, you can create a "double drizzle." After the dark chocolate has set, melt a small amount of white chocolate or peanut butter chips and use a spoon to flick thin lines across the top. This adds visual texture and hints at the flavor hidden inside.
If you have any leftover dough that didn't quite make it into a ball, you can crumble it over vanilla bean ice cream for a truly decadent sundae.
My last piece of advice? Make a double batch. These Peanut Butter Balls have a way of disappearing the moment the tray hits the table. Whether you call them buckeyes or just your favorite snack, they represent the best of home baking: simple ingredients, a bit of patience, and a result that feels like a genuine gift.
Happy rolling!

Recipe FAQs
What kind of chocolate do you dip peanut butter balls in?
Use high-quality dark chocolate (70% cocoa or higher) for the best flavor balance. The bitterness of dark chocolate cuts through the sweetness of the filling perfectly. For a smoother dip, mix in a teaspoon of coconut oil to help thin the melted chocolate.
What is the best way to melt chocolate for peanut butter balls?
Melt using short bursts in the microwave at 50% power. Stir thoroughly between each 20-30 second interval to prevent scorching the delicate cocoa butter. The goal is a silky, fluid consistency around 90°F before dipping.
Do chocolate covered peanut butter balls need to be refrigerated?
Yes, refrigeration is recommended for optimal texture and food safety. This keeps the chocolate shell firm and the filling stable, especially if you used real butter. Store them in an airtight container for up to two weeks.
What is the easiest way to dip balls in chocolate?
Use a fork to lower the cold peanut butter ball into the chocolate bath. Lift it out while tapping the side of the bowl to let excess chocolate drip off. If you are nervous about texture control, you can practice the same temperature precision in our Unique Cookie Recipes.
Can I use natural peanut butter instead of shelf stable creamy peanut butter?
No, stick to shelf stable creamy peanut butter. Natural peanut butter contains too much free flowing oil, which will cause the dough to become greasy and unable to hold a spherical shape during chilling or dipping.
Why are my peanut butter balls cracking after the chocolate sets?
This is caused by thermal shock or overly cold centers. The centers were likely frozen solid, causing them to expand slightly as they warmed, which stressed the chocolate shell. Ensure the balls are chilled (38°F) but not rock hard before dipping.
How long should the peanut butter centers be chilled before dipping?
Chill the rolled balls for a minimum of 30 minutes in the refrigerator. They must be firm enough to handle without deforming under the pressure of the coating. Working in small batches is key to maintaining the cold temperature of the remaining dough.
Chocolate Dipped Peanut Butter Balls

Ingredients:
Instructions:
Nutrition Facts:
| Calories | 221 kcal |
|---|---|
| Protein | 4.1 g |
| Fat | 14.8 g |
| Carbs | 19.8 g |
| Fiber | 2.0 g |
| Sugar | 14.6 g |
| Sodium | 23 mg |
