Peanut Butter Cookies: the Classic Criss-Cross Crunch
- The Criss-Cross Crunch: Ultimate Chewy Peanut Butter Cookies
- Mastering the Texture: The Science Behind the Perfect Chew
- Essential Toolkit: Ingredients, Measurements, and Smart Swaps
- Baking Success: Foolproof Instructions for Crumbly Perfection
- Troubleshooting Your Bake: Common Pitfalls and Expert Fixes
- Keeping Them Fresh: Storage, Freezing, and Dough Preservation
- Pairing Perfection: Creative Ways to Serve Your Cookies
- Recipe FAQs
- 📝 Recipe Card
The Criss Cross Crunch: Ultimate Chewy Peanut Butter Cookies
There is no sound quite like the crinkle of a fresh parchment sheet as warm Peanut Butter Cookies are lifted from the oven, releasing that distinct, comforting aroma of roasted peanuts and caramelized sugar. It hits you right in the gut, pure nostalgia delivered via buttery goodness.
These are not sad, dry discs; these are thick, soft, intensely flavoured Peanut Butter Cookies that achieve peak chewiness.
Life gets hectic, right? Sometimes you need a reliable recipe that demands almost zero effort but delivers massive payoff. This classic dessert requires pantry staples you likely already own, making these the ultimate emergency bake when a craving strikes hard.
If you have 45 minutes (mostly spent chilling the dough, blessedly), you can have a batch of superior homemade Peanut Butter Cookies ready to devour.
So, ditch the dry, crumbly recipes of the past. We're locking down the perfect technique today. Let's crack on and figure out exactly how we achieve that perfect textural contrast that defines the very best Peanut Butter Cookies you’ve ever tasted.
Mastering the Texture: The Science Behind the Perfect Chew
Nostalgia on a Plate: Why This Recipe Endures
Every home cook needs a signature recipe, and for me, it’s this version of classic Peanut Butter Cookies . They endure because they hit that perfect spot between simplicity and intense flavour delivery.
It’s hard to beat the simple pleasure of a crunchy edge giving way to a dense, soft centre. This recipe respects that legacy while employing modern baking logic to ensure consistency.
Quick Glance: Prep Time, Bake Time, and Yield
You need to know your timelines before starting any baking project. This is a quick prep process, clocking in around 15 active minutes. The mandated chill time is what guarantees the glorious thickness of these Peanut Butter Cookies .
Expect about 24 perfect little discs of delight, depending on how generous you are with your cookie scoop.
The Ease Factor: A Truly Simple Baking Project
Honestly, this is a foolproof recipe. We use the standard creaming method, which is the backbone of almost all great Peanut Butter Cookies recipes. The technique is straightforward: mix the fats and sugars until fluffy, then fold in the dry ingredients gently.
That’s really all there is to it!
The Role of Brown Sugar in Moisture Retention
If you want chewy cookies, you need brown sugar. It’s not just for flavour; it contains molasses, which is hydroscopic, meaning it loves holding onto moisture. By using an equal split of brown and white sugar, we ensure the cookies don’t spread too much and stay wonderfully soft for days.
This specific ratio is key to achieving truly soft Peanut Butter Cookies .
Understanding the Fat Ratio (Peanut Butter vs. Butter)
This is where many basic recipes go wrong. We are relying on conventional, stabilized peanut butter (the creamy stuff, folks!) for structure, not just flavour. The emulsifiers in conventional peanut butter prevent excessive spreading and contribute to the dense texture.
If you try to use oily, natural peanut butter, your Peanut Butter Cookies will likely collapse into flat, greasy puddles. Trust me on the conventional stuff for this recipe.
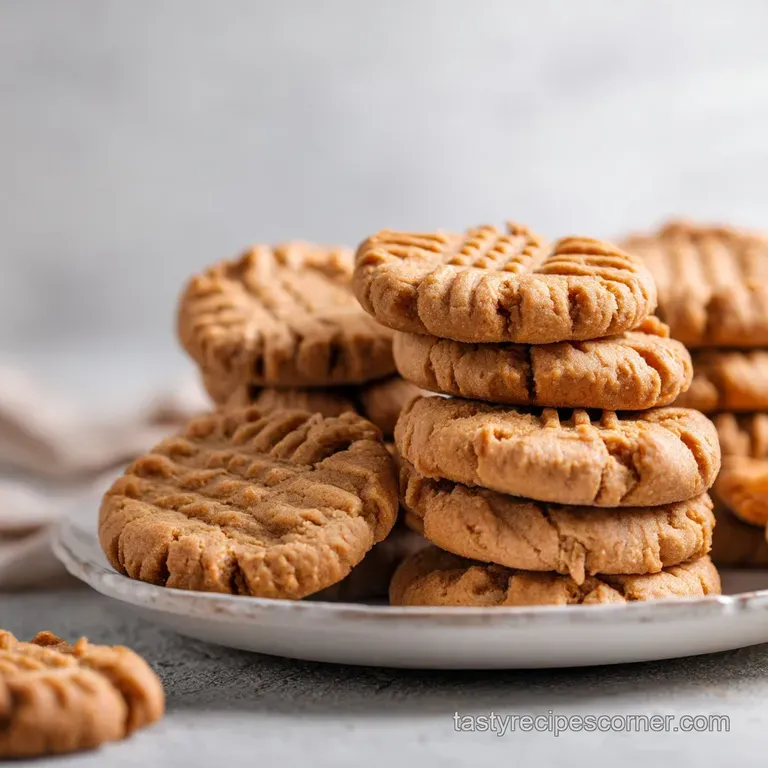
Achieving the Iconic Fork Crosshatch
The crosshatch isn’t just decorative; it’s a necessary tool for managing thickness. Peanut butter dough is generally denser than regular dough, so pressing it down with a fork helps compress the dough slightly and ensures even heat distribution across the surface.
Plus, how can you even call them Classic Peanut Butter Cookies without the criss cross?
Essential Toolkit: Ingredients, Measurements, and Smart Swaps
Getting the ingredients right is half the battle when making the best Peanut Butter Cookies . Don't eyeball these measurements! Baking requires precision, unlike the improvisational magic required when making something like Buttermilk Ranch: The Ultimate Homemade Recipe (Better Than Packet) .
Choosing the Right Peanut Butter (Creamy vs. Crunchy)
As mentioned, go creamy and conventional. Save the crunchy peanut butter for your toast, unless you absolutely adore chunks in your cookies. The chunks can sometimes disrupt the structure and lead to uneven baking.
If you insist on crunch, I recommend adding chopped roasted peanuts instead of using crunchy PB, as that gives you control over the particle size.
Flour Alternatives and gluten-free Considerations
| Ingredient | Standard | Swap/Alternative | Notes |
|---|---|---|---|
| All-Purpose Flour | 1 1/2 cups | 1:1 gluten-free Blend | Ensure the GF blend contains xanthan gum for structure. |
| Granulated Sugar | 1/2 cup | Maple Sugar or Coconut Sugar | These will change the texture and darken the cookie slightly, but work well for flavour. |
| Butter | Unsalted, 1 stick | Vegetable Shortening (Crisco) | Shortening makes for an incredibly soft, almost uniform crumb in these Peanut Butter Cookies . |
| Egg | 1 Large | Flax Egg (1 tbsp flaxmeal + 3 tbsp water, rested 5 min) | Necessary if you are trying to make a strictly vegan version of these Peanut Butter Cookies . |
Adjusting Sweetness: Sugar Options and Alternatives
While some people prefer to coat their cookies in extra granulated sugar before pressing, you can absolutely omit this step. If you want less sweetness in your Peanut Butter Cookies , you can reduce the granulated sugar (white sugar) measurement by up to 1/4 cup without sacrificing much structure, but do not reduce the brown sugar.
The brown sugar is essential for the moisture content and chew.
Veganizing This Classic Peanut Butter Cookie
Making vegan Peanut Butter Cookies is surprisingly easy. Swap the dairy butter for a high-quality, plant based stick butter (like Miyoko's or Earth Balance) and use a flax egg replacement.
The resulting cookie will be slightly less rich but will still deliver that gorgeous classic flavour and texture.
Baking Success: Foolproof Instructions for Crumbly Perfection
The Creaming Method: Achieving Light and Fluffy Bases
Start with room temperature ingredients, I beg you. Soft butter and room temp eggs incorporate air far better than cold ones, and incorporating air is the secret to light, tender cookies rather than dense bricks.
Beat the butter and both sugars together for a solid 2– 3 minutes on medium speed until the mixture looks pale and fluffy. This step is critical for developing the beautiful texture of these Peanut Butter Cookies .
Mixing the Dough: Key Indicators of Proper Consistency
After adding the egg, peanut butter, and vanilla, it’s time for the dry ingredients. STOP the mixer as soon as you no longer see streaks of flour. Overmixing develops gluten, which results in tough, less chewy cookies.
The dough should be soft, pliable, and easily handled; it shouldn't stick excessively to your hands. If your dough feels too sticky, chill it for 10 minutes longer.
Chef’s Note: Did you forget to soften your butter? Don’t panic. Slice the cold butter into small cubes, then beat it on high speed in the mixer for one minute before adding the sugars. It won't be perfectly soft, but it helps speed up the warming process dramatically.
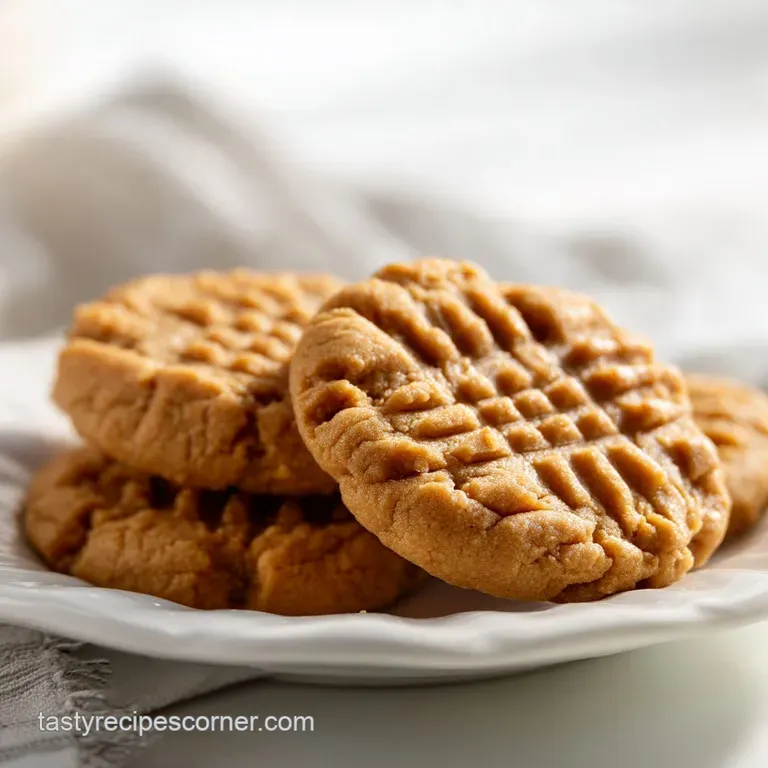
Shaping and Pressing: Making the Signature Crosshatch Mark
I love using a cookie scoop (the 1.5 tablespoon size is perfect). Scoop the dough, roll it lightly between your palms to smooth it, and place it on the prepared baking sheet. Leave plenty of space; they will spread slightly. Then, grab your fork.
Press gently you only want to flatten the dough ball to about half its height. Repeat the press perpendicular to the first one. If the fork sticks, dip it in sugar! This is key for beautifully shaped Peanut Butter Cookies .
Optimal Baking Times for Chewy Centers
Set your timer for 10 minutes. When the timer dings, check them immediately. You are looking for edges that are starting to set and just barely turning golden brown. The centers should still look slightly puffy and soft. This means they are perfectly underbaked, which is exactly what we want.
They will continue to bake on the hot sheet and result in the perfect chewy center you crave in true Best Peanut Butter Cookies .
Troubleshooting Your Bake: Common Pitfalls and Expert Fixes
Why Your Cookies Are Spreading Too Thinly
This is almost always due to one of two things: either your butter was too soft/melted before creaming, or you skipped the chilling step. Cold fat melts slower, meaning the cookie sets its structure before the fat fully liquifies.
If your Peanut Butter Cookies spread like pancakes, put the entire baking sheet, dough balls and all, in the freezer for 15 minutes before baking the rest. That usually fixes the issue immediately.
Preventing Dry or Crumbly Dough
Dry dough typically means you added too much flour. Flour measurements are tricky, especially if you scoop directly from the bag (which packs it down). Always use the spoon and level method or, ideally, use a kitchen scale to measure the flour by weight.
If your dough is already mixed and too crumbly, try adding 1/2 teaspoon of milk or cream, mixing it in quickly, and seeing if that binds the dough better for shaping.
The Importance of Chilling the Dough (Or Skipping It)
You saw the notes: chilling is mandatory if you want thick, soft, gorgeous Peanut Butter Cookies . When you skip the chilling, the fat in the dough immediately melts in the oven heat, and the resulting cookie runs everywhere.
If you are desperate and need a batch immediately, you can skip the full 30 minutes, but you must scoop the dough and freeze the formed balls for at least 10 minutes before baking.
Keeping Them Fresh: Storage, Freezing, and Dough Preservation
Storing Baked Cookies for Maximum Freshness
Once your Peanut Butter Cookies are completely cool, store them in an airtight container at room temperature. Pro tip: placing half a slice of plain white sandwich bread in the container helps absorb excess moisture and keeps the cookies softer for longer.
They are usually best within 3 to 5 days.
Freezing the Dough for Future Baking
Freezing dough is the ultimate meal prep hack. Scoop the dough balls, form the crosshatch, and flash freeze them on a tray until solid (about 2 hours). Transfer the frozen dough balls to a freezer safe bag or container. They will last up to 3 months.
When ready to bake your frozen Peanut Butter Cookies , you can bake them directly from frozen, adding 2– 4 minutes to the total baking time.
Reviving Stale Peanut Butter Cookies
Did you leave them out overnight? It happens. Stale cookies can be revived easily! Place them on a baking sheet and pop them into a 300°F (150°C) oven for about 5 minutes. The gentle heat softens the sugars and revives the texture beautifully, bringing back that fresh baked flavour. You can even try this trick with my famous Chocolate Chip Cookies: The Ultimate Chewy, Brown Butter Recipe for maximum effect.
Pairing Perfection: Creative Ways to Serve Your Cookies
These Peanut Butter Cookies are perfect on their own, but they play so well with others! Try sandwiching them with vanilla bean ice cream for an epic dessert, or dip them into a glass of cold milk.
For a truly decadent experience, melt some dark chocolate and drizzle it over the cookies while they are still slightly warm. A dusting of sea salt over the chocolate takes the flavour of these Peanut Butter Cookies over the top.
The beauty of these Soft Peanut Butter Cookies Chewy is their versatility they are good at any temperature. Enjoy every last crumb of these fantastic, foolproof Peanut Butter Cookies !

Recipe FAQs
Why are my peanut butter cookies dry and crumbly instead of gloriously chewy?
Dryness is often caused by over measuring the flour or over baking the dough. Ensure you use the spoon and-level method when measuring flour to avoid packing it tightly, and remove the cookies from the oven immediately when the edges look set.
They continue to cook significantly on the baking sheet after being removed from the oven.
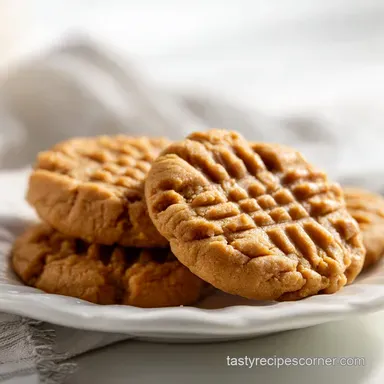
Is the iconic crosshatch pattern necessary, or can I skip it?
The crosshatch pattern serves two important functions in this dense recipe. First, pressing the dough slightly helps to flatten it, ensuring the cookie bakes evenly rather than remaining a tough, round mound.
Second, it increases the surface area, which helps achieve those perfectly crisp edges while maintaining the soft, chewy center.
Can I use natural, oilier peanut butter for this recipe?
It is highly recommended to stick to processed, stabilized peanut butter (like Jif or Skippy) for consistent results. Natural peanut butter tends to separate and contains excess oil, which often causes the cookies to spread too thinly and become greasy.
If you must use natural, ensure it is stirred thoroughly and chilled before mixing.
What is the best way to store these cookies, and can I freeze the dough?
Store baked cookies in an airtight container at room temperature for up to five days, possibly placing a half slice of bread in the container to help retain moisture. For freezing, roll the dough into balls, press the crosshatch, and flash freeze on a tray; once solid, transfer them to a freezer bag for up to three months, baking directly from frozen (add 2-3 minutes to the bake time).
My cookies spread too much while baking what could have gone wrong?
Excessive spreading usually indicates your dough was too warm or contained too much softened fat. Always ensure your butter is only slightly softened, not melted, and chill the formed dough balls for at least 30 minutes before baking. This solidifies the fat, preventing them from melting too quickly in the oven.
How do I know when the peanut butter cookies are perfectly baked for maximum chewiness?
Peanut butter cookies are done when the edges look lightly golden and fully set, but the centers still appear slightly pale and puffy. If the entire cookie looks deeply golden brown, it is likely over baked and will be crunchy rather than chewy.
Prioritize removing them slightly early to ensure that tender middle texture.
Can I make a gluten-free version of this recipe?
Yes, you can successfully make these gluten-free by substituting the wheat flour with a quality 1:1 gluten-free baking blend that contains xanthan gum. No other major modifications are generally needed, but monitor the baking time closely as GF flour can absorb moisture differently.
Chewy Peanut Butter Cookies Recipe
Ingredients:
Instructions:
Nutrition Facts:
| Calories | 120 kcal |
|---|---|
| Protein | 3.0 g |
| Fat | 6.0 g |
| Carbs | 14.0 g |
