Buttermilk Biscuits Recipe: Flaky Layers
- Time: Active 20 minutes, Passive 15 minutes, Total 35 minutes
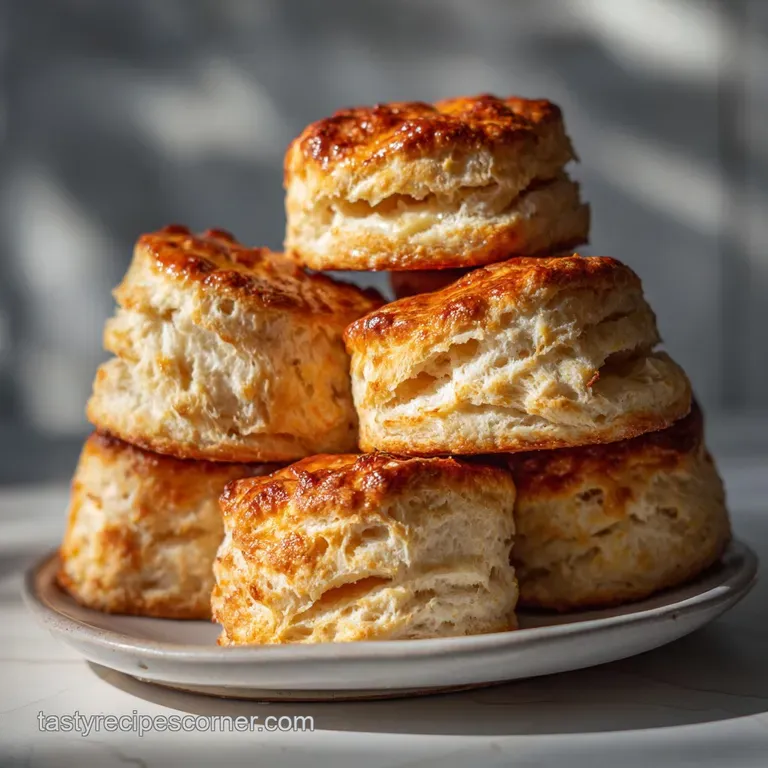
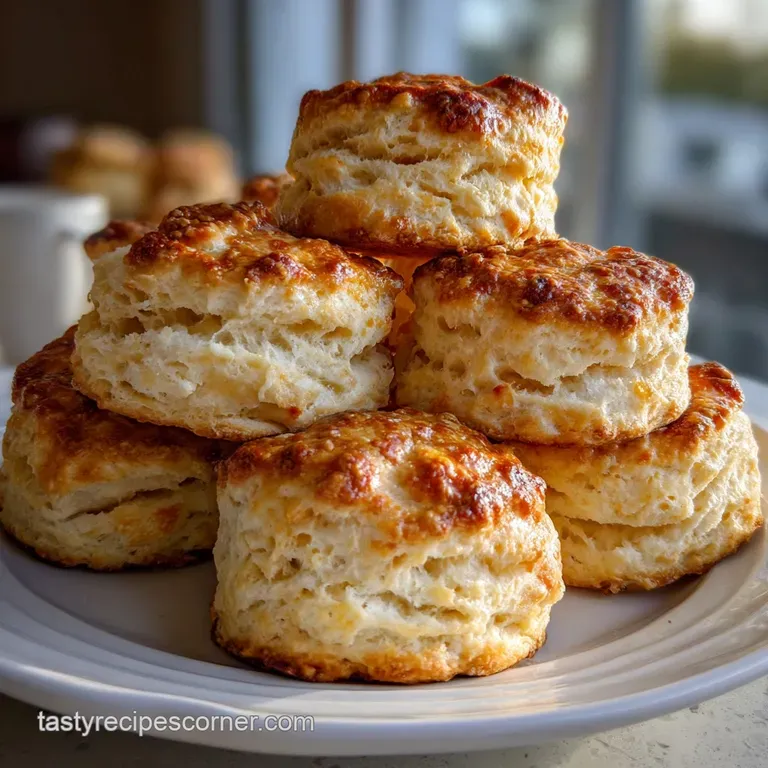
- Flavor/Texture Hook: Shatter crisp exterior with buttery, cloud like layers
- Perfect for: Hearty Sunday brunch or a comforting family dinner side
The Ultimate Flaky Buttermilk Biscuits Recipe
There is a specific, soul warming aroma that only a Tennessee kitchen can produce on a Sunday morning. It’s the scent of flour hitting a hot cast iron skillet and the sharp, tangy promise of cold buttermilk meeting sourdough like expectations.
I remember watching my grandmother stand at the counter, her hands dusted in white, moving with a rhythm that felt more like a dance than chores. She never used a timer; she just waited until the kitchen smelled like "toasted clouds," and honestly, she was never wrong.
But let’s be real for a second. We’ve all been there expecting a sky high, flaky masterpiece and ending up with something that looks more like a hockey puck than a southern buttermilk biscuits legend.
I’ve spent years tinkering with fat ratios and temperature spikes to figure out why some rise and others flop. It turns out, the secret isn't some ancient family mystery; it’s just cold blooded physics and a little bit of patience.
We’re going to walk through this buttermilk biscuits recipe together so you can hear that satisfying "crunch" when you pull them apart. We aren't looking for "good enough" here; we want that vertical rise that makes people stop and stare.
It’s about creating a hearty, stick to your ribs experience that feels like a warm hug from the inside out. Right then, let’s get our hands in some flour and crack on.
Secret Behind the Biscuit Rise
Thermal Expansion: When the 115g of frozen butter hits the 220°C oven, the water trapped in the butter evaporates instantly. This creates pockets of steam that force the flour layers upward before the structure sets, resulting in that iconic vertical lift.
Gluten Relaxation: A short rest after mixing allows the flour proteins to hydrate without becoming elastic. This ensures your homemade buttermilk biscuits remain tender rather than chewy or bread like.
For Shattering Multi Layered Flakiness
The trick to those layers you can peel back one-by-one is lamination. We aren't just mixing; we are folding. Think of it like a croissant's rugged southern cousin. By grating the butter, we ensure every single fold has a thin sheet of fat ready to puff up.
If the butter melts into the dough before it hits the oven, you lose the layers. That’s why we keep everything ice cold.
For a Soft Tender Crumb
High protein flour makes for great bread, but for this biscuits recipe, we want to keep things humble. All purpose flour strikes the right balance, providing enough structure to hold the rise while keeping the interior velvety. Overworking the dough is the enemy here.
We want to treat the dough like a secret handle it gently, and don't let it get out of hand.
For Maximum Vertical Rise
When you use your cutter, never, ever twist it. I made this mistake for years! Twisting seals the edges of the dough, essentially "locking" the layers together so they can't expand upward. A straight, sharp punch downward is what gives you those beautiful, exposed edges that are ready to climb.
| Feature | Fast Method (Drop) | Classic Method (Laminated) |
|---|---|---|
| Texture | Craggy and soft | Shattering and layered |
| Effort | 5 minutes prep | 20 minutes prep |
| Visuals | Rustic mounds | Tall, uniform cylinders |
Classic laminated biscuits are the gold standard for a hearty breakfast, while drop versions are the midweek savior for a quick stew topping. If you're looking for that "wow" factor at the table, the extra 15 minutes of folding is a trade off that pays dividends in flaky gold.
Component Deep Dive
| Ingredient | Science Role | Pro Secret |
|---|---|---|
| Buttermilk | Acidic leavening agent | Use it straight from the fridge to keep the dough temperature below 15°C. |
| Baking Powder | Primary lift provider | Check the expiration; old powder is the number one cause of "flat biscuit syndrome." |
| Frozen Butter | Steam generator | Grate it with a box grater for even distribution without over handling the dough. |
Before we move into the assembly, make sure your buttermilk is truly cold. If you've been letting it sit on the counter while you prep the flour, pop it back in the fridge for ten minutes. This temperature differential is the soul of a great buttermilk biscuits recipe from scratch.
Essential Pantry Staples
- 375g All purpose flour: The backbone of the structure.
- 1 tablespoon Baking powder: For that initial chemical lift.
- 0.5 teaspoon Baking soda: Reacts with the buttermilk for extra fluff.
- 1 teaspoon Fine sea salt: To sharpen the buttery flavors.
- 1 tablespoon Granulated sugar: Helps with browning the tops.
- 115g Unsalted butter: Why this? Frozen and grated butter creates the most consistent, flaky layers without heavy mixing.
- 240ml Cold buttermilk: Why this? The acidity tenderizes the gluten and activates the leavening agents.
- 1 tablespoon Honey: Adds a hint of floral sweetness and helps with crust color.
- 30g Melted butter: For that final, golden brush on top.
- 1 pinch Flaky sea salt: The ultimate savory finish.
Substitution Table
| Original Ingredient | Substitute | Why It Works |
|---|---|---|
| Buttermilk (240ml) | Milk (230ml) + Lemon Juice (10ml) | Mimics the acidity needed to react with baking soda. Note: Slightly thinner consistency. |
| Unsalted Butter | Salted Butter | Provides the same fat content. Note: Reduce added sea salt to 0.5 teaspoon. |
| All purpose Flour | Pastry Flour | Lower protein content for an even softer crumb. Note: Biscuits will be slightly more fragile. |
If you happen to have leftovers, these pair beautifully with a homemade Buttermilk Ranch recipe for a savory snack, or you can go the sweet route with some jam. The honey in the dough provides just enough of a bridge to work with either flavor profile.
Hand Crafting the Perfect Batch
Phase 1: Frozen Prep
- Grate the butter. Take your 115g of frozen unsalted butter and use the large holes of a box grater to shred it into a small bowl. Note: Pop the bowl back in the freezer while you prep the dry ingredients.
- Whisk the dry base. In a large mixing bowl, combine 375g all purpose flour, 1 tablespoon baking powder, 0.5 teaspoon baking soda, 1 teaspoon sea salt, and 1 tablespoon granulated sugar.
- Incorporate the fat. Toss the frozen butter shreds into the flour mixture. Use a fork to gently coat each piece of butter with flour until it looks like coarse, pebbly sand.
Phase 2: Hydrate and Laminate
- Add the liquids. Create a well in the center and pour in 240ml cold buttermilk and 1 tablespoon honey.
- Mix the dough. Use a spatula to fold the flour into the liquid until a shaggy, messy dough just forms. Do not overmix; it should look a bit ragged.
- The first fold. Turn the dough onto a lightly floured surface. Pat it into a rectangle, then fold it in half like a letter. Repeat this 5-6 times until the dough feels cohesive but still cold.
Phase 3: Precision Cut
- Shape the slab. Pat the dough down to a thickness of about 2.5 cm (1 inch).
- Cut the rounds. Using a 6cm round cutter, press straight down into the dough. Listen for the satisfying "hiss" of the air escaping as you cut. You should get about 10 servings from this batch.
- Arrange the pan. Place the biscuits on a baking sheet lined with parchment. For soft sides, let them touch; for crisp edges, leave 2 cm of space.
Phase 4: over High heat Bake
- Final brush. Coat the tops with 30g of melted butter. Bake at 220°C (425°F) for 15 minutes until the tops are deeply golden and the kitchen smells like toasted butter. Sprinkle with flaky sea salt immediately after removing from the oven.
Chef's Tip: If you want an even deeper flavor, whisk a teaspoon of honey into the melted butter before brushing. It creates a tacky, sweet salty crust that is absolutely addictive.
Troubleshooting Your Bake
Dense Texture Troubles
If your biscuits feel like bricks, you likely over handled the dough. When you work the dough too much, the gluten becomes tough, and the heat from your hands melts the butter. This ruins the "steam lift" mechanism we discussed earlier.
Always use a fork or spatula for the initial mix and keep your hands as cool as possible.
Pale Soft Tops
A pale biscuit often means the oven wasn't hot enough or you skipped the butter brush. The sugars in the buttermilk and the honey need that high 220°C heat to caramelize properly.
If you find your oven runs cool, try moving the rack to the top third of the oven for the last 3 minutes of baking.
| Problem | Root Cause | Solution |
|---|---|---|
| Short Rise | Twisted the cutter | Press straight down; don't rotate the tool. |
| Dry Crumb | Too much flour on surface | Use the "minimal dust" approach; only enough to prevent sticking. |
| Greasy Bottoms | Butter was too soft | Freeze the butter and chill the dough for 10 mins before baking. |
Common Mistakes Checklist
- ✓ Never use room temperature butter (it must be frozen for that "shatter" texture).
- ✓ Don't skip the "fold" steps; this is what creates the 10 layer look.
- ✓ Check your oven temperature with a separate thermometer to ensure it hits 220°C.
- ✓ Use full fat buttermilk; the fat content is essential for the velvety crumb.
- ✓ Let the biscuits rest for 5 minutes after baking so the internal steam finishes setting the structure.
Scaling for Large Crowds
If you are hosting a big family breakfast and need to double this biscuits recipe, it’s fairly straightforward. For a 2x batch, use exactly double the ingredients, but keep the liquids (buttermilk and honey) slightly under the double mark reduce the total liquid by about 10% to prevent the dough from becoming too sticky to handle.
For a half batch, simply halve everything. Since this recipe uses 240ml of buttermilk, 120ml works perfectly. If a recipe ever calls for half an egg, just beat the egg in a cup and use half by weight, but luckily we are egg free here!
When baking a double batch, ensure you don't overcrowd the oven racks, as this can drop the internal temperature and prevent that vital steam rise.
Decision Shortcut
- If you want high altitude rise, keep all ingredients at 4°C until the moment they are mixed.
- If you want a softer, pull apart style, nestle them closely in a cast iron skillet.
- If you want a savory kick, add 50g of shredded sharp cheddar and a pinch of black pepper to the dry mix.
For a truly decadent spread, serve these alongside a Whipped Butter Recipe topped with a drizzle of extra honey. It’s the kind of breakfast that makes everyone slow down and actually enjoy the morning.
Traditional Myths Debunked
"You must use a wooden bowl for the best rise." This is a lovely sentiment, but physics doesn't care about the bowl material. A cold metal bowl is actually superior because it helps keep the butter frozen while you work the dough.
"Biscuits need to be kneaded like bread." Absolutely not! Kneading develops gluten, which is great for a chewy sourdough but disastrous for a tender biscuit. We only want to fold the dough just enough to hold it together.
"Buttermilk can be replaced with regular milk 1:1." While you can use a substitute, the lack of acid in regular milk means your baking soda won't activate properly. You'll end up with a flat, soapy tasting biscuit unless you add an acid like lemon juice or vinegar.
Freshness and Zero Waste
Storage: Keep your homemade buttermilk biscuits in an airtight container at room temperature for up to 2 days. For longer storage, they stay fresh in the fridge for 5 days, but they will lose that "shatter" on the crust. To reheat, avoid the microwave it makes them rubbery.
Instead, pop them in a 175°C oven for 5-7 minutes until they are warm and the edges crisp up again.
Zero Waste: Don't toss those dough scraps! After cutting your 10 rounds, gently gather the leftover bits and pat them into one "ugly" biscuit. It won't have the same layers, but it will be the crispest, most flavorful bite in the batch.
If you have extra buttermilk, use it as a marinade for fried chicken or whisk it into your morning pancakes. Even the flour dust on your counter can be swept up and saved in a "scrap jar" for the next time you need to flour a surface. In a hearty Tennessee kitchen, we don't let a single crumb go to waste.

Recipe FAQs
What is the secret to making incredibly flaky buttermilk biscuits?
Use frozen butter and a folding technique. Grating frozen butter ensures tiny pieces are distributed throughout the dough. Folding it multiple times creates distinct layers that puff up when baked, resulting in extreme flakiness.
Can I use regular milk instead of buttermilk?
Yes, but with a small addition. Regular milk lacks the acidity of buttermilk, which is crucial for activating the baking soda. Mix 230ml of milk with 10ml of lemon juice or white vinegar and let it sit for 5 minutes to create a buttermilk substitute.
Why didn't my biscuits rise tall?
Likely causes include overworking the dough or a dull cutter. Overmixing develops gluten, making them tough, while twisting the cutter seals the edges, preventing upward expansion. Ensure you handle the dough minimally and press the cutter straight down.
How do I prevent my biscuits from becoming tough?
Handle the dough as little as possible and use cold ingredients. Overworking the dough develops gluten, leading to toughness. Keeping your butter, buttermilk, and even your hands cold helps maintain tenderness and flakiness.
Can I make buttermilk biscuits ahead of time?
Yes, unbaked dough rounds freeze well. Shape and cut your biscuits, then freeze them on a baking sheet until solid. Transfer them to a freezer bag and bake directly from frozen, adding a few extra minutes to the baking time. This is a great shortcut for busy mornings, much like the convenience of our Texas Toast Sloppy Joes Recipe: Crispy Baked in 30 Minutes.
What is the best way to cut biscuit dough?
Press straight down with a sharp cutter, do not twist. Twisting seals the edges of the dough, preventing the layers from separating and rising properly. A clean, sharp downward press is key for maximum vertical lift.
What should I serve with buttermilk biscuits?
They pair wonderfully with savory dishes or sweet toppings. Serve them alongside stews like Loaded Potato Soup: Crispy Bacon & Gold Potatoes, or top them with jam, honey, or butter for a delightful treat.
Buttermilk Biscuits Recipe

Ingredients:
Instructions:
Nutrition Facts:
| Calories | 267 kcal |
|---|---|
| Protein | 4.8 g |
| Fat | 12.9 g |
| Carbs | 32.6 g |
| Fiber | 1.0 g |
| Sugar | 4.0 g |
| Sodium | 437 mg |
